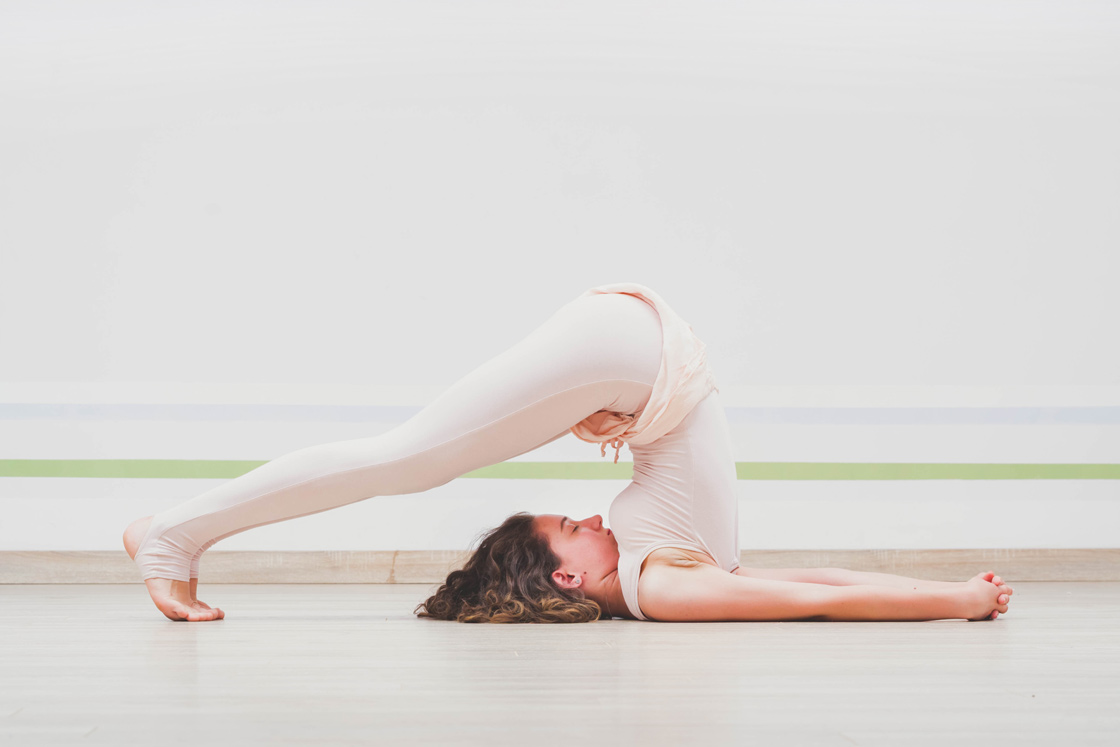
Plow Pose or Halasana has been named after the posture your body assumes in the final pose. It resembles a plow or plough, which is a popular farming tool used in Indian agriculture. And as the name suggests, the word Hal is Sanskrit for a plow.
The Plow Pose is an intermediate-level gentle inversion & a stretching pose. It mainly stretches the spine and provides flexibility to the whole body. It also works towards the muscles of your neck, core, hips, and hamstrings.
As a result, it also removes laziness, lethargy, and fatigue and keeps you energized.
According to BKS Iyenger, Halasana is the continuation of Sarvangasana (shoulder stand).
It increases the blood flow to your head and improves your brain power, memory, and intellect. It is an excellent pose to open up the mind and body.
The Plow stance is a yoga posture that folds you over and twists you like a pretzel!
However, because of the strain it places on your cervical spine and neck, some practitioners and teachers choose to skip it despite its several advantages such as lengthening the spine and soothing the mind.
But once you start performing this pose, you will find that its benefits supersede its challenging posture.
Let us see how you can perform this asana correctly and the benefits you will gain.
Practice Guide to Plow Pose
Preparatory Poses
- Salamba Sarvangasana (Supported Shoulderstand)
- Bridge Pose (Setu Bandha Sarvangasana)
- Navasana (Boat Pose)
How to Do Plow Pose(Halasana)
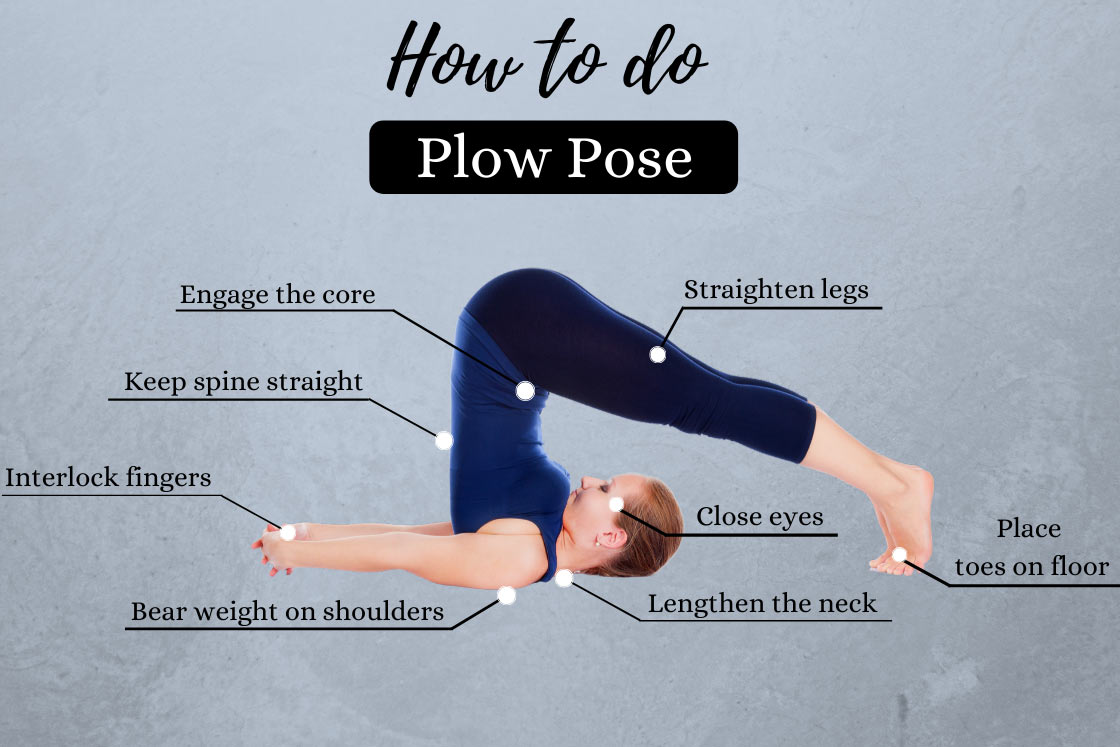
- Lay down flat on your back on your yoga mat. Place your arms beside your body with palms facing downwards.
- Inhale, and lift your legs using your abdominal muscles. Raise the legs to create a 90-degree angle to the floor.
- Bending your knees and exhale while bringing your hands to your toes and your forehead closer to your knees or legs. Feel the stretch in your neck and shoulders.
- After taking a few deep breaths, slowly relax your neck, lower your head, and lift your legs higher so that your lower back is raised off the floor.
- Using your core muscles, inhale deeply and move your feet behind your head to place the toes on the floor. This will make your hips lift off the mat making your back perpendicular to the mat.
- Move the legs slowly and gently while keeping them straight and stretched.
- Hold the back of your thighs for a few seconds to maintain the leg position.
- Once you are sure confident of the leg position, straighten your arms and interlace fingers behind your back.
- Close your eyes or gaze straight at the tip of your nose. Make sure you are not holding your breath at any point of performing this pose.
- Hold this pose for at least 10-15 seconds initially or for as long as you can. Gradually increase the holding time.
- When you are done, release your hands and bring them to hold the lower back for support.
- inhale and bring your hips down as you slide your hands to the back of your legs. Bring them to a 90-degree angle and gradually bring them to the mat as you finish your exhale.
- Extend the legs & arms and relax.
Beginner’s Tips
- Since this is a challenging pose that places pressure on your cervical and shoulders, you should learn it under the strict guidance of an expert yoga teacher before performing it on your own.
- To push yourself up onto the tops of your shoulders when starting this position, clench your shoulder blades together. Once you are in the position, expand your sternum by extending your shoulder blades across your back.
- Instead of your neck and head, try to place your weight on your upper shoulders. To avoid placing too much strain on your neck, engage your shoulder and arm muscles.
- Put a little pressure on your chest by tucking your chin in.
- You can put a folded blanket under your neck, head, and shoulder for additional support and comfort. Also, feel free to ask a friend or instructor for help to get into this asana.
Precautions
- Don’t rush into the posture. Perform it slowly and gently without skipping any step.
- While performing Plow Pose, do not turn your head or look around, as it can cause harm to your neck.
- Do not force your body for stretching. Understand the limits of your body and stretch it accordingly.
- Perform this asana on an empty stomach or at least after 4-6 hours of having a meal.
Contraindications
- Do not perform Halasana if you are suffering from slipped discs, sciatica, or diarrhea.
- If you have any recent injury or have undergone surgery on your neck, shoulders, spine, or legs, do not perform this asana.
- Women in pregnancy or undergoing menstruation should avoid Plow Pose for time being.
- Given that this yoga pose puts a lot of strain on the lower abdomen, those who have enlarged thyroid, spleen, or liver should avoid it.
- People with weak or injured cervical muscles should not perform this asana.
- Patients with asthma, high blood pressure, migraines, or headaches should proceed with caution.
- This position is typically not advised for practitioners who have glaucoma, an eye ailment that damages the optic nerve. The pressure already placed on the optic nerve by this position may become even more acute.
Modifications
- In the initial stages, you can put a chair behind your head and place your toes on it instead of placing them on the floor. The same can also be done with a cushion, a stack of yoga blocks, or bolsters.
- You can also place your feet against the wall instead of placing them behind the head. Your legs will make a 90-degree angle with the hips when you place the sole of the feet on the wall.
Plow Pose Variations
- Karnapidasana (Ear Pressure Pose) – You should proceed with this variation when you have gained sufficient flexibility in your back and hips and strength in your neck and shoulder. In the ear pressure pose, after staying in the final pose of the plow pose, you bend your knees and place them near your ears.
- Parsva Halasana (Side Plow Pose) – In this variation, you need to move your legs to the side. This is again an advanced variation that should be done only after attaining some level of expertise in the original plow pose. For support, continue to keep your hands on your back. Slowly move your feet to the right and stay here for 30 seconds to 1 minute. Next, bring it to the center and pause. Now move your feet to the left and hold for 30 seconds to 1 minute. Retrace your steps to the middle.
Follow-Up Poses
- Matsyasana (Fish Pose)
- Sirsasana (Headstand)
- Savasana (Corpse Pose)
- Adho Mukha Svanasana (Downward-Facing Dog Pose)
- Paschimottanasana (Seated Forward Bend Pose)
Benefits of Plow Pose(Halasana)
Plow pose comes with a lot of benefits to the body. It improves body posture and tones the muscles of the entire body. It removes the stiffness from the back and hip muscles and enhances blood circulation. In addition to this, you can work towards strengthening your core muscles and ability to support the spinal column.
Here are some benefits of Plow Pose.
- Stretches and strengthens the muscles of the back.
- Boosts blood flow to the spine making them supple, toned, and flexible.
- Helps to manage diabetes by increasing circulation, regulating blood pressure, and reducing blood sugar levels.
- Aids in preventing and treating back, neck, and shoulder pain.
- Improves muscles and joining flexibility and mobility.
- Nourishes the cervical neck muscles by stretching them and making them more flexible and strengthened.
- Tones and strengthens the abdominal muscles thereby strengthening the core.
- Reduces accumulated stress and stiffness from the hip and pelvic muscles.
- Massages the reproductive organs for better functionality which prevents menstrual discomfort and painful symptoms of menopause in women and infertility in men.
- Increases blood flow throughout the body, which aids in detoxification.
- Improve digestion and reduces digestion-related issues like constipation, gas, etc.
- Improves the metabolism which further helps in reducing fat from the abdominal and thigh area.
- Energizes the body and removes fatigue, stress, and lethargy.
- Enhances brain power by boosting blood and oxygen flow to the head.
- Calms the mind and removes negative emotions like anger, depression, etc by soothing the central nervous system.
- It stretches the leg muscles and improves the flexibility of the thighs, knees, calves, and feet.
Conclusion
Do not be afraid to attempt this complex-looking pose. Even though it looks difficult, following the instructions to the, and using some props, will make it easier for your to conquer your fears and practice this pose.
Frequently Asked Questions
What are the disadvantages of Plow Pose?
Halasana is not a beginner-friendly pose. Many people simply don’t enjoy practicing this posture because of the odd angle, which can make them more anxious. They are sometimes discouraged to practice this pose simply y looking at it.
Moreover, the compression of the throat that results from pulling the shoulders too far from the ears can make it difficult to swallow and cause symptoms of suffocation. And unless you are using props for your spine, you can risk straining your back muscles and injuring your spinal column.
Does Plow Pose/Halasana reduce belly fat?
Yes, when performed correctly, it can reduce belly fat.
You put pressure on your gut and midsection when you acquire this pose. It aids digestion and controls appetite by massaging the digestive system. Additionally, it affects the thyroid, which enhances metabolism. Your breath will become more powerful if you practice halasana frequently.
All of these combined make it a fantastic tool to help with fat cutting.
: Meaning, Steps, Benefits, & Precautions")
: How to Do, Benefits & Precautions")
: How to Do, Benefits and Precautions")


for how long can we hold Halasana pose?
Normally hold halasana pose for 7 to 8 deep breath. It can be 2 minutes max. However, in restorative sessions with props, the pose can be held for up to 10 minutes.
Yikes! “Performing the Plow Pose is not too hard. It only needs the flexibility of the spine and willpower.” This sentence makes me very nervous, which sounds like using the force of our mind/ ego to achieve a pose ideal, rather than gently supporting ourselves to mindfully and carefully find our way into the version of the pose that aligns with where our own body is at! I’ve never heard any of my teachers talk about using ‘willpower’ to get into a pose, as our minds can push us to do many things that aren’t in our deepest alignment, and leading with our mind/ ego/ willpower is the number one cause of injury! To me, yoga asanas should come from deep awareness of our body, and the process of finding our way into a pose is a journey of attunement to inner self, rather than the gym-like application of mental willpower.