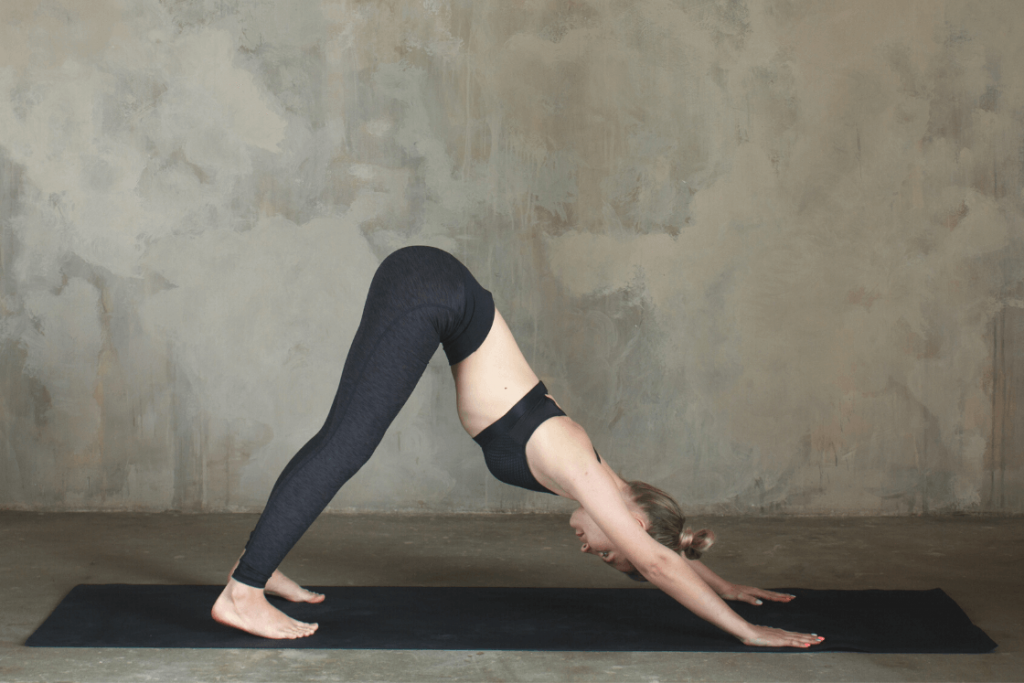
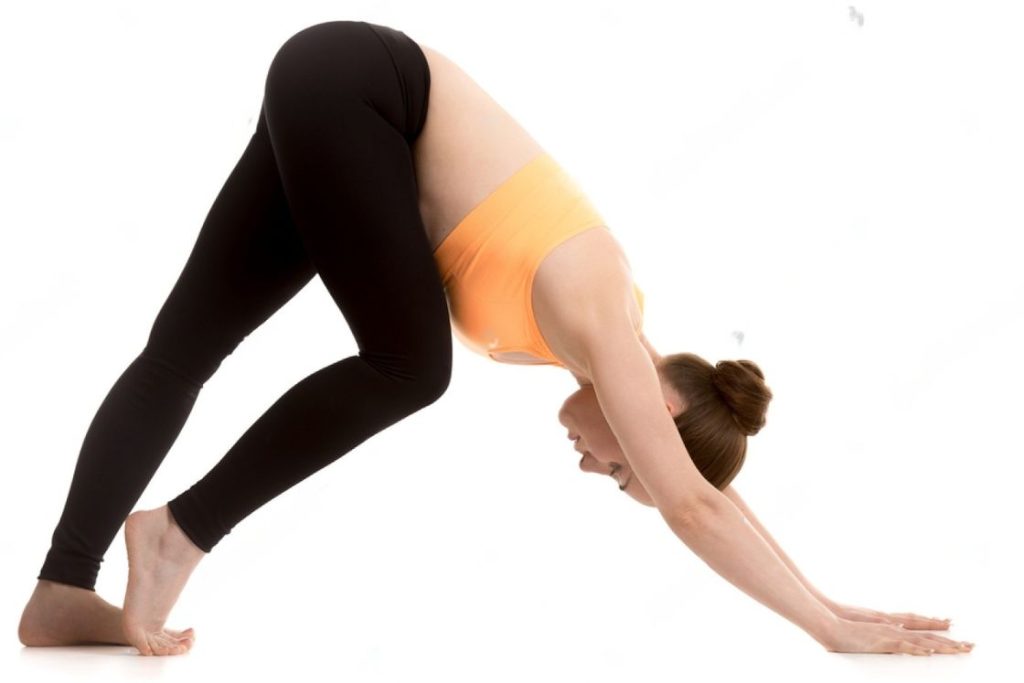
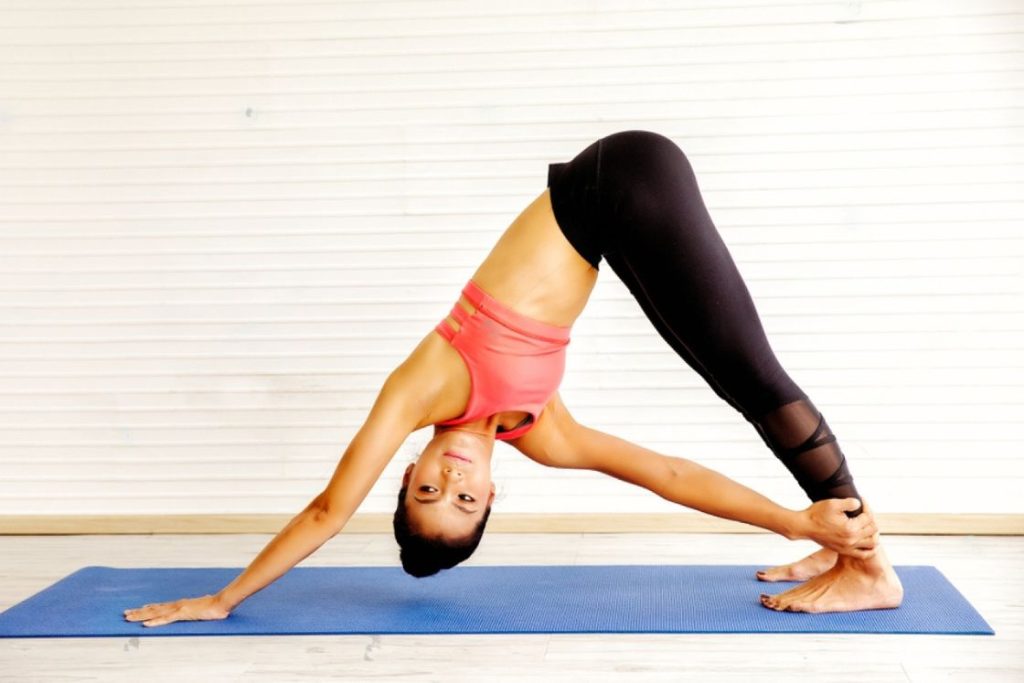
The downward-facing dog pose is one of the most popular poses in yoga asana practice. It is also among the first poses that are taught to beginners because of its usage in many yoga styles and sequences.
Adho Mukha Svanasana, as it is called in Sanskrit, is named after the similar position a dog takes while stretching. When you attain the final pose, your upper body resembles a dog (svana) in a stretched-out and relaxed position, while burying its face (mukha) downwards (adho).
It is a popular transition pose between Sun Salutation and other poses in Ashtanga, Power, and Vinyasa yoga practices.
Being a weight-bearing practice, it helps to strengthen and stretch nearly all of the muscles in the body as well as increase bone density. It lengthens the hamstrings, stretches the calves, strengthens the shoulders, and tones the arms and legs.
Additionally, this pose can help stabilize your endocrine system, soothe your nervous system, increase blood supply to your brain, and promote circulation.
This pose is also used as a warm-up as it gets the body ready for internal heat generation. Downward-facing dog pose is also included in the vinyasa yoga style and is a prominent pose in the Sun Salutation.
The full-body stretch and strengthening of the core muscles in this pose make it a favorite among yoga instructors and practitioners alike
In this article, we will see in detail how you can perform this pose along with some of its variations. We will also let you know the precautions you would need to take and the benefits this pose gives when practiced consistently.
Practice Guide to Perform Downward-Facing Dog Pose
Steps to Perform
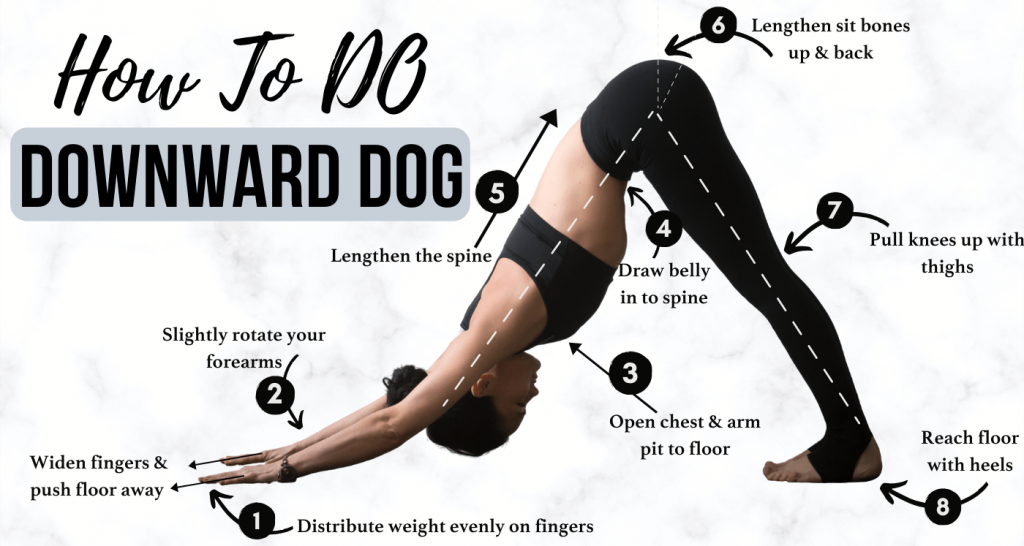
- Come to the tabletop pose. Your arms should be placed shoulder width apart and fingers spread to evenly distribute the weight.
- Your legs should be positioned hip-width apart and your knees should be stacked below the hips.
- Keeping your arms straight, turn your toes under and lift your knees. Here your heels will not come in direct contact with the ground.
- With a slight bend of the knee, lengthen your tailbone towards the ceiling to push your hands your hips up. Engage your core further to further push the hips upwards.
- Straighten your knees and press your heels on the ground to stretch your hamstrings.
- Make sure that your weight is evenly put on the hands and legs.
- Move your shoulder away from your ears by bringing back your shoulder blades towards the hips.
- Let your head hang freely.
- Hold this pose for 5-7 breaths.
- Gently release the pose by lowering your knees and coming to the original tabletop pose.
Beginners’ Tips
- The most important aspect of performing the downward-dog pose is to maintain the length and stretch in the spine instead of straightening your legs.
- Rounding the back is the most common mistake that practitioners make while getting into the final pose. This happens when your hamstrings, shoulders, or back muscles are not flexible and you are unable to place your entire feet on the floor. For this, you can keep a slight bend on the knees and move them down and up to gradually increase the flexibility.
- Do not hunch your shoulders towards the ears as it will affect the lengthening of the spine.
- Do not lock your elbows as it can put pressure on the wrists and shoulders. Keep the arms straight with a micro bend in the elbows.
- Avoid stepping your feet toward your hands to bring your heels on the floor. Alternatively, you can keep a folded blanket or towel under your heels for support.
- You can use yoga blocks or folded blankets to place your hands for supporting the wrists and tight shoulders. Similarly, you can use the yoga block to place your head on it if you feel uncomfortable hanging it freely.
- Draw your navel towards the spine to keep the hips elevated.
Benefits of Downward-facing Dog
As mentioned earlier, one of the greatest advantages of this posture is that it addresses virtually all the muscles and joints of the body. The downward dog exercise is a great way to eliminate stiffness in the leg muscles while strengthening and stretching the spine. It also helps strengthen the shoulders and wrists, which can be very helpful during more challenging balance exercises.
With the above in mind, let us take a look at the benefits of this pose:
Stretches and strengthens muscles. Downward facing dog stretches the hamstring and calf muscles and strengthens the ankles. It also strengthens the wrists and stretches the arm muscles. The entire back muscles and spine are stimulated as well as the pelvic area.
Promotes a strong core. Lifting your hips upwards not only requires strong arms and legs but also a strong core. By pulling in your navel towards the lower spine, you are effectively massaging and stimulating the muscles of the abdominal regions, resulting in strong core muscles and abs. This has also been proven in a 2014 study where it was noted the downward facing dog pose, along with other poses, was effective in strengthening the abdominal muscles.
Improves flexibility and range of motion. Adho Mukha Svanasana helps increase flexibility while improving the strength of the body. Hamstrings, shoulders, back and even the chest are stretched, as well as calves, ankles and back. The flexibility of the body is improved through increased joint mobility and muscle elasticity.
Opens the chest and improves lung capacity. By keeping the shoulders from touching the ears, the shoulder blades are opened and the shoulder muscles are stretched. This expands the chest cavity, which improves breathing and promotes deeper breathing.
Reduces varicose veins. Due to the stretching and adequate blood supply for the veins, this pose is useful for treating varicose veins as it removes lactic acid from the legs.
Improves alignment and posture. Your vertebrae can be straightened and your spine can be aligned by doing a downward dog, which stretches up the chest and shoulders. Your posture will greatly improve as a result of the shoulders’ strengthening and lower body’s toning.
Aids in reducing stress. The inversion of this pose helps the blood flow towards the head. It also encourages the free flow of energy through the spine towards the head. This in turn helps soothe and calm the nervous system and activate the parasympathetic nervous system. This is a sure-shot way to de-stress and reduce anxiety levels.
Acts as a therapeutic and healing pose. Through inversion, this pose is also extremely helpful in alleviating problems of sinus and nasal congestion. It also ensures that your face gets a good dose of fresh blood and oxygen which promotes a healthy glow.
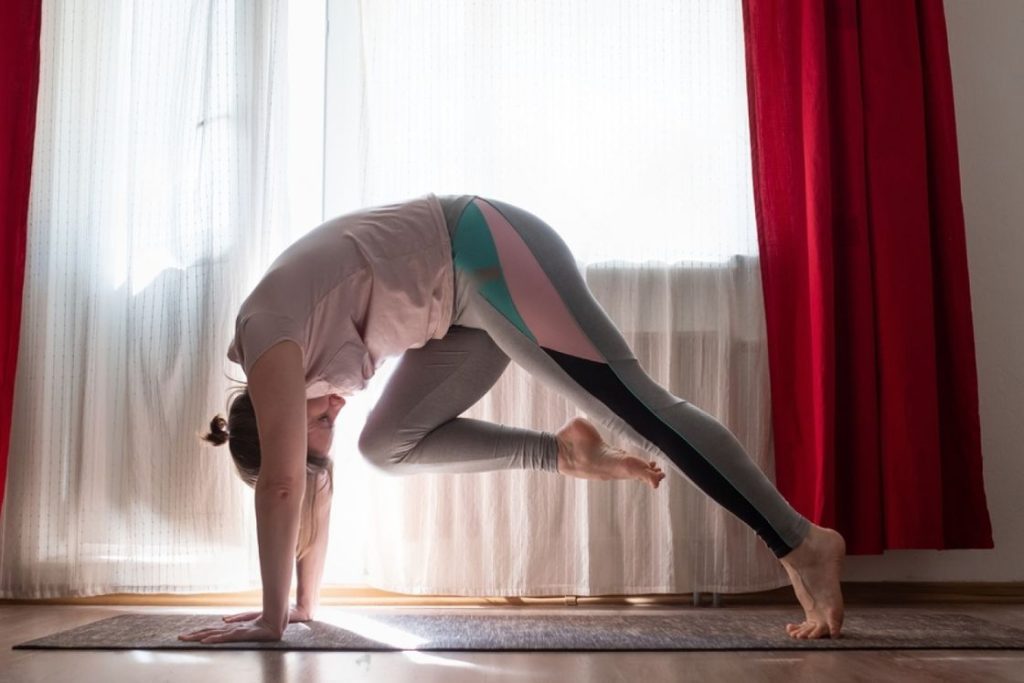
Downward-Facing Dog Variations
One knee bend – This is a simple variation where instead of keeping both legs straight, you can bend one knee at a time. This is helpful when you want to gradually and steadily increase your stability and flexibility.
Both knees bend – In this variation, you bend both your knees before coming to the final pose. bending both knees is extremely beneficial when your thigh muscles are stiff. It can also help in strengthening your lower back muscles, prevent rounding of the back and alleviate some pressure from the shoulders.
Revolved Downward Dog – This variation gives an abdominal twist to the usual downward-facing dog pose. After you have gained stability and balance in your pose, you can slowly lift one hand, say the right hand, and bring it inwards to hold the ankle of the left foot. Your body will also turn towards the left and give a deeper stretch to the entire back. This is also a good variation to encourage spinal decompression.
Legged Downward Dog – This advanced variation should only be practiced if you have mastered the original pose and have gained enough strength in your core, leg, and shoulders muscles. To do this pose, you would need to bend the knee of one leg, say the right leg, and lift the feet off the ground. Your body should make a straight line from the knee to your hands. Applying pressure on your hands and engaging your core, lift the lower leg towards the ceiling such that the right leg and right arm are in one line. you should do this pose with both legs one at a time.
Modifications
Downward-facing Dog Pose with a wall – This variation is meant for people who cannot bend forward completely. Here you will stand in front of the wall and extend your arms overhead. Place your hands on the wall and start walking back without your hands leaving the wall. As you will walk back, your hands should slide down. You can stop when your upper body becomes parallel to the ground. You can also walk back further to encourage forward bending.
Downward-facing Dog Pose with a chair- This is just like taking the help of a wall. Here you will place your hands at the back of the chair and walk back till your upper body becomes parallel to the ground. To further bend your body forward, you can place your hands at the edge of the seat and then finally at the base of the chair legs to attain the full pose.
Precautions and Contraindication
- People with recent injuries or surgeries on the knee, shoulder, ankle, wrist injuries, spine, hip, knee, and shoulder should not perform this pose until healed.
- This pose should be avoided or practiced for shorter periods by those who suffer from vertigo, high blood pressure, epilepsy, or other conditions connected to vertigo.
- Patients with weak joints and bones, such as those with arthritis and carpal tunnel syndrome, should avoid this pose.
- Pregnant women and seniors should avoid this pose.
Preparatory Poses
- Tabletop pose (Bharmanasana)
- Cat Cow Pose (Bitilasana Marjaryasana)
- Standing Forward Fold (Uttanasana)
- Extended Puppy Pose (Uttana Shishosana)
- Dolphin Pose (Chatur Svanasana)
Follow-up Poses
Conclusion
One of the most fundamental poses in a yoga routine is the downward-facing dog pose. Yoga practitioners of all ages, regardless of their fitness level, can perform this basic level pose. You will feel the effects of it from head to heel since it engages the full body.
Frequently Asked Questions
How long should I hold Downward Facing Dog?
In general, you can start by holding Downward Facing Dog for about 5-10 breaths and gradually increase the duration as you build strength and flexibility. You can also incorporate it into a flowing sequence of poses, moving in and out of the pose with the breath.
Why do my wrists hurt in downward dog?
Your wrist pain in Downward-Facing Dog Pose may be caused by several factors, but weight distribution is probably the main culprit.
As opposed to putting more pressure on the thumb and index finger, shifting the weight toward the pinkie puts more stress on the wrist.
You can alleviate this pain by practicing resting on your forearms instead of straightening your arms fully. Additionally, by allowing your knees to bend and pushing your hips further back, you can relieve pressure on your wrists.
Using folded blankets or rolled towels or yoga blocks can also be of great help.

: Steps, Contraindications & Benefits")


