Over the past decade, Yoga has shown significant influence over curbing knee pain. Knee pain is most often related to muscular dystrophy, knee osteoarthritis, and rheumatoid arthritis. It’s generally accompanied by knee stiffness and lack of mobility.
Integrated yoga therapy not only relief knee pain but generates knee stability and balance as well. Incorporating yoga poses with their easy modifications makes yoga easy-to-follow exercises in knee pain.
How yoga relieves your knee pain?
Yoga includes a series of systematic poses, that stretches and flexes the muscles around your knee and condition them for better shock absorption. For example, adding little bouncing (up and down) movement in Tadasana like standing pose can strengthen your knee menisci.
Moreover, yoga breathing exercises like Nadi Shodhana Pranayama helps you in knee pain management by regulating the flow of Prana.
To relieve knee pain, yoga when practiced in the correct manner will help you develop four essential elements – strength, flexibility, balance, and proprioception.
1. Strengthens knee surrounding muscles
Yoga develops strength around the knee surround muscles including hamstrings, quadriceps, and abductors. Every time your knee takes a shock, these muscles need to be prepared to handle it all.
2. Brings flexibility in knee joint
Yoga involves stretching of both the active and dormant muscles around the knee. Properly utilising all the available muscles, your knee gets a greater range of motion. And, strength even at the extremities of the motion.
3. Balances muscles around the knee
When all the muscles are not active, the muscles are not balanced. And even under average stress, the knee will fail to receive the required support from the muscles. This lack of balance is a primary cause behind ligament and cartilage injuries of the knee. Yoga establishes effective muscle balance, not only of your knee but your entire body.
Every time there is a knee injury, there is a certain bit of nerve damage happening. And every time there is nerve damage you lose a bit of control over your muscles, ligaments, and tendons. This loss of control further increases the chance of a second injury. Balancing postures of Yoga are excellent at reviving the damaged nerves and giving you back control over your knee.
What research says?
The benefits of yoga are backed by research. Research by the International Journal of Preventive Medicine studied the effects of hatha yoga on women with osteoarthritis. The research had the subjects practicing hatha yoga for 60 minutes, 3 times a week for only 8 weeks. The program resulted in a significant decrease in both knee pain and symptoms.
Yet another research by BMC complementary and alternative medicine concluded that a weekly yoga program is acceptable, feasible, safe, and shows therapeutic benefit in women with knee osteoarthritis.
Different yogic exercises including asanas, relaxation, pranayama, and meditation have shown positive results in people with knee osteoarthritis. Study shows, yoga relieves knees resting pain, early morning stiffness, state and trait anxiety scores, blood pressure, and pulse rate.
6 Yoga Poses to Relief Knee Pain
Some yoga poses are totally safe to do in knee pain, as long as your body allowing you to go comfortably into the pose. In any knee issues, using yoga props and wall support for pose modification is always recommended to safely approach the poses.
Below 6 yoga poses with their modifications are helpful to relief knee pain.
1. Mountain pose (Tadasana)
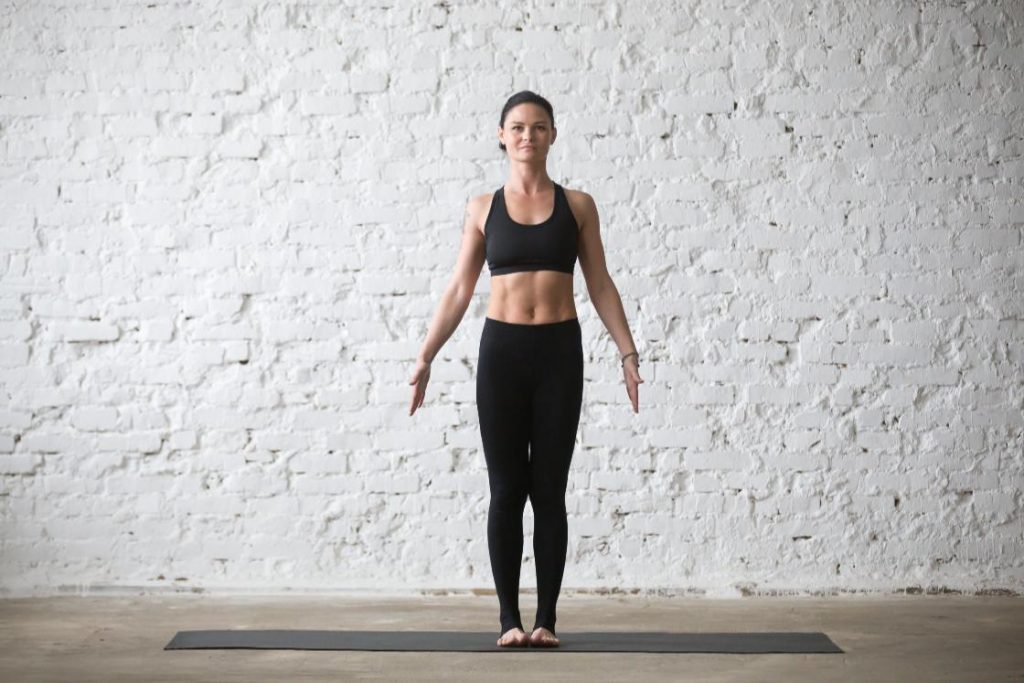
The standing mountain pose is particularly helpful in maintaining the alignment of your knees. It prevents your knees from excessively extending outwards or inwards (basically aligns the knee joint). Abnormal knee alignment can otherwise cause wear and tear of soft tissues around the knee.
Mountain pose also works exceptionally well in making us aware of our posture. The mountain pose will impact your thighs, knees, feet, ankles, buttocks, and abdomen. And the best part -it’s beginner-level yoga.
- Remember to work your way up your feet. Place your feet hips apart -align your feet with hips and aim for an absolute upright position.
- Straighten your spine, and push your head back such -that the back of your head aligns with your heel.
- Press down the back of your heel and keep your hands straight, at the side of your body pointing towards the ground.
- Hang your shoulders down and try to distribute your entire weight evenly between all four corners of your feet.
Mountain pose modification for knee pain
By using a block in between the upper thighs in the tadasana, excessive weight coming onto the knee joint can be reduced. It will give you the freedom to easily make movements in mountain pose to release the tension causing knee pain.
2. Bridge pose (Setu bandhasana)
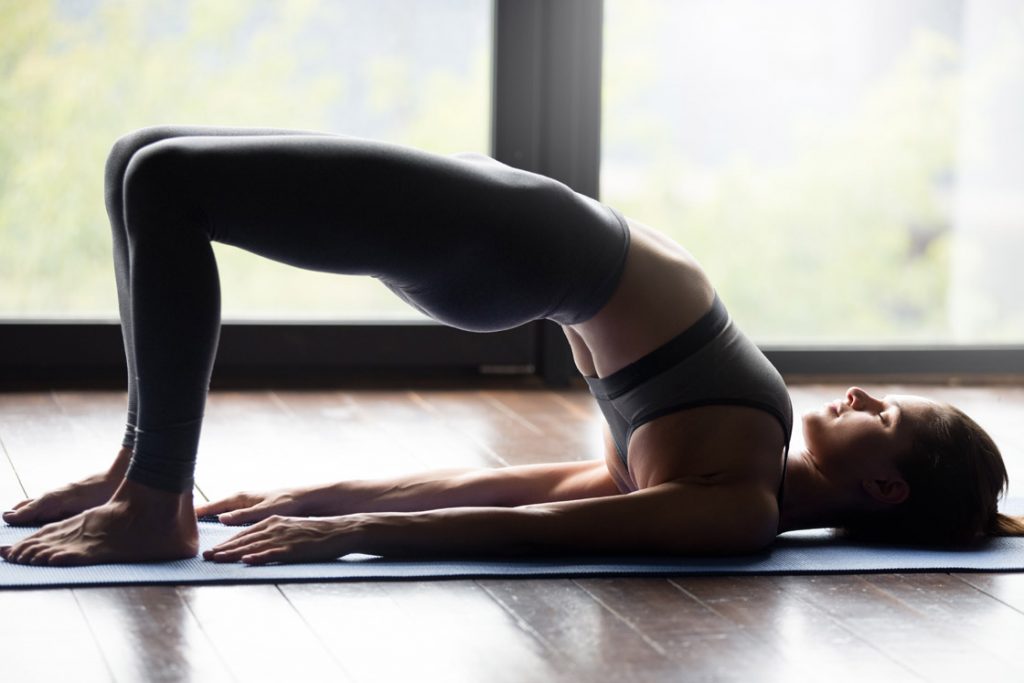
The setu bandhasana is a highly recommended pose for knee pain and other joint pains as well. It’s the great benefactor of your entire musculoskeletal system.
This pose is not a beginner-level pose. Thus, if not practiced under the guidance of an experienced individual, you might injure your neck or knee. However, the difficulty pays off, with the diverse range of benefits. Apart from working on all four knee muscles, it reduces stress, improves digestion, deals with fatigue, insomnia, and backache, and also stimulates many of our internal organs.
- Lie supine on the floor. Use some support or cushion beneath your shoulders -this will reduce the chances of injury.
- Bend your knees, setting your feet on the floor. Draw your heel back till it’s below your knee.
- Breathe in – and as you breathe out push your feet and arms against the floor and thrust your tailbone upward toward the ceiling.
- This should lift your buttocks off the ground. Lift till your thighs are parallel with the floor. Firm your buttocks and do not let them drop.
- Join your hands below your pelvis and clasp. Try to reach out with your arm, so as to form a V-shape from your shoulders to your hand.
- Do not spread your feet but keep them parallel to your thigh at just hip-length apart.
- Now try to extend your knee forward, and away from your hip. In the process, stretch your tailbone and pull up your pubic bone toward your navel.
- Lift your chin a little away from your breastbone. And now firm your shoulders and press the upper part of your chest toward the chin.
- Finally, broaden your shoulders, firm your arms and pull up the region between your shoulders.
- Hold for 30 seconds ( or 15 if 30 gets difficult ) to 1 minute. Then very slowly release your pose in an exhale.
Bridge pose modification for knee pain
Bridge pose mainly puts your upper back and neck at the risk of injury. However, for someone with knee pain, the final hold position of Setu bandh can be a bit stressful on the knees. This is why it is advisable to set a yoga block right below the hip, to reduce the tension on your knees.
3. Warrior 1 Pose (Virabhadrasana 1)
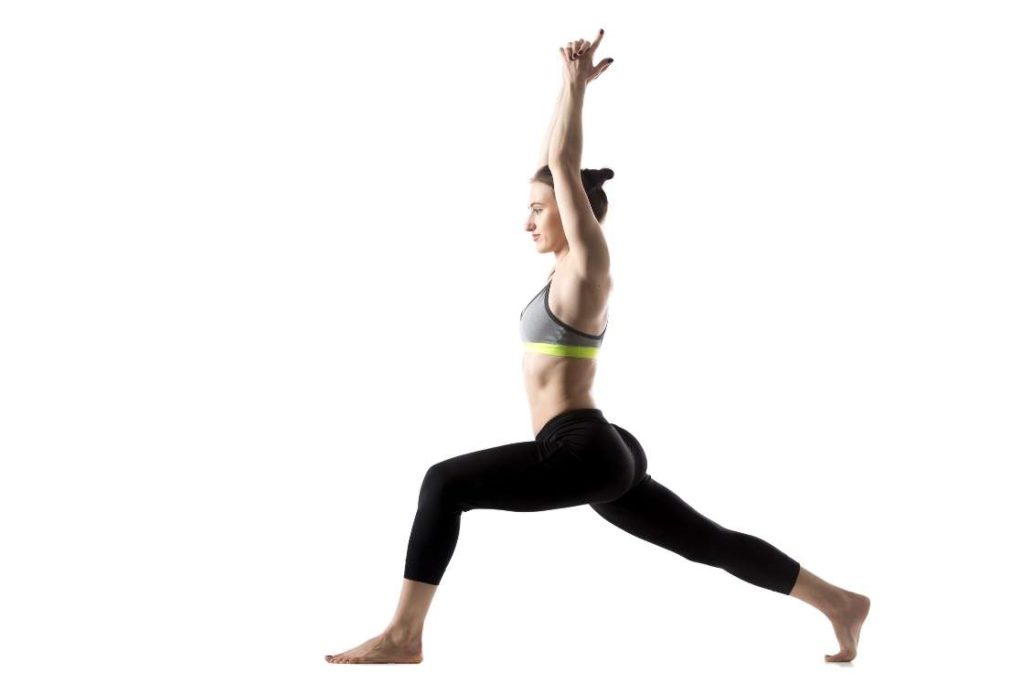
The warrior pose is an intermediate-level pose that works on your thigh and calf muscles, leg joint ligaments, lower back, lower abdomen, chest, and shoulder blades. Once again working on your entire leg muscle and ligament system, Virabhadrasana is a relief for knee pain.
The warrior pose is particularly designed to stretch out our entire muscles system and activate under utilised muscles throughout our body. Thus apart knee pain, warrior pose will bring therapeutic relief to many other muscle related body aches.
- Stand in mountain pose, with feet hip length wide. Increase the gap by a foot.
- Turn your left foot inside by 45 degrees and right foot by 90 degrees. Keep both your heels in the same line.
- Now as your feet turn, do not restrict your body, let it turn naturally as well. If you forcefully restrict, it will pull your thigh muscle from abnormal angles. Consequently, increasing your knee pain.
- Now lift your left heel and rotate the foot on your toe, so as to point it in the same direction as your right foot.
- Turn your upper body right, from your hip to match your feet.
- Keep your back and head straight and set your left heel down on the floor.
- In the beginning placing the left heel all the way to the ground can pull your calf muscle or injure your ankle ligament. So, you can use a support lift under your left heel.
- Bend your right knee, and take your knee and upper body front. And stretch your left leg. Distribute your body weight equally on both legs.
- Finally, raise your up hands straight, and join them high on top of your head. Hold it for 15 seconds and then repeat the pose by reversing the leg roles.
Warrior Pose 1 modification for knee pain
In the beginning days of practice, placing the left heel all the way to the ground can pull your calf muscle, hamstrings, or injure your ankle ligament. So, you can use a yoga block as a support lift under the heel of your back leg.
4. Tree pose (Vrikshasana)
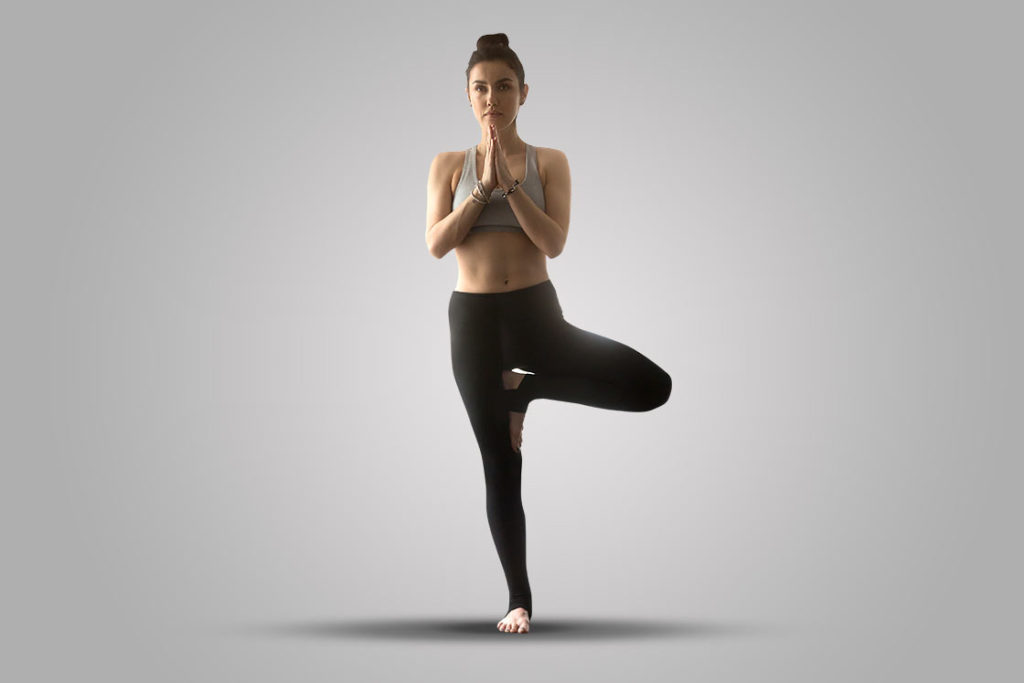
Tree pose is a lot less stretching and a lot more balancing. Vrikshasana is a fine blend of physicality and meditation. Tree pose will bring balance to your muscles, train your leg nerves for better control and will make you highly aware of your body.
For a beginner, the balancing can be a challenge, but once you get the hang of it -you’ll love this pose. It has a unique calming effect on the mind and nerves. From a knee pain sufferers perspective -this Yoga will bring stability and control at the knee joint.
- Once again stand in a mountain pose.
- Very slowly shift your entire weight to your right leg, and lift up your left leg from the floor, whilst balancing your entire bodyweight on your right.
- Break your left leg at your hip and pull up your entire leg by bending it from the knee. Bring your left foot upto your inner right thighs and rest your left foot against your inner right thigh.
- While pulling up your left leg, support pull it with your left hand to keep your balancing stable. An otherwise sudden movement or jerk can injure your right knee.
- Now put your hands up high like the warrior pose and hold it not more than a minute. Then try balancing on left leg in the same manner.
Tree pose modification for knee pain
While pulling up your left leg, support pulls it with your left hand to keep your balancing stable. An otherwise sudden movement or jerk can injure your right knee.
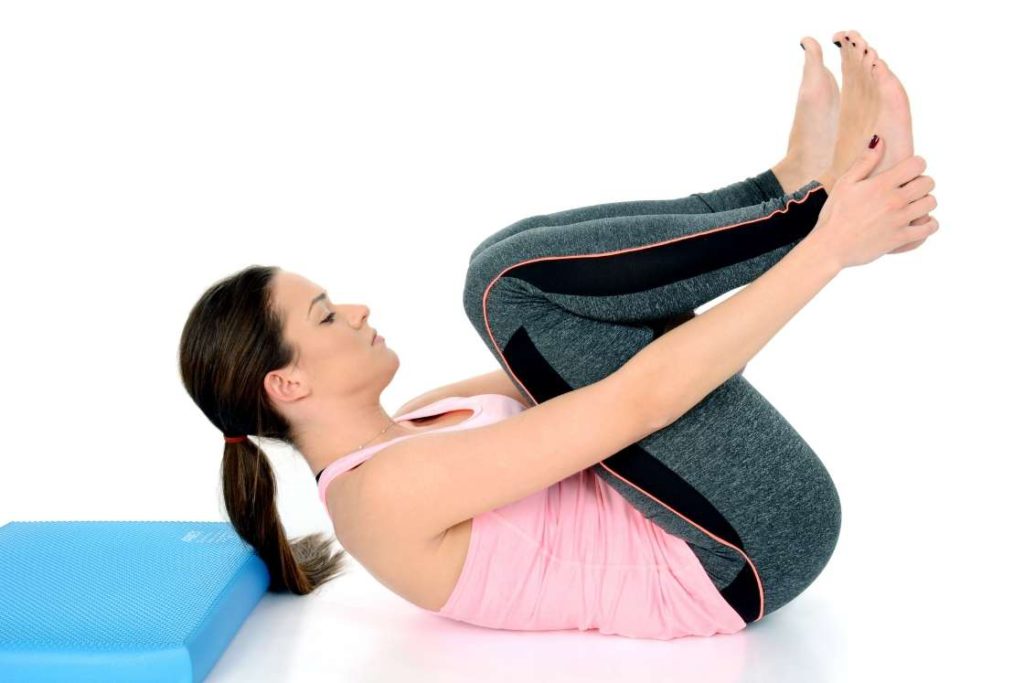
5. Hero Pose (Virasana)
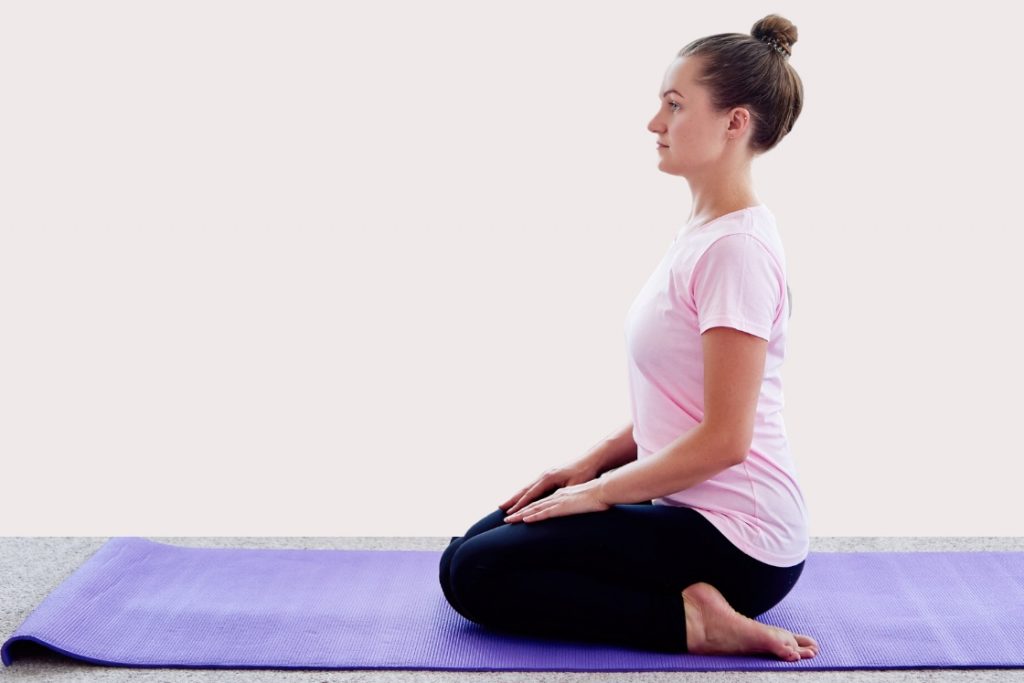
Hero pose is a great way to relax and exercise at the same time. This too is a very meditative pose, with very little physical exertion. Additionally, this is one of those rare yogas that you can do almost at any time of day. Even after (not immediately after) a meal or before going to bed.
This yoga pose is a must for people with knee pain. Virasana works mostly on your legs, knee, ankle, hip and lower abdomen. Hero’s pose benefits, blood circulation, gas relief, digestion, leg inflammation and obviously knee strength and flexibility.
- Keeping your thighs perpendicular to the floor, and kneel on the floor.
- Bring your inner thighs close to each other. Stretch out our feet, with the bottom facing up.
- Do not join your feet, rather keep them almost hip length apart. keep your big toes pressed down and pointed towards each other.
- Slightly leaning forward, bend your knee and sit on your heel.
- Feel free to modify at this point to avoid beginner’s injury. You can either put a rolled blanket between your feet to support your sitting. Or, you can firmly apply support at both your ankles with your hand.
- Doing this will avoid excessive pressure on your ankle and unnatural pull at your knee.
- Straighten your upper body, from hip to torso to shoulders, and hold it firmly.
- Even distribute your weight on both heels, and hold your position for 30 seconds to a minute. Once comfortable, it’s okay to increase the time of hold.
Hero pose modification for knee pain
Feel free to modify Hero’s pose to avoid beginner’s injury. You can either put a rolled blanket or a yoga block between your feet to support your sitting. Or, you can firmly apply support at both your ankles with your hand.
6. Downward facing dog (Adho mukha svanasana)
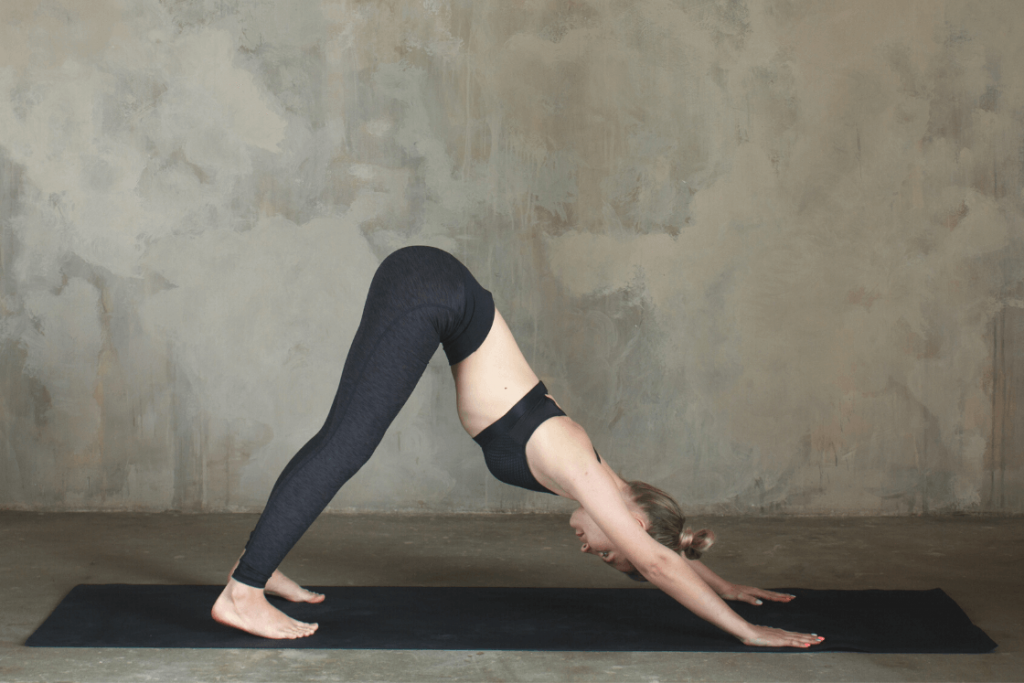
Downward facing dog is another holistic hatha yoga pose that works on multiple muscles, bones, and ligaments of your body. This exercise can be seen performed by many athletes worldwide, especially the ones requiring high leg activity. Adho Mukha Svanasana works on the ankle, knee, leg muscles, lower abdomen and chest muscles, lower and upper back muscles, shoulders, and arm muscles.
Just as the name suggests, this yoga mimics a stretching downward facing dog. Getting you down on all fours and stretching, this yoga taps into a great range of muscles in your body. And, eventually unlocking an equally wide range of motions and movements for your joints. This pose requires a bit of upper body strength, so maybe preparing with a plank pose is a good idea.
- Set up on all fours, both your knees and hands.
- Place your hands and feet at hip length wide. Keep your left hand, knee and feet in one line and right hand, knee and feet in one line.
- Lift your knee, and pull up your body. Push your buttocks up and backwards, and place your feet completely on the floor.
- Keep your knees and arms straight. And your entire upper body and hip, stretched outward.
- Press down firmly with your hands and feet. Do not build tense in your neck, but keep it free.
- Slowly try to push your hip further up and back, along with slow and even breathing. Keep pushing till you make an inverted V on the floor, with your arms, legs and hip.
- Note, this movement will put immense tense on your calf muscles, hamstrings and ankle -so, do not over-stretch. If you feel the tension getting unnatural, then keep that as a limit.
- As an alternative to slowly get the hang of the pose, try slightly breaking the knee, to reduce the tension.
Downward facing dog modification for knee pain
The downward dog stretch can put immense tension on your calf muscles, hamstrings and ankle -so, do not over-stretch. If you feel the tension getting unnatural, then keep that as a limit. As an alternative to slowly get the hang of the pose, try slightly breaking the knee, to reduce the tension.
Keep a watchful eye while practicing
Yoga is a potent practice, and like everything potent -you must ensure a necessary bit of caution. Inspite of the successful benefits of yoga, careless practices can further lead to injuries.
- If you are someone with knee pain, then you must be careful with the type of yoga and yoga class you are choosing. Select slow-paced and long hold classes. Such classes will be injury-free for your joints, as well as, train your joints for balance and alignment.
- It is also important to know your limits. You should not test the limits of a joint that is already suffering, rather go easy on it.
- At any point, if you feel like you need to sit out a pose, do so without hesitating.
- Similarly do not over-stretch your limits. If you are someone with knee pain, practicing yoga -know that tension in the muscle above the knee joint is normal, but the tension in muscles at the sides of the knee joint and below the kneecap is unwanted. That is when you need to halt your stretching.
- And finally, if your body is unable to reach for a pose at all, then feel free to reach for props, supports, and modifications.
: Steps & Benefits")


Mudras are wonderful remedy no doubt but I will post a comment only when I start and get some relief. Thanx.