Usually, muscles in our side body parts remain inactive most of the time because it doesn’t include in our day to day activities.
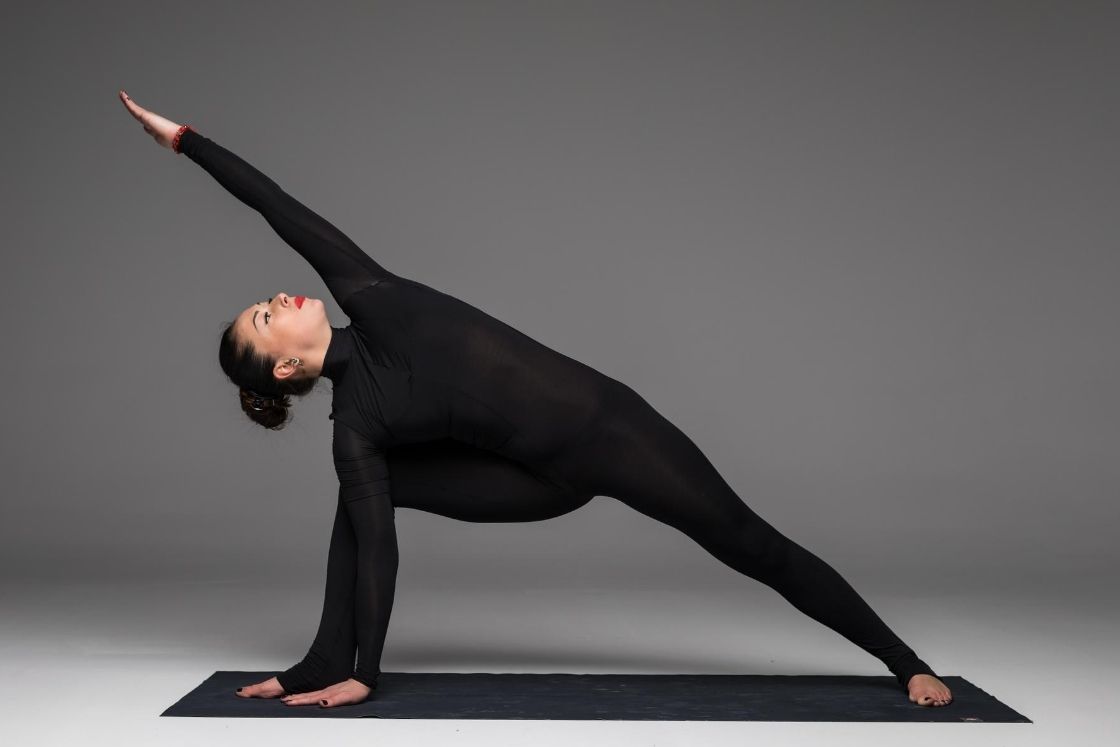
Utthita Parsvakonasana is a standing pose in which the torso reclined at an angle and stretches from the tip of the extended finger to the outer heel. In Vinyasa flow, it used to tone the inactive side body muscles.
Meaning
Utthita – Extended / Active | Parsva – Side body | Konasana – Angle pose
Combining the root terms, Utthita Parsvakonasana means the active extension of the side body bound at an angle. Commonly it’s called Parsvakonasana in short, the side angle pose.
Extended side angle pose is achieved by stretching the side body so as to achieve a specific position where you are actually measuring the length from your heel to the fingertips above.
Although it’s a beginner level pose though if someone finds it difficult, its practice can be understood as a combination of Utthita Trikonasana and Warrior pose 2. The legs in this pose come in a similar position to Warrior pose 2 and the hands in the extended triangle pose.
Even though Parsvakonasana is popular pose, it is not part of the medieval Hatha yoga. Later Krishnamacharya’s School of Yoga included it into the many yoga asanas list.
Utthita Parsvakonasana Practice Guide
Follow this practice guide to do Utthita Parsvakonasana safely.
Precautions & Contraindications
- As the body is supported over one bend leg and other stretched legs in Parsvakonasana, don’t practice it in case of knee or hip injury.
- If you have a migraine, headaches, vertigo, etc. it’s advised to practice balancing breath like anulom vilom pranayama before it, otherwise, you may feel restrictions in neck movements.
- People with high blood pressure should practice it with very low intensity, for example, by lowering stretched hand elevation.
Preparatory Poses
- Vrksasana (tree pose)
- Prasarita Padottasana (Intense leg stretch pose)
- Utthita Trikonasana (Extended Triangle Pose)
- Virabhadrasana 2 (Warrior Pose 2)
Utthita Parsvakonasana Steps
- Stand tall in Tadasana at one edge of your mat (say left edge). Let the hands holding hips, take a long step from the right foot to the long side of the mat (right side).
- Turn your right foot out at 90 degrees so the pelvis opens toward the front and bring left foot in the same direction at 45 degrees.
- With a gentle breath out, bend the right knee at 90 degrees and slowly go down your trunk. Maintain your thighs parallel alignment to the ground. Let the quadriceps muscles work and for that, just elevate the knee caps towards the thighs.
- Take a few deep breaths here.
- Exhale, tilt your body over the right leg while stretching sideways through the crown of the head. Simultaneously, reach down with your right hand and rest it inside or outside of the right foot (wherever you feel comfortable to reach down).
- Take your left hand (palm down) parallel to the left ear and over the head.
- Stretch intensely from the fingertips of the left hand, down to the side ribs, to the waist, to side thighs, and ultimately to the outer side of the left heel.
- If your neck allows it, you can look up from underneath the left armpit to the ceiling.
- Hold the final pose for a few breaths. Keep deep breathing.
- Slowly come out of the pose; firmly press your feet down, down the left arm on the left thigh, and straighten your torso.
- Change your standing position on the mat, reverse the direction of feet, and do the same pose on the other side (left).
Beginner’s Tips
- To support the body in the wide stretch in Parsvakonasana, do it bring your back leg against the wall or as your friend to hold the back leg.
- If you feel that you can’t stand firmly with legs wide apart then you can keep the fewer gaps in the beginning and stay comfortable as much as you can.
Props & Modifications
- Use a strap, make a noose from it and ask a your friend to hold the bend leg thighs through it. It will support inner groins and you can hold pose for longer duration.
- There’s one more modification for Parsvakonasana and it includes you keeping the lower arm in front of the bent-knee thigh. This will help to enhance the stretch at the front groin.
Follow Up Poses
- Baddha Konasana (bound angle pose)
- Malasana (garland pose)
- Bakasana (crane pose)
Utthita Parsvakonasana Benefits
- Utthita Parsvakonasana helps in strengthening knees, calves, ankles, and thighs. Since the legs in this pose are maintained at the right angle while stretching the body sideways, it strengthens the quadriceps. People with knee pain, back pain, or stiffness in the groin area will find it beneficial.
- Overall strengthening of legs in this pose improves the balance for advanced postures.
- Since the lungs and chest area also experiences a stretch in this pose, so it enhances lung capacity as well.
- Because of the perfect stretch of the side body, it massages the abdominal organs & helps in secreting digestive juices for better digestion.
- On the regular practice of side angle pose, it reduces the chances of menstrual disorders and gets rid of fertility-related issues.
- As this pose activates the side muscles of the body, it’s the best exercise to burn the waist and hip fat.
- This yoga pose is good for heart muscles and for cardiac health.
- Utthita Parsvakonasana is chakras balancing pose. It opens up the Manipura Chakra, Heart Chakra, Root Chakra, and Swadishthana Chakra.
- This asana helps in balancing emotions, releasing and healing blocked energy, and directing the same in the right direction. On practicing this pose, you will experience more flexibility and there will be a better flow of energy throughout the body.
