- Supta Kapotasana Meaning
- Precautions & contraindications
- Steps
- Variations
- Reclining Pigeon Pose Benefits
Are those tighter hips acting as hurdles to prevent you from stretching your hamstrings? Well, look no further! Reclining pigeon pose is all that you need to resolve your challenges.
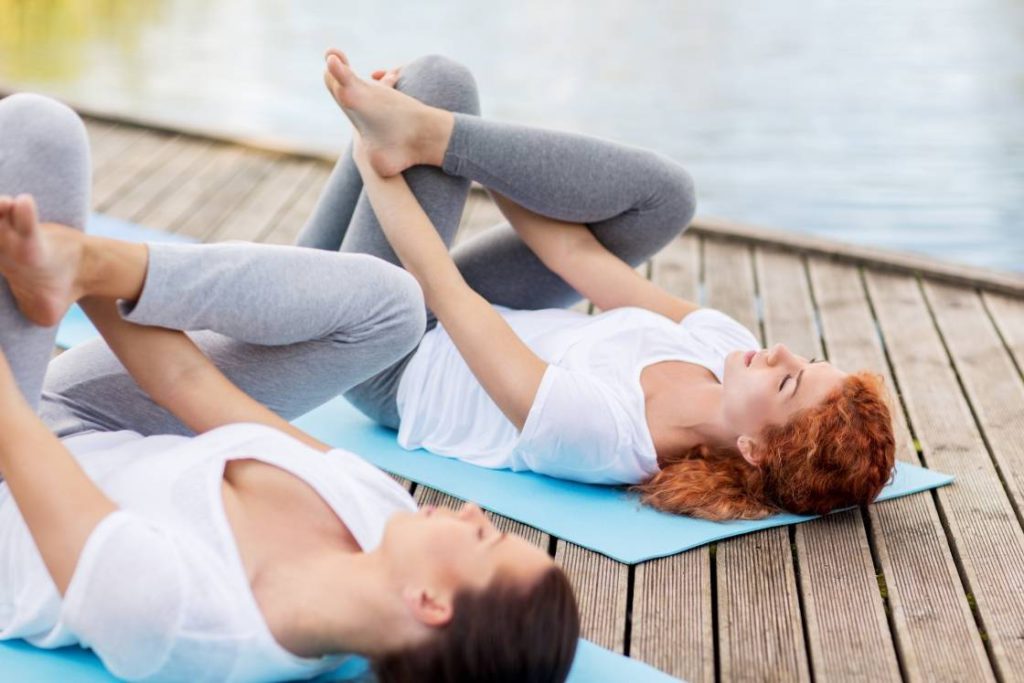
Reclining pigeon pose is a gentle way of stretching the hamstrings and quads. It’s a great hip opener pose for beginner yogis who have tightness in the hips.
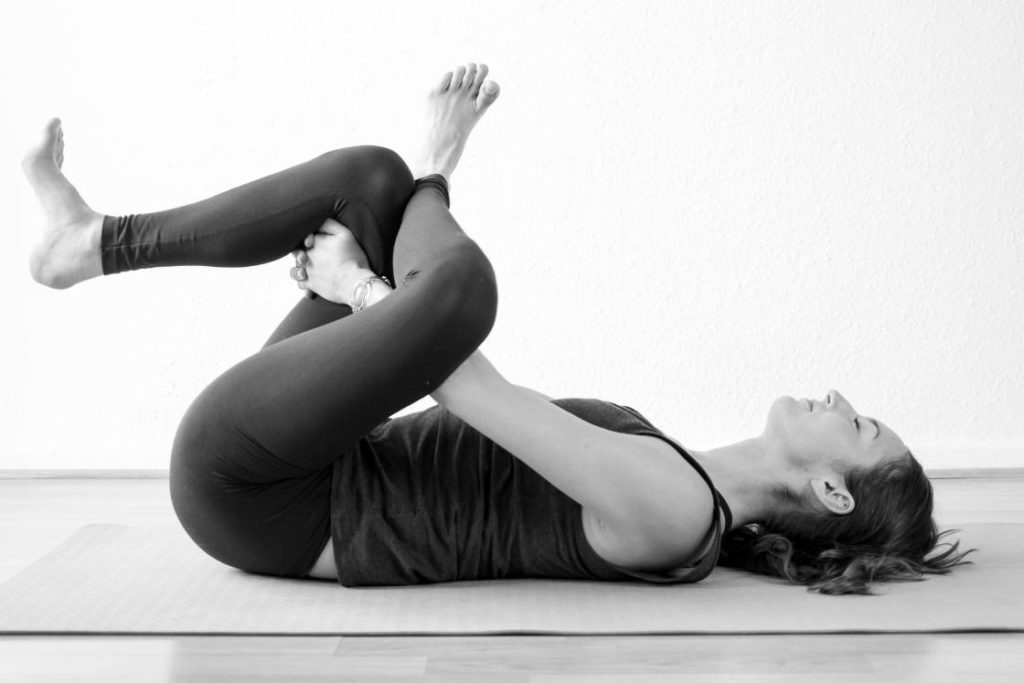
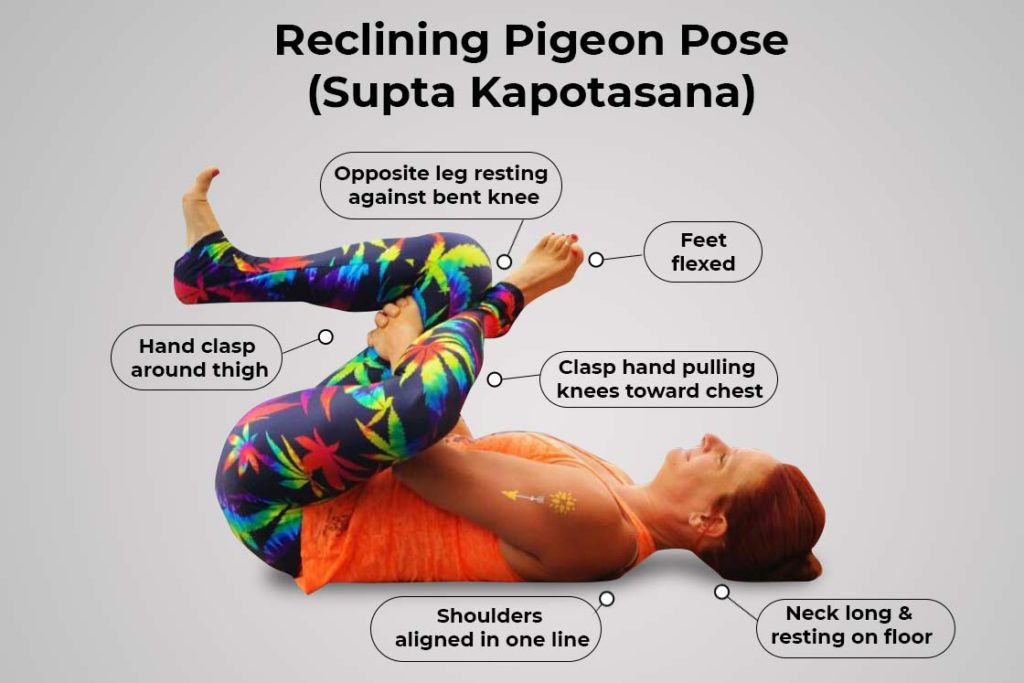
It is performed in the supine position with bent knees in the air. Then, the right ankle is placed over the left thigh and the right-hand threads in between the legs. The hands are clasped around the left shin, lifting the left foot and squeezing the knee towards the body.
This pose seems complicated, however, performed at a beginner level. It serves to prepare the body for pigeon pose by making the hips flexible.
Supta Kapotasana Meaning
Reclining pigeon pose is a variant of advanced pigeon pose. It is performed in a supine position, resembles a dead pigeon lying on the back, hence the name Supta Kapotasana.
In Sanskrit, “supta” refers to “reclined”, “kapota” means “pigeon”, “asana” is “pose”.
Some practitioners also refer to it as sucirandhrasana. In Sanskrit, “suci” means “needle” and “randhra” means “loop.” Here, the legs are crossed to make a loop like that of the needle. As you thread the needle, similarly the hand is threaded between the legs in the pose, hence the name.
Sometimes this pose is also described as Reverse Pigeon Pose or Eye of the Needle Pose.
Reclining Pigeon Pose Practice Guide
Even this beginner-level pose requires the proper practice guide and preparation. Here is what you need to know before getting into the pose.
Precautions
- The head and neck must be kept relaxed in the reclining pigeon pose.
- Do not move the body while holding the pose.
- The shoulders should be away from the ears relaxed on the floor.
- Keep the crossed over ankle flexed to prevent any injury.
Contraindications
- Do not practice this pose if you’ve had recent surgery in the hips, knees, lower back, or abdomen.
- Pregnant women must refrain from this asana after the second trimester.
- People with Sacroiliitis or other sacroiliac issues must not try it.
Preparatory Poses
- Knees To Chest Pose (Apanasana)
- Happy Baby Pose (Ananda Balasana)
- Garland Pose (Malasana)
- Reclining Bound Angle Pose (Supta Baddha Konasana)
Reclining Pigeon Pose Steps
- Lie down on your back with bent knees and feet on the floor.
- Lift the right foot and place the right ankle on the left thigh near the knee.
- Thread your right arm between the legs.
- Clasp right hand with the left around the left shin.
- Bring the left knee closer to the chest lifting the left foot off the floor.
- Set your gaze towards the ceiling.
- Exhale and feel the stretch around the lower hip.
- Hold the pose for up to 3 breaths then release the pose in reverse order.
- Repeat these steps keeping the right ankle over the left thigh.
- Once done on both sides, relax lying on the floor.
Follow-up Poses
- Supine Spinal Twist Pose (Supta Matsyendrasana)
- Wind-Relieving Pose (Pawanmuktasana)
Props and Modifications
- Blanket – Place a folded blanket under your hips to perform this pose. It supports the hips while holding the stretch.
- Against a Wall – It can be performed near a wall. While squeezing the knee towards your corresponding foot can rest pressing against the wall. It prevents any stress in the lower back.
Variations
- Half reverse pigeon pose – In this variation, as the name shows, only one leg is raised off the floor and pressed against the abdomen.
Lie down on your back. Bend your knees and bring your feet to the floor. Lift the right foot off the floor. Squeeze the right knee towards the body clasping both the hands behind it. - While holding the pose you might feel difficulty placing the hands around the shin. In this second variation of reclined pigeon, try clasping the hands behind the thigh.
- Reclining pigeon pose simple variation – This is an easier variation for those who have tighter hips or can’t hold legs off the floor. In the supine position with bent knee place the right ankle over the left thigh. Keep the hands by your sides and keep breathing.
- Reclining pigeon pose Advanced variation – Firstly, attain the base pose (reclined pigeon) fully with the right ankle crossed on to left thigh. Now, release your arms opening them to the sides. Bring your left thigh and right sole to the floor dropping them towards the left. Hold your right ankle with the left hand and push the right knee away from the body.
Therapeutic Applications
- Reclining pigeon pose is therapeutic beneficial in relieving back pain. It cures sciatica by gently stretching the hip muscles. A person who’s at the beginning of Sciatica treatment can try reclining pigeon pose to ease the pain
Reclining Pigeon Pose Benefits
1. Stretches the hips
Reclining pigeon acts as a hip opener pose. It stretches the gluteus maximus and piriformis muscles. This improves hip flexibility and prepares the body for intense and advanced stretches.
2. Strengthens the thighs
It also provides deep stretches to the hamstrings while squeezing the knee towards the body. It strengthens the thigh muscles and hip flexors.
3. Provides flexible lower back
The pose is performed lying on the back. Drawing the leg towards the chest provides a deep stretch on the lower back. This releases any tension trapped in the lower back muscles, thereby improving flexibility.
4. Improves blood circulation
Supta kapotasana helps to enhance the blood flow in the lower body. It includes the legs, hips, and lower back. Hence, aids in improving blood circulation.
5. Better digestion
The stretching involved to draw the legs towards the body exerts pressure on the abdomen. This stimulates the abdominal organs, thereby, facilitating and improving the digestive system.
6. Activates root and sacral chakra
Both the root (Muladhara) and sacral (Svadhisthana) chakra are stimulated while holding the pose. It benefits the practitioner by bringing stability and balance. It also improves emotional balance and enhances creativity.
")
 for Beginners: A Complete Guide To Get Started")
 in Yoga: Steps, Benefits, and Variations")

