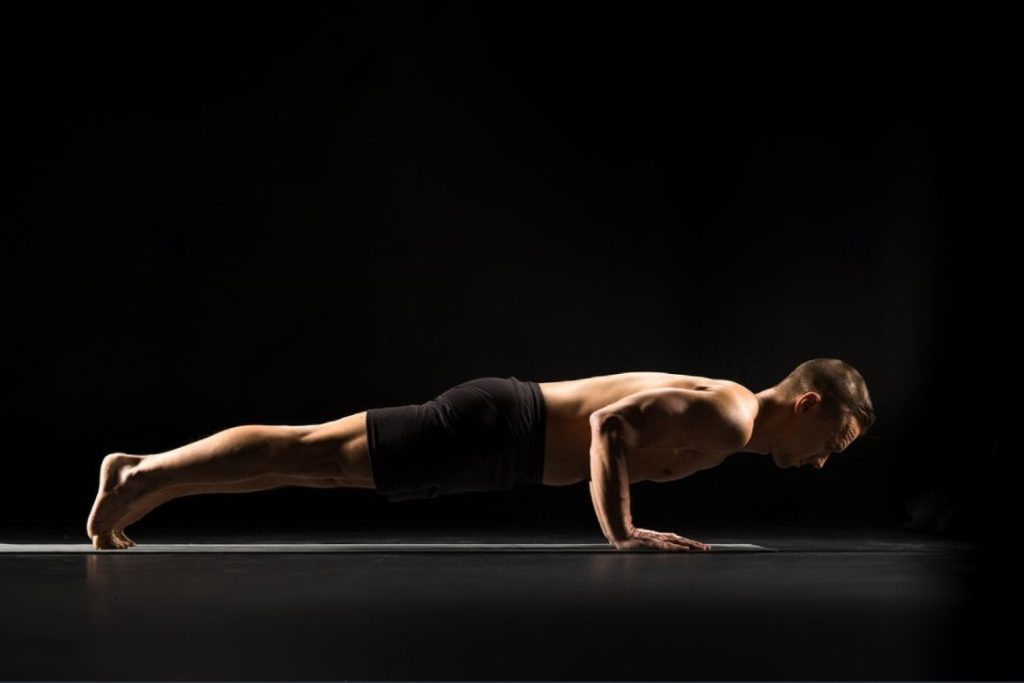
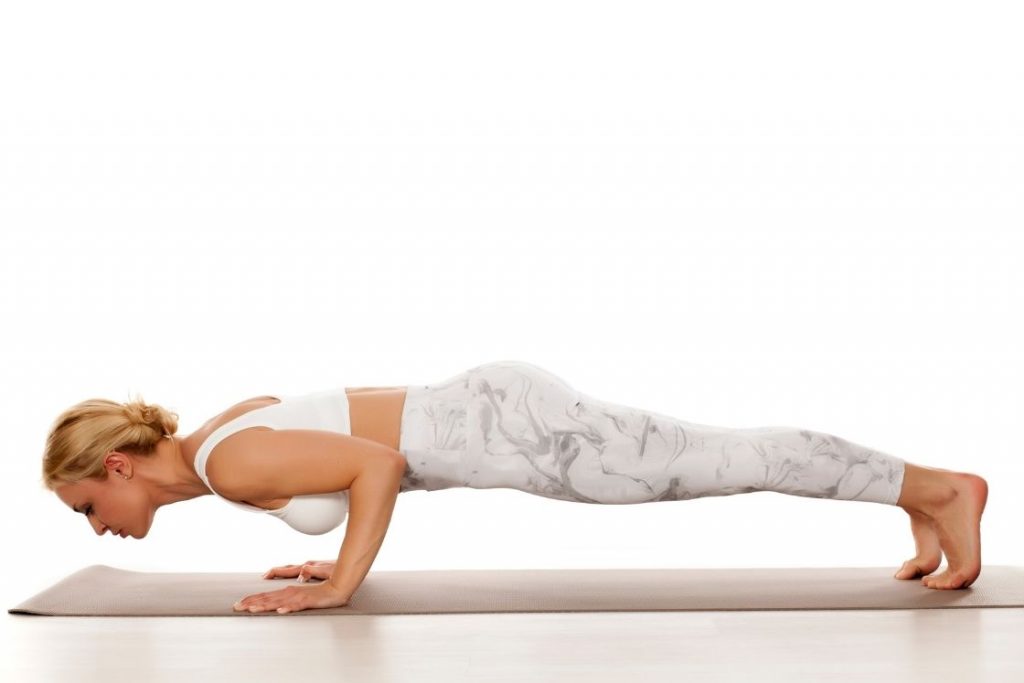
Phalakasana, Kumbhakasana or Dandasana are the names of the Plank Pose, which has become very popular among fitness freaks in recent years. It is a yoga pose that targets the core muscles and strengthens the shoulders, arms and back. It is performed to strengthen the body and tone the muscles.
It is also one of the asanas that balance the arms and is part of the sun salutation sequence.
The term phalakasana is composed of the two Sanskrit words phalaka and asana. Phalaka means “plank,” “wide,” or “bench,” and asana means “pose” or “posture.” Since the posture in this asana resembles a plank, it is called Plank Pose in English.
Holding Plank Pose for a long period of time can increase your stamina and muscle tone, build the strength needed for more challenging poses, generate heat, and activate the navel chakra.
Kumbhakasana is another name for this pose where Kumbhaka means breath retention. It is named so because before going down for a push, you should hold your breath for a few counts.
Plank pose is a flexible stance that is often used in the gym, pilates, and other types of physical activity.
Practice Guide for Plank Pose(Phalakasana)
Preparatory Poses
Adho Mukha Svanasana (Downward-Facing Dog)
Uttanasana (Standing Forward Fold)
Warrior Pose Series
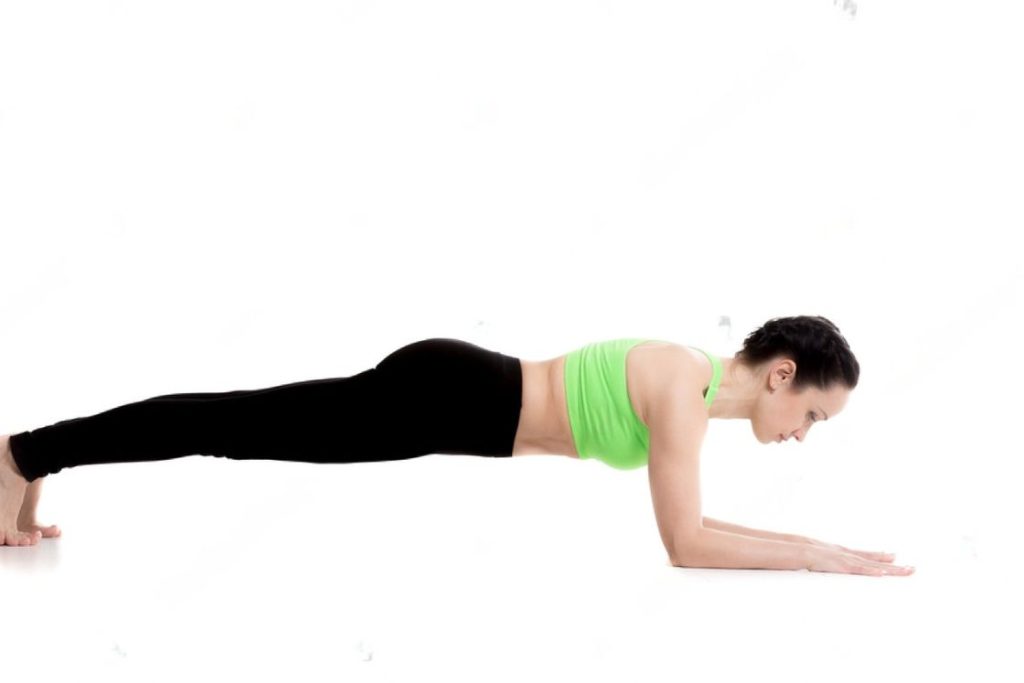
How to Do Plank Pose(Phalakasana)
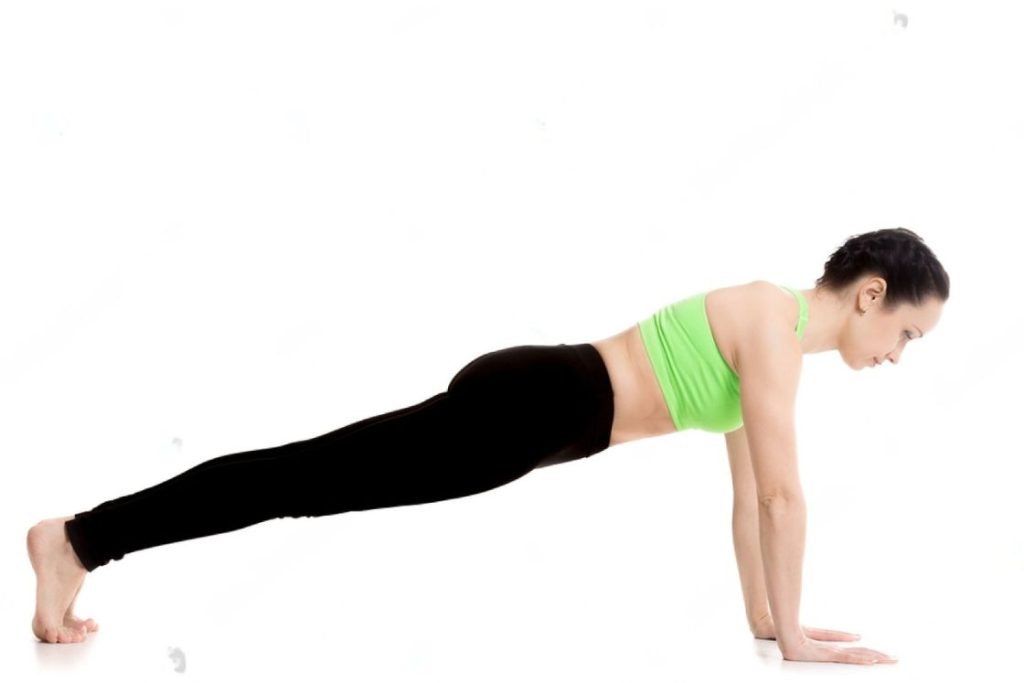
- Start with a table posture.
- The legs should be placed under the hips and the hands under the shoulders. Press down with your hands and forearms, spreading your fingers.
- Take a deep breath while lifting your knees off the floor and keeping your back straight. Place your feet firmly on the mat with your toes curled inward. Only the feet and palms should touch the floor.
- To achieve a slight backward tilt of the pelvis and firm your core, lift the top of your thighs toward the ceiling while lowering your tailbone to the floor.
- It should feel like your lower abdomen is a plate supporting your lower back.
- Keep your abdominal muscles tense as you push your heels back and extend your sternum forward.
- Initially, try to hold this posture for 30 seconds. Gradually, you can increase the duration of the exercise from 45 minutes to 1 hour.
Beginner’s Tips
- There is a tendency for the hips to sag down or lift. Try to maintain a straight line between the shoulder and heels. You can initially practice this pose in front of the mirror or take the help of someone to correct your alignment.
- Even when the arms are straight, the elbows shouldn’t be locked as the palms can get strained. Pay attention to how much of your weight is on the palms of your hands.
- Do not put all the pressure not only on the wrist or fingers. Balance the body weight evenly on the hand or you might end up hurting your wrist.
- Avoid hanging your head down to keep the alignment. Only your gaze should be pointed down not your head.
- Make sure that your upper back isn’t hunched. Keep the shoulders away from the ears and pull down your shoulder blades.
- If you cannot maintain the pose on your feet, take the help of the wall and place the soles flat against the wall. This will help you in a better alignment and remove the pressure off the legs.
- Even though it is a beginner-level pose, you might face difficulties in maintaining the pose for a longer period, start by holding it for 10-15 seconds and increase the time gradually.
Precautions & Contraindication
- If you are suffering from any injury or have had recent surgery on your arms, legs, hips, back, or shoulders, do not perform this pose at all.
- This pose should be avoided by those who suffer from vertigo, high blood pressure, or migraines.
- Patients with Carpal Tunnel Syndrome and osteoporosis should not perform Plank Pose.
- It should also be avoided by pregnant women, senior citizens, and people with generally weak bodies.
Plank Pose Variations
Forearm Plank Pose – For people with weak wrists or wrists problems, they can practice this pose by placing their forearms on the ground. When you are in the tabletop position, place the forearms on the ground instead of your hands. The elbows will be directly under the shoulders. This way, it will be easier to spread the weight of the upper body.
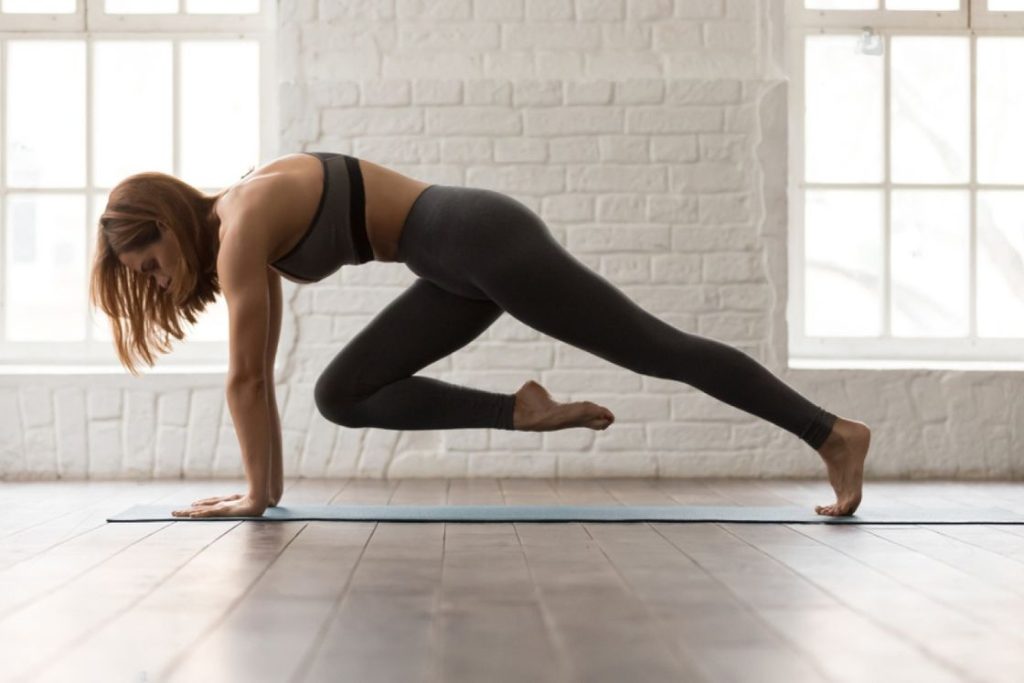
Plank Pose Knee to Elbow – You should only perform this pose if you have gained sufficient strength in your arms and legs with stability. In this version, bend your right knee and bring the knee towards the right elbow as much as possible. Then do the same with the left leg as well. This way, you are working on the flexion of the knee joint and stretching the muscles of the calves and thighs.
Low Plank Pose (Chaturanga Dandasana): Begin in High Plank Pose and slowly lower your body down, keeping your elbows close to your ribs. Your arms should form a 90-degree angle at your elbows, and your body should be parallel to the ground. Low Plank Pose challenges your arm and shoulder strength while also engaging the core and building upper body stability.
Follow-up Poses
Chaturanga Dandasana (Four-Limbed Staff Pose)
Urdhva Mukha Svanasana (Upward facing Dog Pose)
Vasisthasana (Side Plank Pose)
Benefits of Plank Pose( Phalakasana)
Like any other pose, the Plank Pose increases flexibility in the body. Moreover, it focuses on strengthening the body more than stretching it. It strengthens the lower and upper body at the same time. Let’s discuss its benefits in detail.
- Strengthens and tones the body
Plank pose tones and strengthens the muscles around the shoulders, upper arms, forearms and wrists. It addition, the hamstrings, quadriceps and calves, making them more flexible. This pose mainly strengthens the core and abdominal muscles, which results in a toned and symmetrical appearance and builds core strength for more advanced and difficult poses
- Improves posture and spinal alignment
Since you have to align the body in a straight line, every vertebra of the spine is stressed. This promotes spinal decompression and allows the spine to assume its natural shape. Proper alignment of the spine, especially the lower back, and strengthening of the hip and leg muscles also improves posture. A healthy foundation for good posture includes strong arms, legs, glutes and hips, and a neutral spine.
- Increases focus and concentration
To maintain the pose, one must pay attention to the alignment of the spine, which is only possible without raising the hips. To balance the body weight, the arms must be supported without locking the elbows, and the feet must be supported with the toes curled. The small abdominal press provides a conscious core force that helps our body form a straight line. So you have to be constantly aware of the subtle nuances of this pose to achieve both mental and physical stability.
- Reduced Risk of Back Pain
Strengthening the core and back muscles in Plank Pose can contribute to reduced risk of lower back pain.
- Better Metabolism
Engaging multiple muscle groups simultaneously in Plank Pose can boost metabolism and support weight management efforts.
Conclusion
The Plank Pose requires consistent practice to experience its full benefits. It’s a challenging pose that targets multiple muscle groups, including the core, arms and legs, making it a great total body workout.
It’s perfectly normal to start with just a few seconds in the pose, and it’s important to listen to your body and not push yourself too hard at first. By gradually increasing the duration of the Plank Pose over time, you can build strength and endurance.
With dedication and patience, you will likely find that Phalakasana becomes more accessible and comfortable, and you will reap the benefits of improved strength and stability in your practice and daily life.


