Restorative Yoga is different from other yoga styles as it is quite gentle and focuses on releasing tension from the body and mind. You stay in a pose for longer than 5 minutes and go on up to 30 minutes at a time.
The poses practiced in this yoga style releases anti-stress and anti-anxiety hormones that will slow your heart rate and breathing. This ensures that your body resets, gets rejuvenated, and refreshed.
The best part of this yoga style is that it can be performed by anyone anywhere. You can use a variety of props such as a chair, wall, straps, ropes, cushions, pillows, blocks, bolsters, blankets, books, eye masks, etc to support your pose.
Another distinguishing factor is that if you are suffering from a chronic illness or are recovering from an injury, practising restorative yoga is safe.
Keeping all of the above in mind, let us have a look at some of the poses that you can perform.
Before you begin!
You can use a yoga mat or a cushioned blanket to perform restorative yoga poses. In any of the reclining or lying down poses, you can also use an eye pillow or eye mask, as it helps some people with getting grounded and relaxed. Also, these poses should be practiced for a minimum of 5-7 minutes and if it helps, keep a timer next to you.
Restorative yoga is quite slow in movement between the poses so it doesn’t generate any internal heat hence it is advised that you keep an extra blanket beside you to cover yourself or wear an extra layer of clothing.
1. Child’s Pose – Calms the Mind
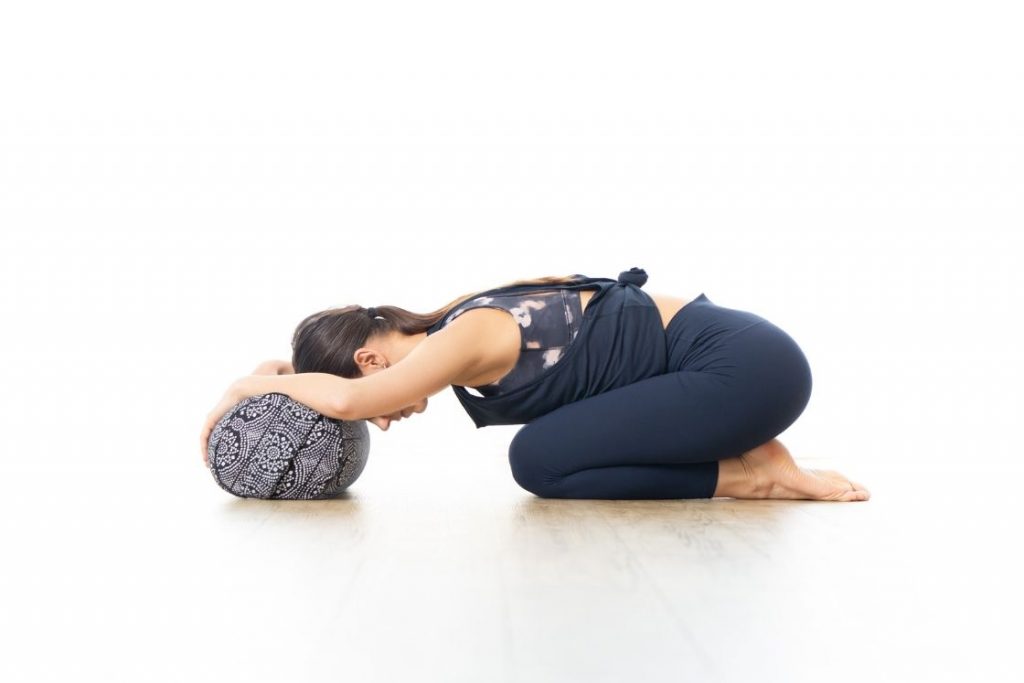
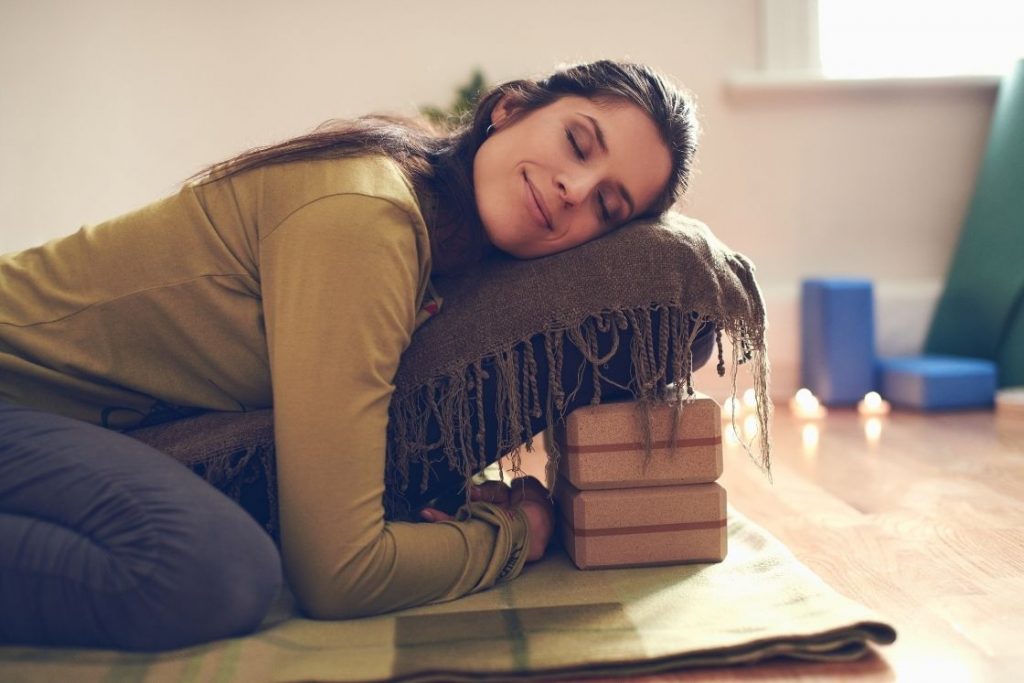
Child pose is often recommended for beginners as it creates a moment of rest in the body. In restorative yoga style, it’s performed with the support of props so it can release tension from the lower back and head. It provides a gentle stretch to the hamstrings, hips, thighs, and ankles.
Since you place the head above the heart, this pose increases the blood circulation towards the head. This helps in calming the brain and reducing stress.
It can be a bit challenging as one has to bend forward over the knees and compress the stomach. However, if you use props, it can become extremely relaxing.
How to Do it?
- On a yoga mat, sit on your knees. Your big toes should be touching and be seated in the heels. Spread your knees hip-width apart.
- Place a bolster or a stack of blankets between your inner thighs and fold forward to lay your torso on top of it. You can use a rolled towel, pillow, or folded blanket to keep under the back of the thighs for more support.
- Place your head on top of the bolster to keep it in line with the spine. If you have placed your cheeks, make sure that you keep changing the sides to avoid stiffness.
- If the bolster’s length is short, place a stack of blocks where you can rest your forehead. You can keep your hands beside you or stretch in front of you.
Maintain this pose for a minimum of 5 minutes or for as long as you like and keep taking deep breathes.
2. Reclining Bound Angle Pose – Aids in Weight Loss
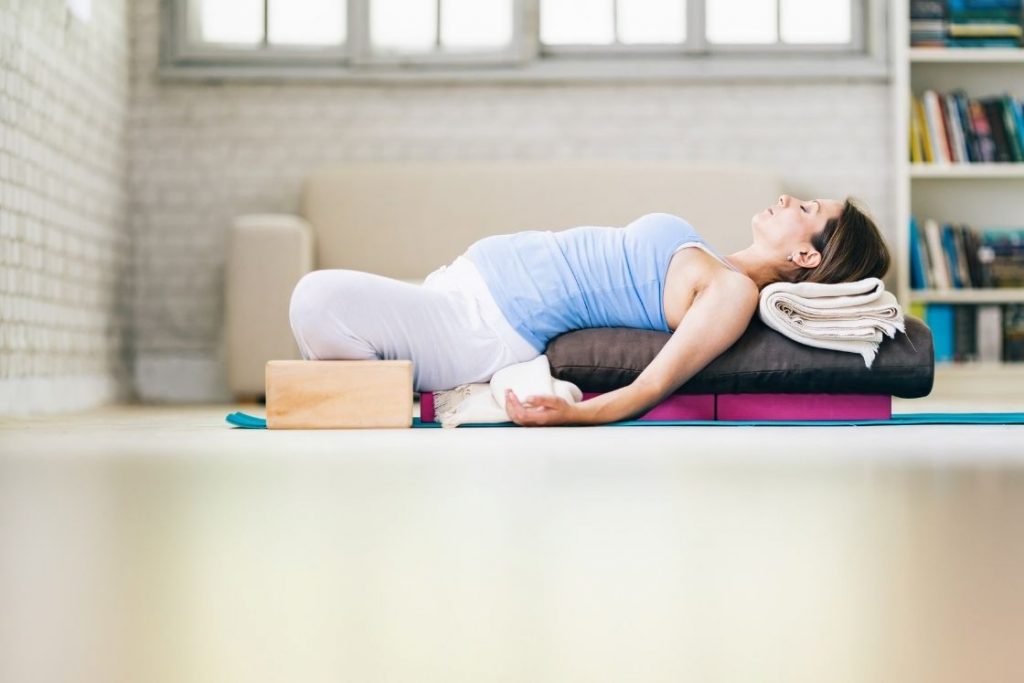
The Reclined Bound Angle is a good chest and hip opener restorative yoga pose. In this pose, you bend the knees and bring your feet close to your groin; it stimulates and stretches your groin, inner thighs, and knees. By releasing the tension in the hips, you are also reducing stress, anxiety, mild depression, as it is said that tension and stress get accumulated in the hips.
Some may find the stretch too extreme. They can use props such as folded blankets, blocks, cushions to support your head, thighs, and knees.
How to Do it?
- Lie down on your yoga mat with a folded blanket under your head, with the fold supporting the neck. For a more elevated torso, you can place a bolster lengthwise on two blocks. Adjust the blocks in a way that gives a reclining position and lie down on the bolster.
- Bend your knees on the sides and bring your feet together at the soles. Over here, you can place blocks under each knee, cushions under the thighs, and a folded blanket under your hips.
- Keep your hands at your sides with palms up or on top of your chest. To enhance the opening of the chest, you can place a pillow or folded blanket under your chest.
Hold this pose for 10 minutes or for as long you want.
3. Supported Fish Pose – Boosts Immune System
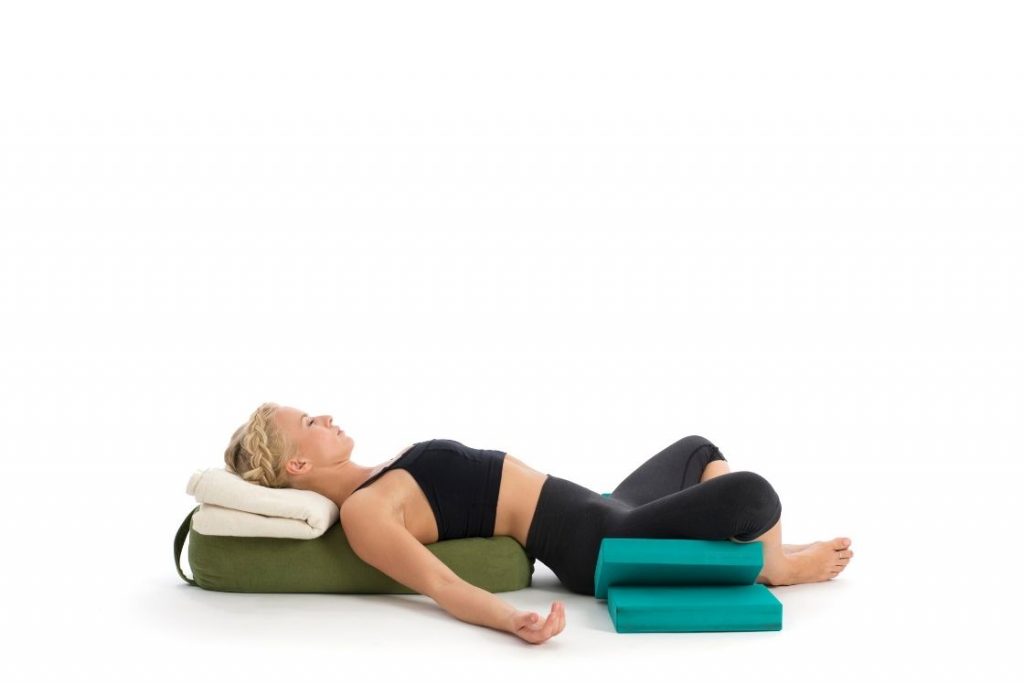
Another chest opener, the fish pose is a wonderful way to open your heart and lungs. It is one of the best restorative poses for people who have desk jobs or stay hunched over their desks. It gives you a gentle backbend which also improves the function of the nervous system.
With such benefits, it aids in the betterment of the immune system as well. You can easily transition to this pose from the Reclined Bound Angle Pose.
How to Do it?
- Place a bolster lengthwise, a stack of folded blankets or pillows. Lie down such that your head and upper chest are supported by the props.
- You can also add a blanket under your hips. Place more folded blankets or blocks to support your shoulders blades.
- Keep your legs together and stretch them straight or with a slight bend on the knees.
- Your hands can be placed beside your body, on top of your chest, or bent at the elbows with palms up.
- If you are someone who is comfortable with weights, place sandbags on your pelvis, abdomen, and/or thighs.
Stay in this pose for at least 10 minutes or as long as you want and focus on your breathing.
4. Supported Bridge Pose – Lowers Blood Pressure
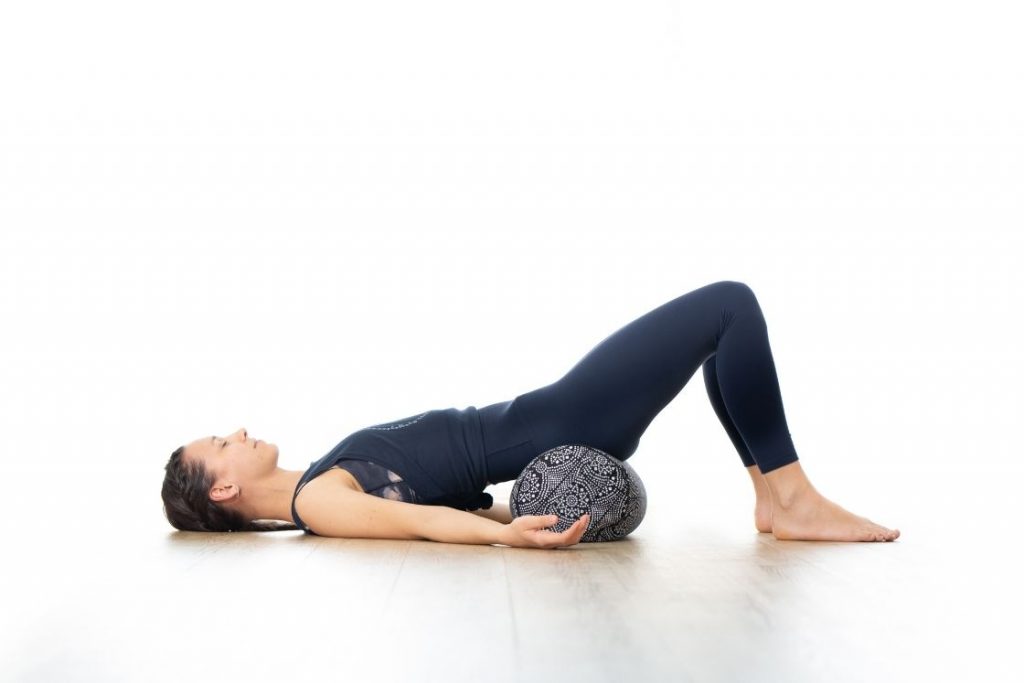
The Bridge Pose is one of those poses that activates the Parasympathetic Nervous System (PNS). The PNS is responsible for our body’s “rest and digest” mode where it helps our organs resume their routine activities after a traumatic or emotional episode.
Through supported bridge pose, you can expand your front and stretch your hip flexors. It helps improve blood circulation, lowers blood pressure, and reduces stress and tension. You can easily perform this pose soon after the supported Fish Pose.
How to Do it?
- Lie completely on your back and spread your legs hip-width apart. Bend your knees so that your lower legs are perpendicular to the floor and are feet are firmly placed on the mat.
- With help of your hamstrings and core muscles, lift your hips off the floor. Place a prop of your choice such as one or two folded blankets, bolster, a stack of books, block, cushions, or pillows under your sacrum. The prop should ideally be supporting your lower back and tailbone.
- Additionally, you can also place a rolled blanket under your head.
If you feel that you are unable to hold your legs, you can bind them lightly with a strap on the thighs.
Keep your hands spread on your sides or in the cactus position with palms facing up.
Hold this position for 5-10 minutes or as long as you feel comfortable.
5. Legs-up-the-wall Pose – For Pregnant Women
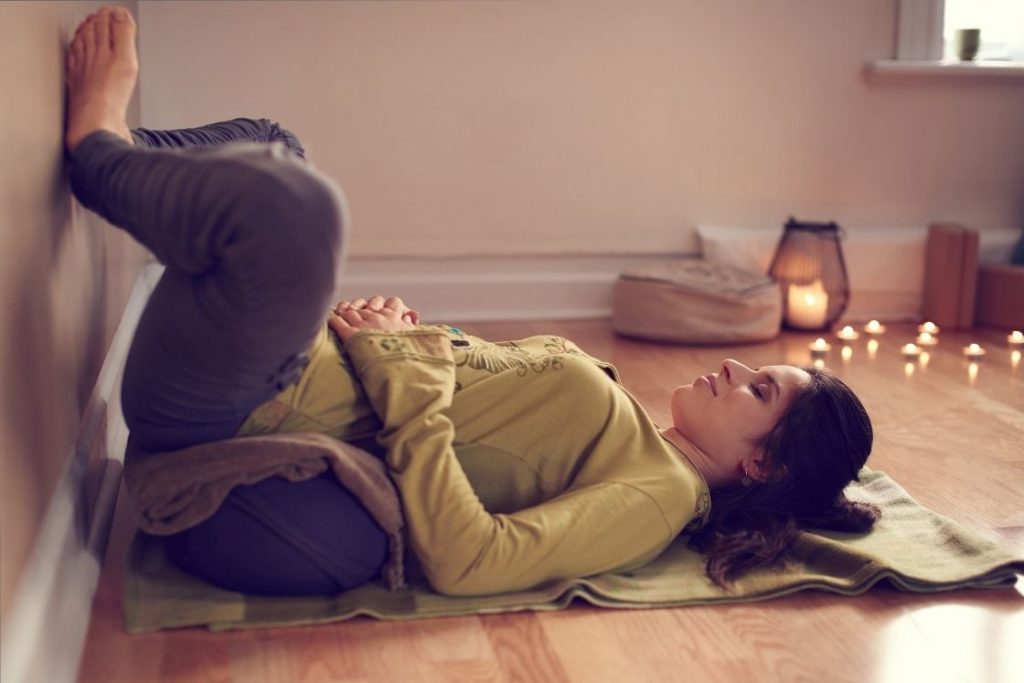
If you want a pose that gives your feet and legs some relief, this is one of those poses. By putting your legs higher than your heart, you are reversing your energy flow and blood circulation. It also ensures that your entire body is getting reenergized with this flow.
This pose is also beneficial if you are feeling jet-lagged or fatigued.
Since most yoga poses need to be avoided by pregnant women due to obvious reasons, this pose can be easily performed. It helps in reducing swelling in your feet and ankles and water retention in your body, which occurs in the majority of pregnant ladies.
How to Do it?
- Place the shorter end of the yoga mat close to the wall. Keep a wide surfaced bolster, cushion, pillow, or folded blanket to support your hips.
- On the opposite end of the mat, place a folded blanket or pillow for your head.
- Lie on the left or the right side of the props in a fetal position. Roll back on the props and straighten your legs upwards to rest on the wall. You may have to scoot to adjust your position as per your comfort.
- If you are heavily pregnant or experience discomfort while lying completely on your back, place a stack of blankets, cushions, or pillows behind your upper back to elevate at an angle. Make use of as many props as you can to get comfortable.
- You can also use a chair to place your legs instead of the wall.
- Spread your hands to the side with your fingers spread, place them straight beside you or on top of your belly.
You can hold this position for as long as you want but make sure to hold it for at least 5 minutes.
To come out of this pose, bend your knees and gently roll on your side to come back to the fetal position.
6. Savasana – The Ultimate Relaxing Pose
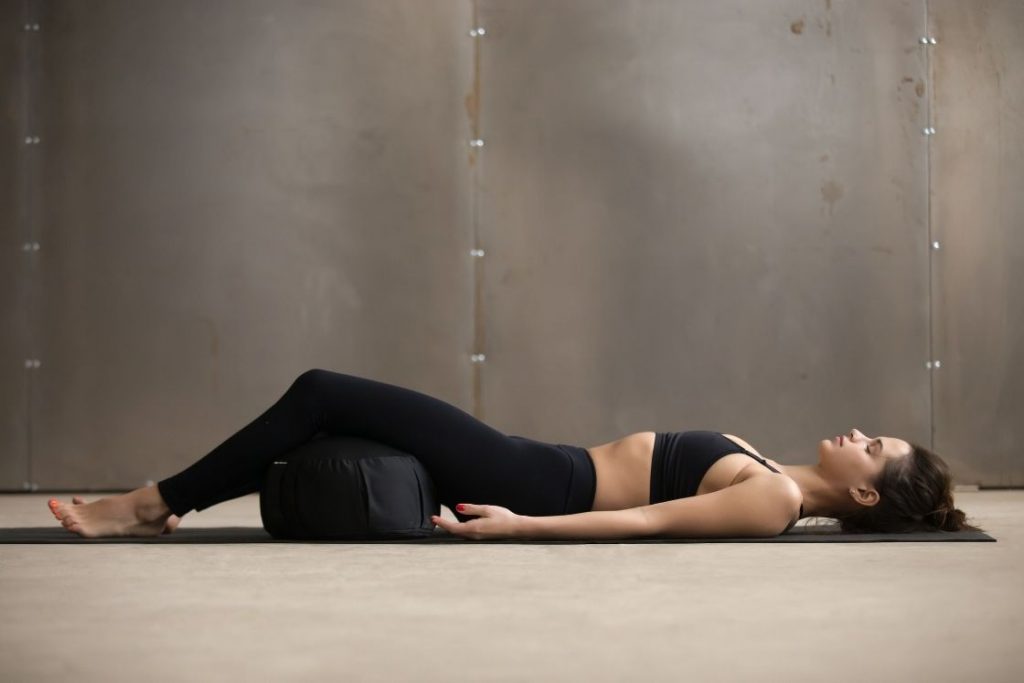
Even without props, the corpse pose is beneficial in a number of ways. Though it is generally performed at the end of the session, it can also be done when taking a rest during transitioning from poses.
It can also be termed as an all-rounder pose as it helps in reducing stress, anxiety, and tension calms the mind, relaxed the body, improves the quality of sleep, lowers blood pressure, enhances the flow of prana, etc.
How to Do it?
Lie down on your back with your legs stretched out. Use a pillow or a cushion under your head, a bolster or folded blanket under your knees and ankles to keep your legs in a straight line.
Spread your arms beside you and surrender your weight on the props. Place a pillow or bolster under your thighs if you have back pain.
You can also place sandbags on your chest, abdomen, pelvis, thighs, and lower legs if you feel comfortable. Here you can use a blanket to cover yourself to further induce relaxation.
Lie completely still for at least 5-10 minutes and focus on your breathing.
Conclusion
The above sequence can be therapeutic, grounding, calming and an overall treat for your body and mind. It will rejuvenate your body by focusing on improving your psychological and physiological functions. With a fresh mind and energized body, you will be able to take on any challenges life throws at you with ease.

