Bikram yoga style is one of the famous yoga styles all over the world, founded by an Indian yogi Bikram Chaudhary in 1970. As poses in Bikram yoga is performed in hot studios, it has a unique way of affecting physical and mental health.
Bikram yoga style has 26 series of yoga poses & two pranayama breathing. These poses and breathing techniques are performed in studios having a temperature of 41°C with 40% humidity in 90 minutes class. Yoga poses involved in Bikram’s practice has various health benefits.
Below is the list of 26 poses of Bikram yoga, which you can even perform at home by following the easy steps.
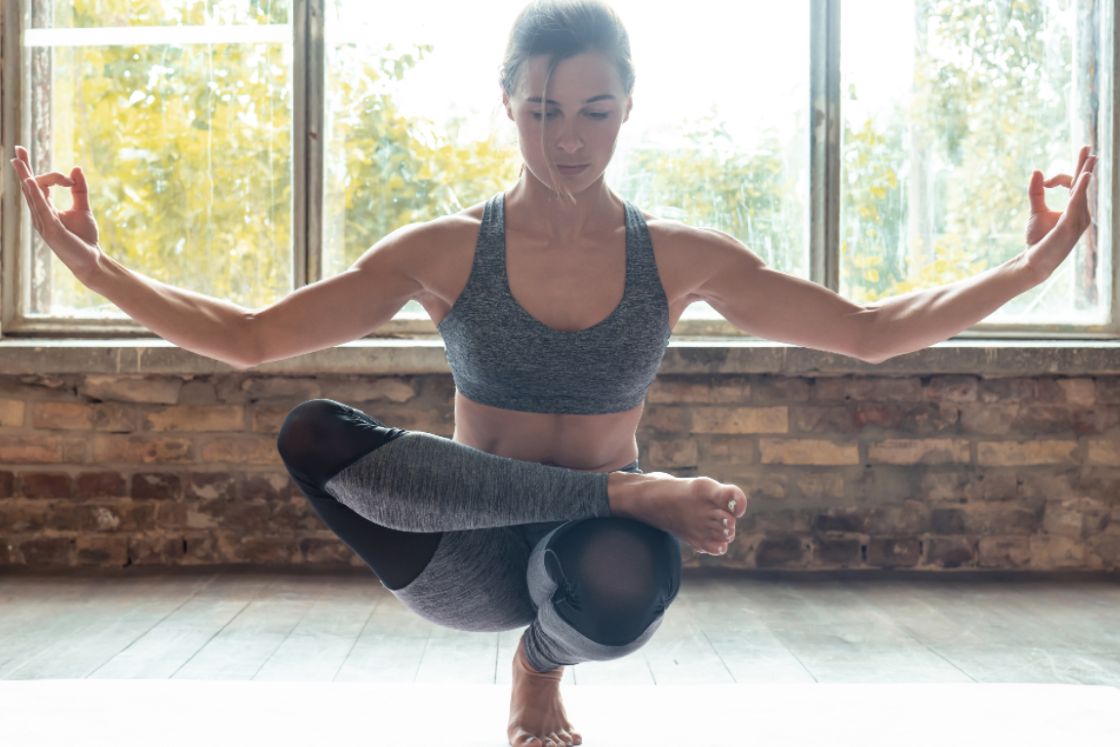
1. Standing deep breathing (Pranayama)
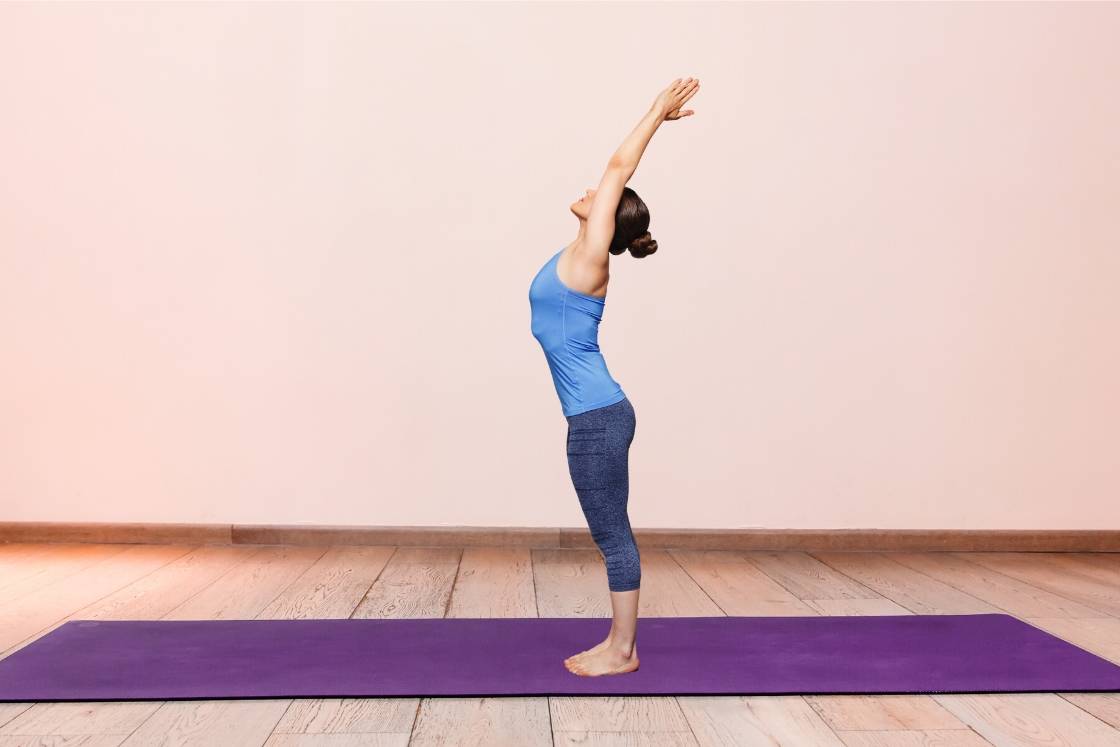
Bikram’s yoga session begins with basic pranayama breathing. However, It is to be performed in a standing position. Inhalation and exhalation should be focused in order to supply adequate oxygen for the muscles. This Breathing prepared a practitioner for the practice of further yoga poses.
How to do Standing deep breathing?
By following the steps below, one can perform this breathing –
- First of all, come into a standing position. Your back should be straight and feet together.
- Interlock your fingers and bring knuckles into the ceiling of the chin.
- Relax your shoulder and elbows down.
- Now, inhale through your nostrils. Stretch the elbow up. Open your chest and lengthen the spine.
- Keep lengthening the spine and open your chest.
- Exhale through the mouth wide open. Tilt your head back slightly. Suck the stomach in and squeeze the air out.
- Drop the shoulder and down your elbows. Relax your body in standing position.
Benefits of standing deep breathing
Standing deep breathing comes with numerous health benefits. Some of them are as follows –
- As this breathing is performed at the beginning of the class, it provides the required oxygen, nutrients across the body. Therefore, this helps in maintaining the pace of yoga practice.
- Alleviates & prevents various respiratory-related disorders ex, Asthma, Breathlessness, etc.
- Increase the blood circulation to the brain, which promotes better functioning and concentration.
- Deep breathing oxygenates the blood reaching to all of the body muscles. This improves the efficacy of all the following postures.
2. Half-moon pose (Ardha Chandra asana with Padahastasana)
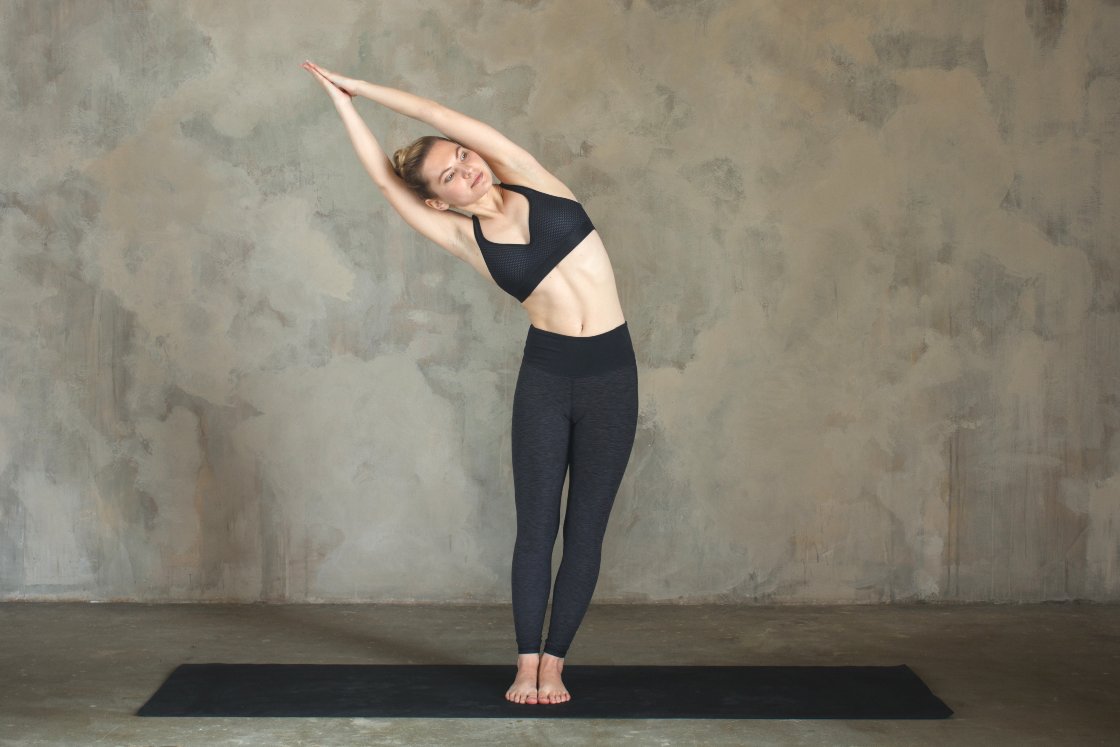
‘Ardha’ means ‘half’, ‘Chandra’ means ‘moon’ & ‘asana’ means ‘pose’. This pose symbolizes the moon, which also symbolizes one of the subtle energy (Ida) channels of the body. Practitioner experiences brilliancy in the face and lightness in the body after performing this pose.
How to Do Half-moon Pose?
By following the steps below, one can perform this half-moon pose with hand to feet pose –
- Come into the standing position. Raise your hands and lock your fingers.
- Bend towards the right side. Keep your elbow and straight.
- Return to the middle and then bend again towards the right side.
- Return again in the middle and prepare yourself for the forward bending (Padahastasana).
- Deep inhale and exhale through the nostrils. Now, bend forward.
- Try to touch your head to the shin bone and both the elbows behind the calf.
- Slowly come back into the normal position and relax your body.
Read More: Another variation of Half-moon pose.
Benefits of half moon pose with hand to feet pose
A combination of two yoga poses enhanced the benefits of this yoga practice. Some benefits are as follows –
- Bending promotes the flexibility of the middle and upper body part.
- It strengthens the muscles if the core, calves, and thighs, etc.
- Side bending improves the function of kidneys and the digestive system.
- Bending massages the nerves of the spinal cord, which improves the nervous system functioning.
- Half Moon with hand to feet pose and carve the waistline, hips, abdomen, buttocks, and thighs. This gives the body a better shape.
3. Awkward pose (Utkatasana)
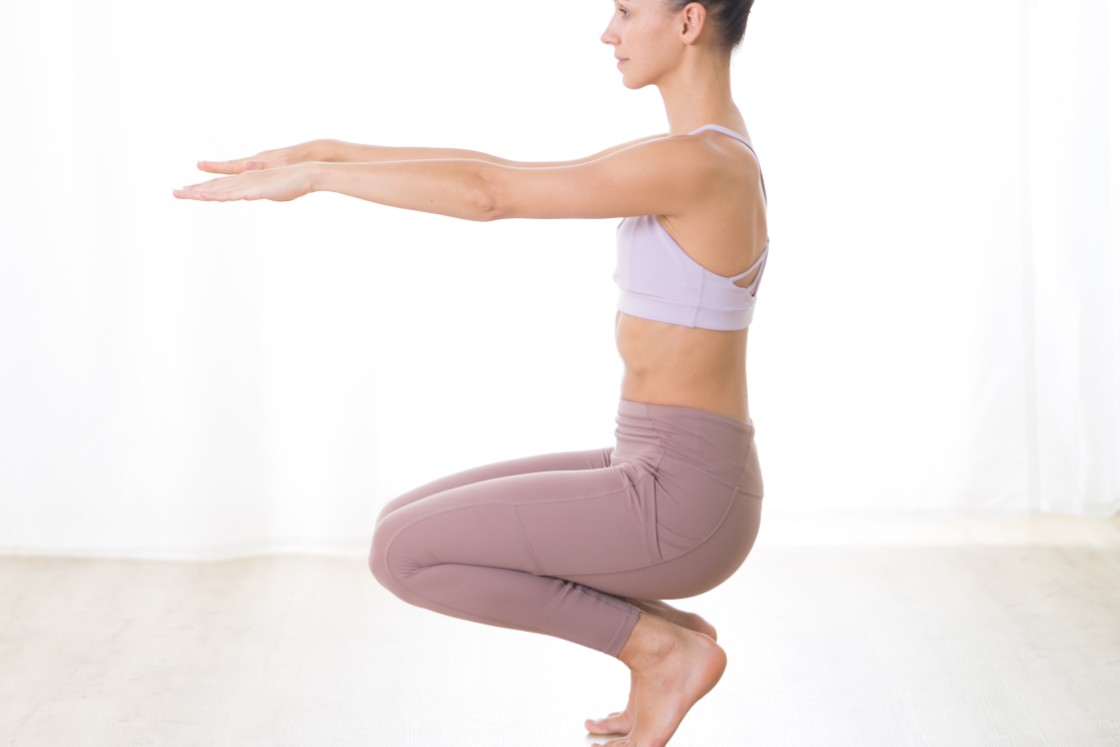
‘Utkata’ means ‘intense or fierce’ and ‘asana’ means ‘pose’. Due to the resemblance of imaginary sitting on a chair, It is also called chair pose. Balancing in this pose needs an immense strength in quadriceps. Therefore, this approach makes the lower body strong and active.
How to Do Awkward pose?
By following the below steps, one can easily find a balance in Awkward pose –
- Stand straight and keep your feet apart up to the distance of arms.
- Now, inhale and exhale to come down and slightly bend your knees.
- Imagine as you are sitting on a chair. Arms should be straight and lengthen.
- Squeeze your thighs together. Weight should be balanced on the heels.
- Hold the position as your capability. Breathing should be normal during the course of the practice.
- Slowly return to the normal standing position. relax your body.
Benefits of Awkward pose
Utkatasan has powerful benefits to the lower body. Some of them are as follows –
- Holding in utkatasana strengthens the thighs, feet and abdominal area.
- Tilting lower back to find different ease stretches hips, spine and chest muscles.
- Breathing during this asana stimulates the function of the heart and Diaphragm.
4. Eagle Pose (Garudasana)
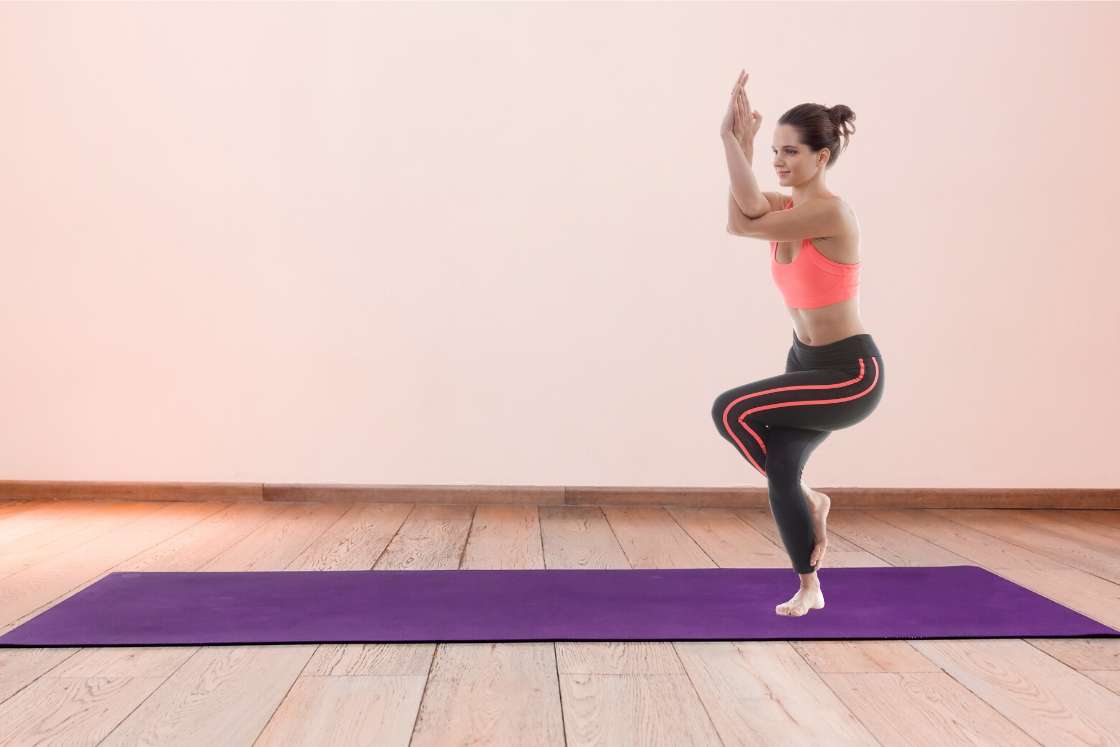
In Hindu tradition, garuda or eagle represents the mythical (king of birds) creature. Also used as the vehicle of god Vishnu (the preserver of the universe). In this pose, the body needs to be twisted in order to achieve completeness.
How to Do Eagle pose?
By following the below steps, one can perform the eagle pose with ease and balancing –
- First of all, come into the standing position.
- Transfer your body weight on the left foot and cross your right thigh over the left.
- Now, wrapped up the right leg around the calf of the left foot.
- Straighten up both the arms in front of you. Parallel to the floor.
- Lift up the elbows to the hight of the shoulder. Shoulder lies just down below the ears.
- Hold the pose as long as possible and maintain the balance while breathing normally.
- Gradually return back to the normal position and relax.
Benefits of eagle pose
Twisting up the body has its own benefits in the long run. Some of them are as follows –
- This enhances the function of CNS and improves lymphatic system functions.
- It is the only pose with the ability to open 14 largest joints in the skeletal muscles.
- Eagle pose improves the blood circulation to the reproductive system, which betters its function. However, it also decreases the chances of sexual disorders.
5. Standing head to knee pose (Dandayaman Janushirsasana)
Dandayama janushirshasana is a Sanskrit name. It can be translated as ‘Danda’ means ‘stick or staff’; ‘Yamana’ means ‘balancing’; ‘Janu’ means ‘knee’; ‘shirsa’ means ‘head’ and ‘asana’ means ‘pose or posture’.
Due to the involvement of all the major muscles, this pose requires strength, flexibility, and concentration as well. It is beneficial in working on the important parts of the body.
How to Do Standing head to knee pose?
By following the below steps, one can get a good grip over this pose –
- Start by putting your body weight on your left leg followed by the interlocking of fingers.
- Now, bend forward at the waist. Lift your right leg.
- Try to place the sole of the right foot on the interlocked fingers. Ideally, fingers should be 3 to 4 inches below the tip of the foot.
- Slowly try to straighten the right leg, By remaining in the pose. Do not strain your body in this step. It could result in serious injury.
- Straight up your back, neck, and legs (not the right foot).
- Gradually return to the normal position. Relax your body.
Benefits of standing head to knee pose
- It stretches and improves the flexibility of your hamstring.
- This also improves the function of the reproductive and digestive systems.
- Strengthening of tendons, arms muscle (triceps & biceps), shoulder’s muscles (trapezius, deltoid), etc
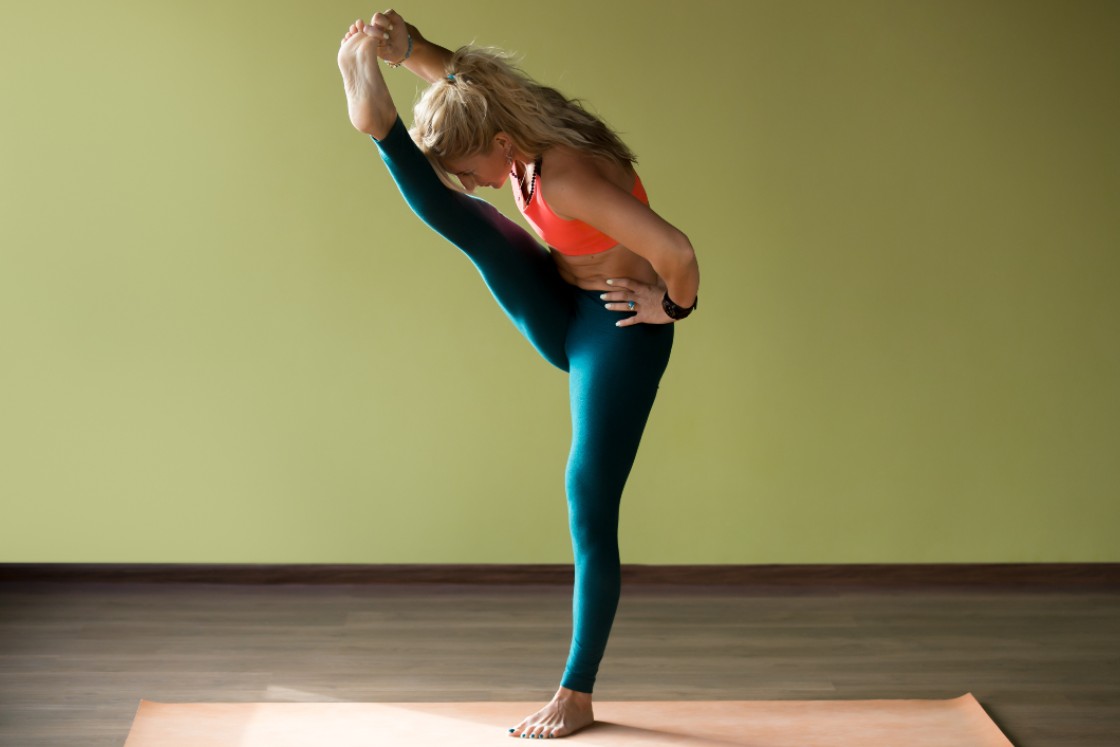
6. Standing bow pose ( Dandayama dhanurasana)
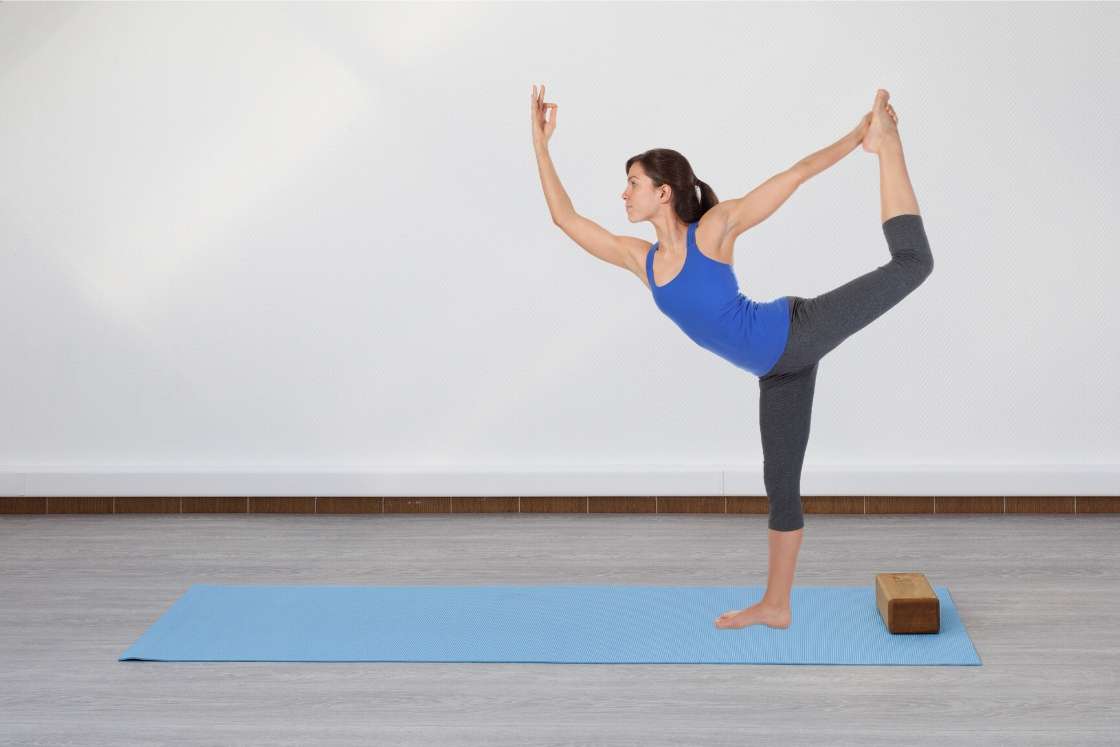
This pose is the blending of standing, stretching and back bending. This resembles the stretched bow in the hands of an archer in appearance. It has various benefits.
How to do Standing bow pose?
- First of all, Come into the standing position.
- Lift your one of the legs from the backside with a hand.
- Stretch the other arm up in the air with the palm facing in the forward direction.
- Slowly try to extend your lifted leg and let your torso move slightly forward while doing so.
- Try to keep your hip and foot in line. do not lose the balance here.
- The more your leg extends, the more your torso comes forward to find the balance in between.
- Slowly return to the normal position. Relax your body.
Benefits of standing bow pose
- This increases the strength in legs and hands. However, it also improves hip movability.
- Complete pose demands ample focus and concentration. So, it harnesses the mind and body coordination.
- According to Bikram, It is the only pose that equalizes the blood flow on both sides of the body.
7. Balancing stick pose (Tuladandasana)
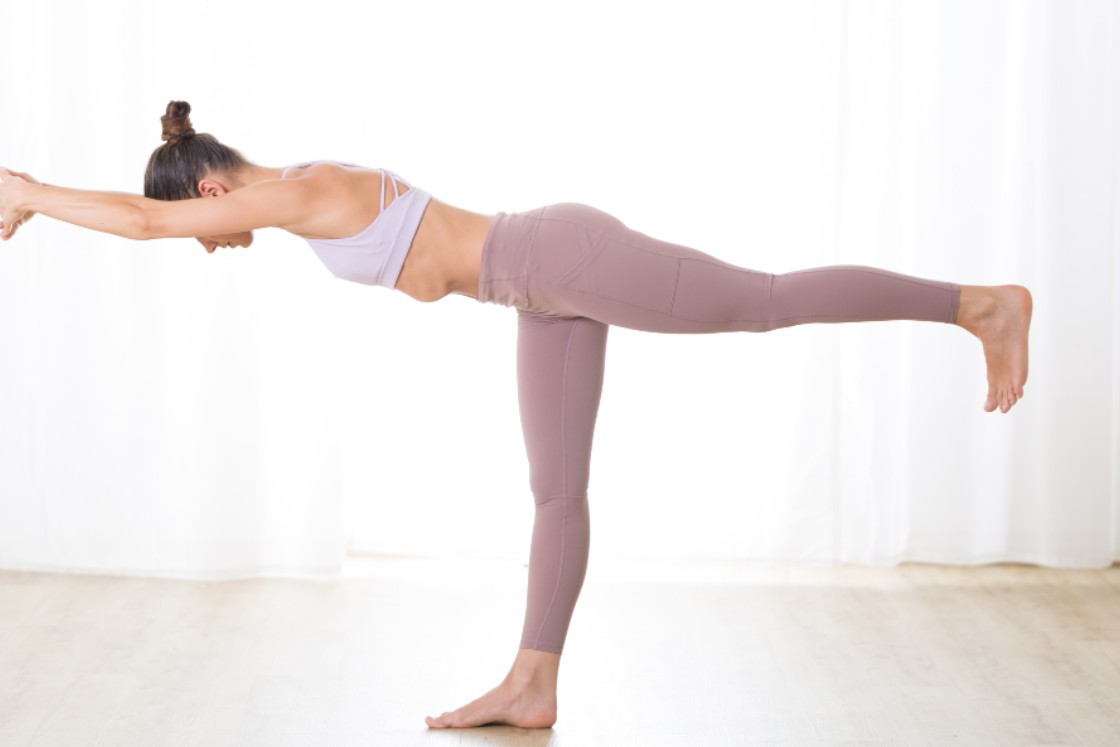
‘Tula’ means ‘balance’; ‘danda’ means ‘staff’ or ‘stick’. This is an advanced, dynamic pose of the Bikram yoga series. This pose gives a full spine stretch and lengthening of the thoracic area. It is also good for the heart.
How to do Balancing stick pose?
- First of all, come into the standing position on your mat.
- Raise your hand and clasp the fingers into each other, leaving index finger-pointing forward.
- Now, slowly lift off your left foot. Try to maintain the balance with the right while doing this.
- Lift your left foot until it becomes straight & makes a line with the spine.
- Distribute the weight properly by spreading the fingers of the foot. Both Knees should be locked.
- Arms must be pressed against the ear and gaze should be down and forward.
- Maintain the posture as long as you feel comfortable. Slowly return back to the standing position & relax your body.
Benefits of Balancing stick pose
- Balancing stick pose increases the blood circulation to the heart muscles, capillaries. Therefore, this promotes cardiovascular health.
- This pose improves the coordination between the brain and the rest of the body. Ultimately, improve coordination.
- It strengthens the musculoskeletal system of the body and massages the internal organs.
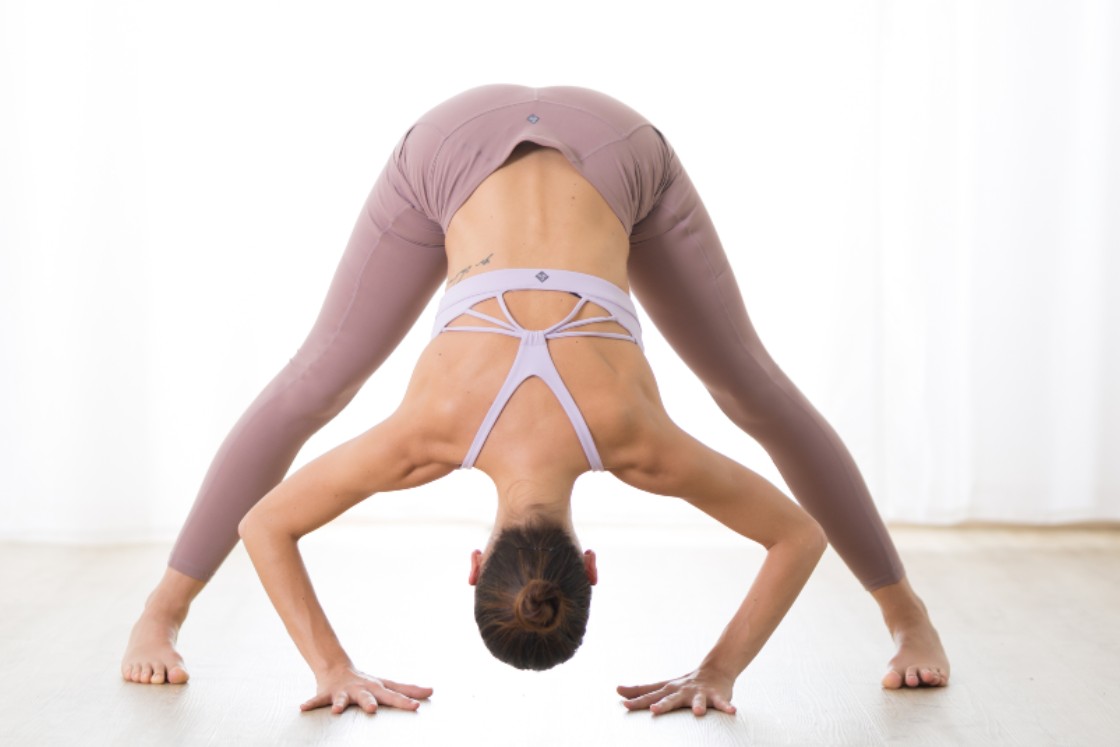
8. Standing separate leg stretching (Dandayamana Bibhaktapada Paschimottanasana)
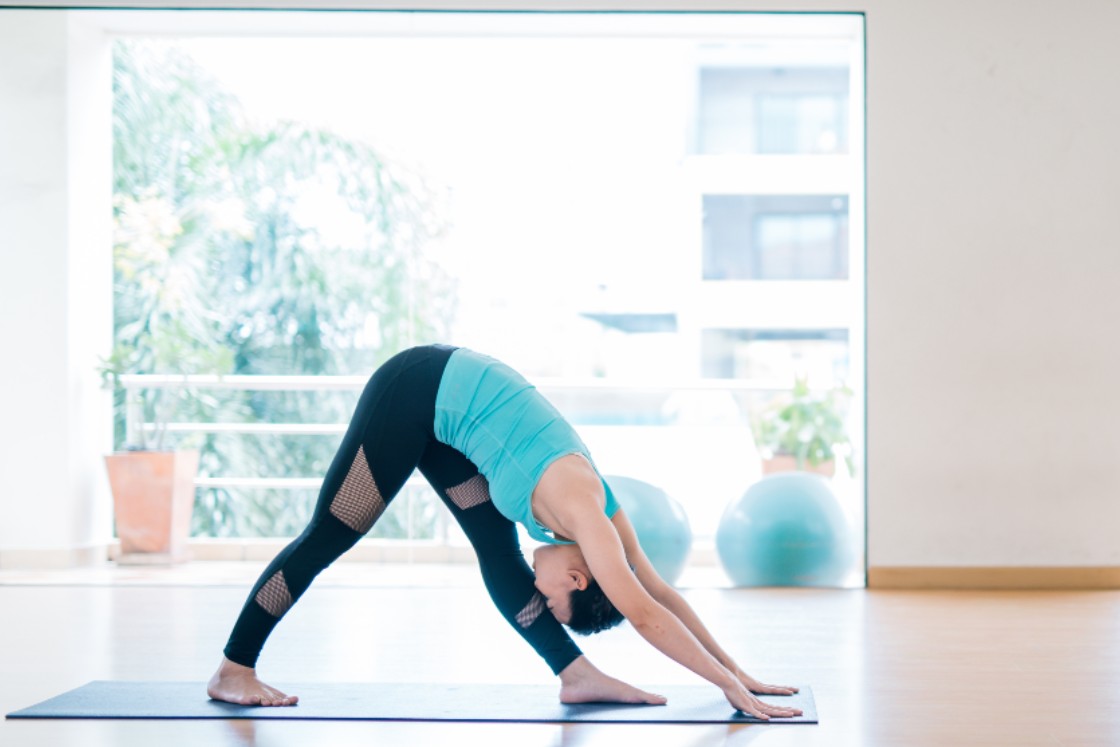
Dandayamana bibhaktapada Paschimattanasana is a standard basic pose. It comes at eighth in the Bikram’s yoga style. It involved the inversion of the torso while the stretching up of the legs.
How to do Standing separate leg stretching?
- Come into a standing position on your mat.
- Take any of the foot away from the other. Keep a distance of around 3 feet between the legs.
- Now, stretch your arms on their respective side.
- Bend forward at the waist to come down between the legs.
- Reach your hand to the feet and clasp the ankles by both the hands.
- Try to stretch the back by gripping the ankles. Do not put extra pressure.
- Straight your spine and lengthen up the thoracic area. Hold here the pose for few seconds.
- Slowly return to the normal position.
Benefits of Standing separate leg stretching pose
- Inversion of the posture makes the circulation to rushes the blood to the head region, which promotes better functioning.
- Cure various spine-related problems such as sciatica, lower back pain and twisted back, etc.
- Blood circulation to the endocrine glands stimulates them to produce the respective hormonal secretion.
9. Triangle pose (Trikonasana)
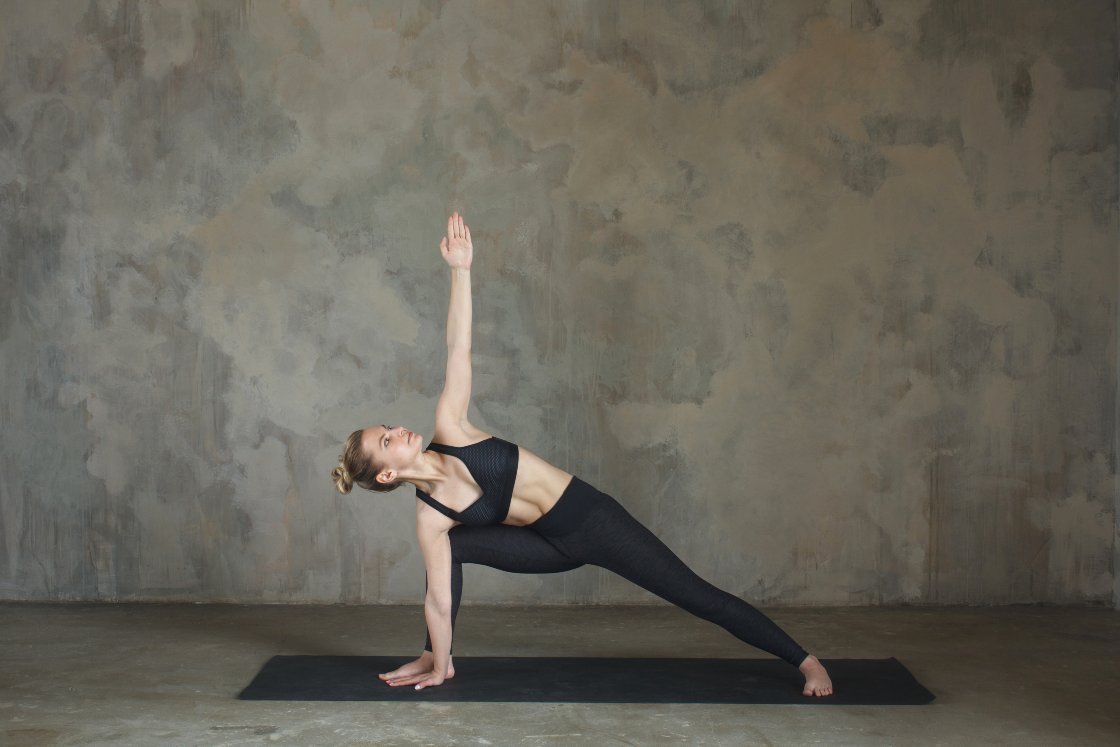
Trikonasana is the Sanskrit name. ‘Trikon’ means ‘three corners or triangle’ and ‘asana’ means ‘pose or posture’. It is also used synonymously as utthita trikonasana. This comes ninth position in Bikram’s yoga style. It is good practice for strength and flexibility.
How to do Triangle pose?
- First of all, stand straight on your mat.
- Separate your feet wider at a distance of 3 to 4 feet.
- Now, turn your right foot to the 90*and another one at 15*. Your right foot and the heel of the left foot should be aligned straight.
- Bodyweight should be equally distributed on both of the feet.
- Bend your body downward in the right at the hips. Try to keep the spine straight without straining.
- Place your right hand on the floor near the right foot. Ankle and shin can be considered at the beginning level.
- Make sure that your body is in sideways and not in the forward or backward directions.
- Hold here while spreading your chest and pelvis area. Slowly return back to the normal position and relaxation.
Read More: Who Shouldn’t Do Trikonasana
Benefits of trikonasana
- It helps in fighting with psychological problems such as stress, anxiety, etc.
- It strengthens the joints of the lower body and improves the flexibility of the pelvic area.
- Enhances the function of the digestive system. It also relief from the sciatic nerve and disc problems of the spine.
10. Standing Separate Leg Stretching Pose (Dandayamana Bibhaktapada Janushirasana)
This pose is on the tenth position in the list of Bikram’s 26 yoga poses. Standing separate-leg head-to-knee pose involves folding while standing. However, this has various mental and physical benefits.
How to do Standing Separate Leg Stretching Pose?
- Deep inhale and exhale and feet together. Raise your arms in the air.
- Stand straight and turn your right foot at the 90 after which step your right foot (3 to 4 ft) apart in the forward direction.
- Turn your left foot at the 45 * to maintain balance at the hip level.
- Tuck your chin into your chest and bend down at hips until your forehead touches your right knee.
- Beginners can bend left knee to touches knee with forehead. However, avoid straining in the hamstring.
- If you need the support then you can place hands on the floor.
- Use your core, thigh, and base of the foot to give pose firm stability.
- Hold the posture as long as you feel comfortable. However, come to normal position & relax.
Read More: Variations of Standing Separate Leg Stretching Pose
Benefits of Standing Separate-Leg Head-to-Knee Pose
- This pose is found to be beneficial for diabetes patients.
- Forward bending helps in the massaging of the abdominal organs, which stimulates and promotes their better functioning.
- It promotes flexibility of hamstring, pelvis and improves the strength of quadriceps muscles.
11. Tree pose (Tadasana)
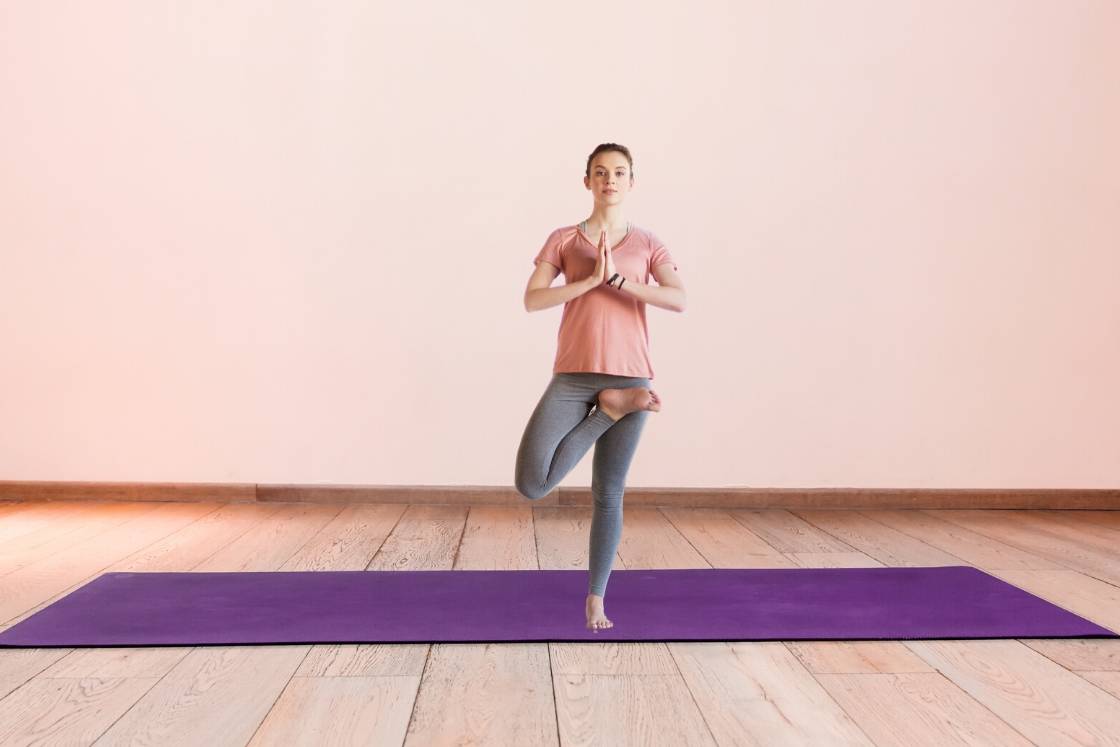
In hatha yoga, tadasana represents the mountain pose. However, the Bikram style of yoga gives it the name of the tree pose. Both the physical postures are almost similar in the context. This is of the best stretching exercise for the entire torso.
How to do Tree pose?
- First of all, come into the standing posture & relax your body.
- Now, find any specific point to gaze upon, which further provides the necessary concentration regarding the posture.
- Lift the right foot to place it on the upper side of the left thigh. Sole of the right foot should be facing the ceiling side.
- Ascertain, your ribs are drawn in, straighten the spine, tighten buttocks & tailbone is lengthening down.
- Activate quadriceps muscles, left foot base and lock left knee to stabilize the posture.
- By maintaining the posture, join both hands right in front of the chest.
- Hold and stay in the posture as long as it makes you uncomfortable.
- Slowly bring down the right foot and return to the normal position. Relax your body.
Read More: Variations of Tree Pose
Benefits of tree pose
- Tree pose is helpful in curing and preventing hernia. However, it also relaxes the abdominal muscles.
- This increases flexibility and enhances the mobility of hips, knee, ankle, etc.
- Tree pose gives strength to the calves, quadriceps and internal oblique.
12. Toe Stand Pose (Padangustasana)
Padangustasana is derived from the Sanskrit language. ‘Pada’ means ‘foot’, ‘angushtha’ means ‘thumb or toe’, and ‘asana’ means ‘pose’ or posture. Toe stand pose comes in 12th position. This pose improves the mobility of the ankle and strengthens the foot.
How to do Toe Stand Pose?
- First of all, come into the tree pose and keep breathing.
- Slowly tilt forward at the hips while keeping the left leg straight.
- Distribute the whole of the body weight evenly on the left foot. Spread up the fingers of the standing foot to get more area for the support.
- Come down to the floor by using hands. Maintain balance here.
- Now, find a point or sign to gaze upon. This will provide the necessary concentration to keep the pose balanced.
- Gradually walk hands back by hips, raise your chest and straighten up your spine.
- Stabilize your weight on your heels and toes. Join your hand in the namaskar mudra.
- Hold the posture as long as you are comfortable. Slowly return back to tree pose and then simple standing pose. Relax your body.
Benefits of Toe stand pose
- Provide relief from arthritis and also helps in its prevention.
- Build focus and concentration. Therefore, helps in leading well balanced & focused life.
- Strengthen up the joints, ligaments, and muscles of the feet. However, it also helps in rheumatism and gout disease.
13. Corpse Pose (Savasana)
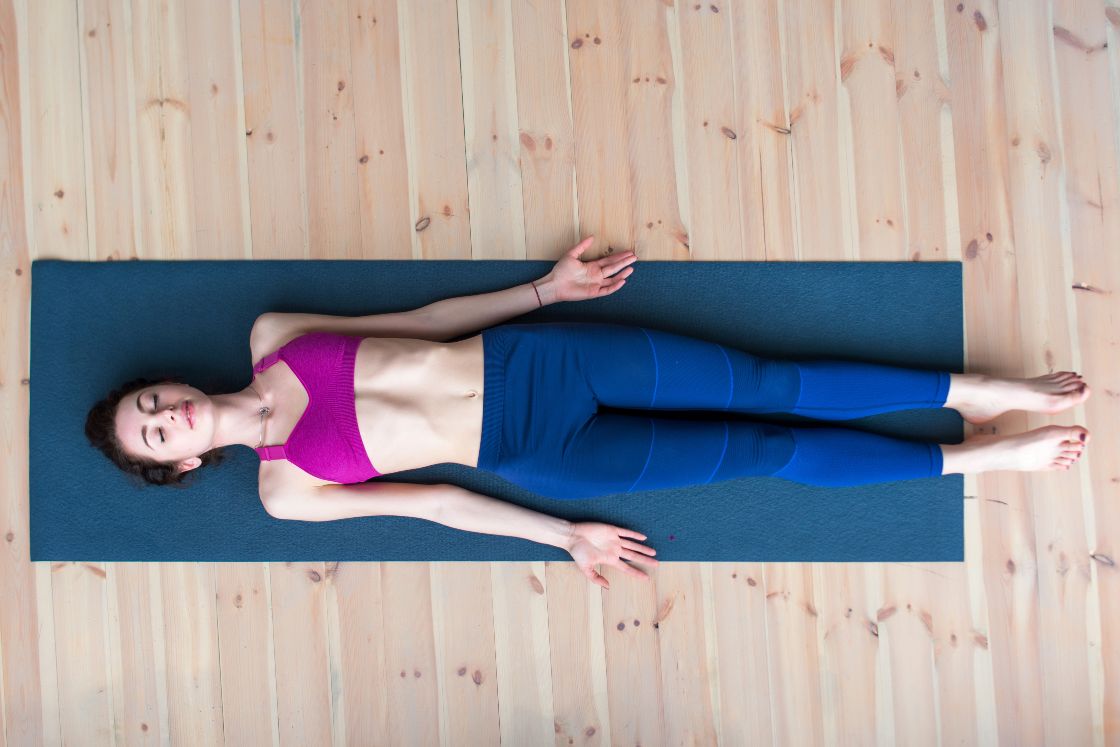
Savasana is derived from the Sanskrit language. The ‘Sava’ means ‘corpse’ and ‘asana’ means ‘pose or posture’. In this pose, a practitioner mimics the dead body. This is on the 13th position of the Bikram’s yoga style. It is one of the best relaxation poses.
How to do Corpse Pose?
- Begin stepping on the mat and lie back on it.
- Arms should be relaxed and free to lie along each side of the body. Your palms should be facing upside.
- Eyes should be open slightly and firmly looking at any specific point on the ceiling.
- Your shoulder should be relaxed and lie flat to release more tension.
- Breathe deep and long enough to relax each and muscles or part of the body.
- After performing this pose, slowly return to the sitting and then standing position.
Benefits of corpse pose
- Deep and long breathing circulates the oxygenated blood to each & every cell of the body. Therefore, nutrify them better.
- Relaxation during this pose helps in curing insomnia and induces sleep.
- It calms the overall hyper activeness of the body, which provides a soothing effect.
14. Wind-Removing Pose (Pavanamuktasana)
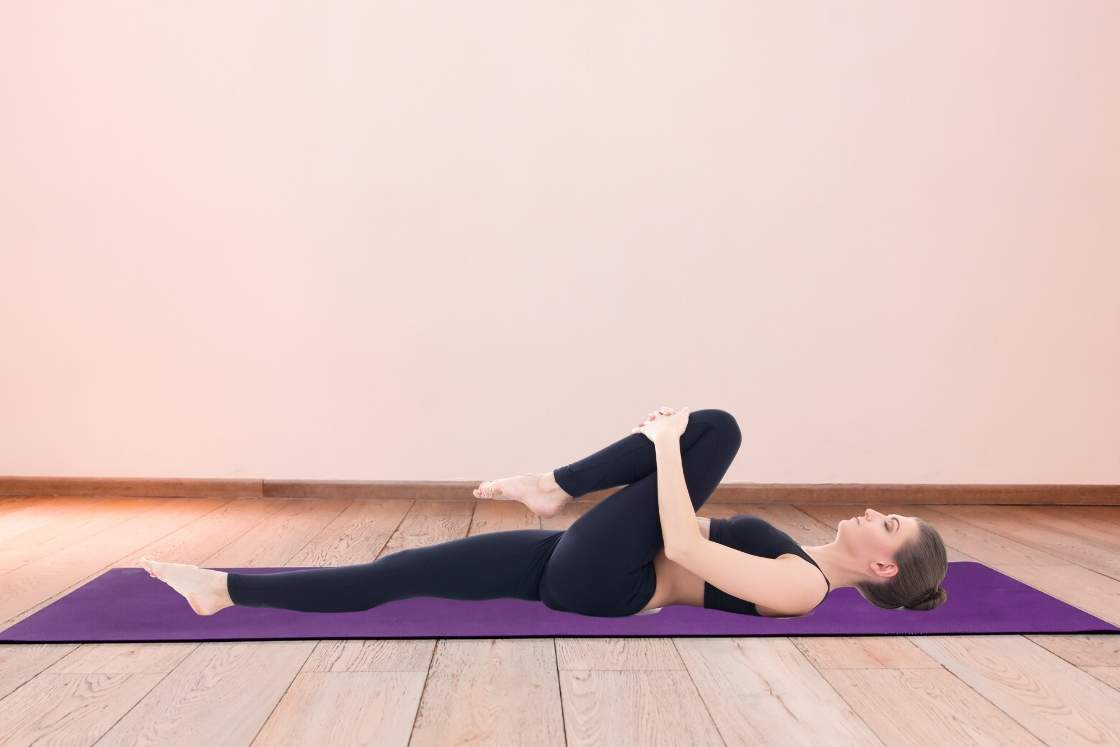
Pawanamuktasana is a Sanskrit term. ‘Pawan’ means wind, ‘Mukta’ means ‘free’ and ‘asana’ means ‘pose or seat’. This pose is beneficial in removing the gases from the body. However, It also helps the digestive organs to work better.
How to do Wind-Removing Pose?
- Firstly, lie your back flat on the mats and legs should be together and straight.
- Arms should be on each side of the body. Head, neck, and spine should be in a straight line.
- Now, interlocked the fingers and grab the right leg just below the knee or upper shin bone.
- Pull the knee to the chest and keep the elbows close to the body. The shoulder should be flat.
- Your left leg should lie flat & firm on the floor. Beginners can lift their calves to perform pose easily.
- Hold the pose here and let the pelvis to stretch fully. Repeat the pose with the other leg too.
- Slowly return to the normal position and relax your body.
Benefits of wind removing pose
- It improves the absorption capability of different parts of the large intestine (ascending, transverse & descending colon).
- However, It improves the flexibility to enhance the movability of the hip joint.
- This massages the digestive organs, kidneys, liver to better their functions. However, it also cures & prevents flatulence.
15. Sit up pose (Paschimotanasana)
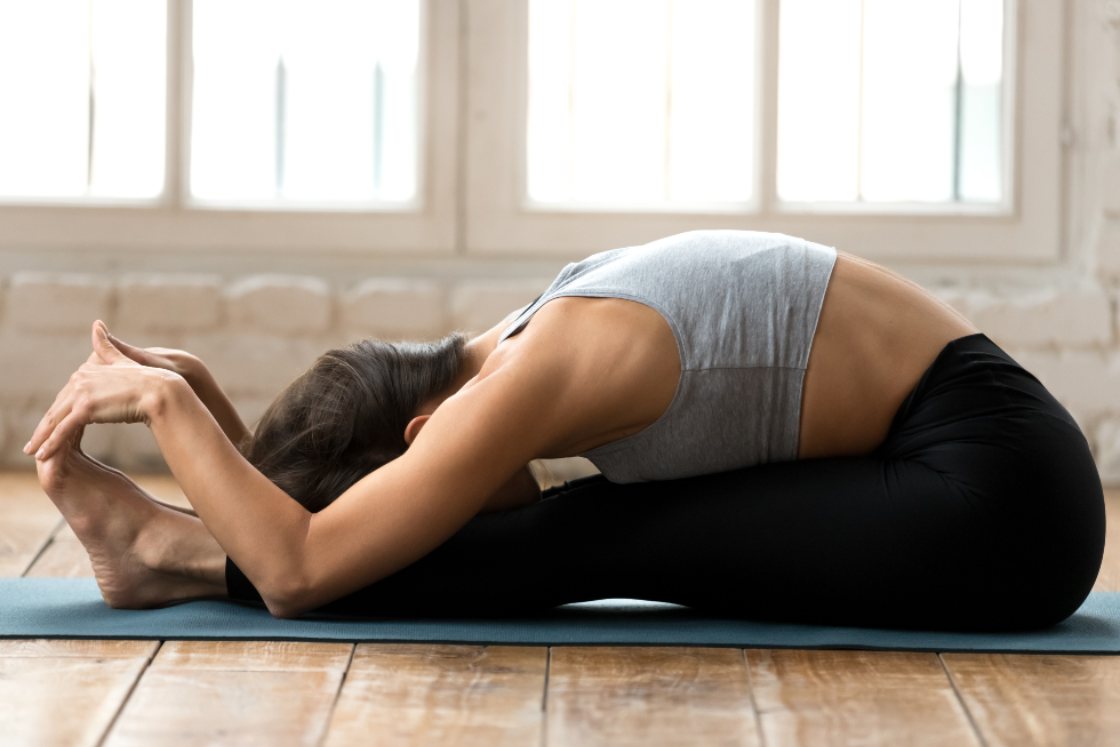
Sit up pose is the fifteenth pose of the Bikram yoga series. It is almost similar to the Paschimottasana pose of the hatha yoga. It is one of the excellent forward bendings poses with numerous health benefits.
How to do Sit up pose?
- First of all, come into the corpse pose. Begin to lift your body to sit flat o your mat.
- Flex your legs. Toes pointing the ceiling side and grab your toes with hands.
- Now, deep inhale and exhale to reach in the forward direction for toes.
- Bend knees in case of stiff hamstrings and lower back, when reaching for the toes.
- Try to keep the spine straight and hold the pose here, as long as you are comfortable.
- Slowly return to the sitting position and then to the corpse pose.
- After that, repeat the pose with the other leg. Relax your body.
Benefits of sit-up pose
- It improves the flexibility of hamstring, glutes and lower back muscles.
- Sit-ups pose put pressure on the thyroid gland which on stimulation enhances the body’s metabolism.
- This pose massages the abdominal organs including digestive, excretory and reproductive.
16. Cobra Pose (Bhujangasana)
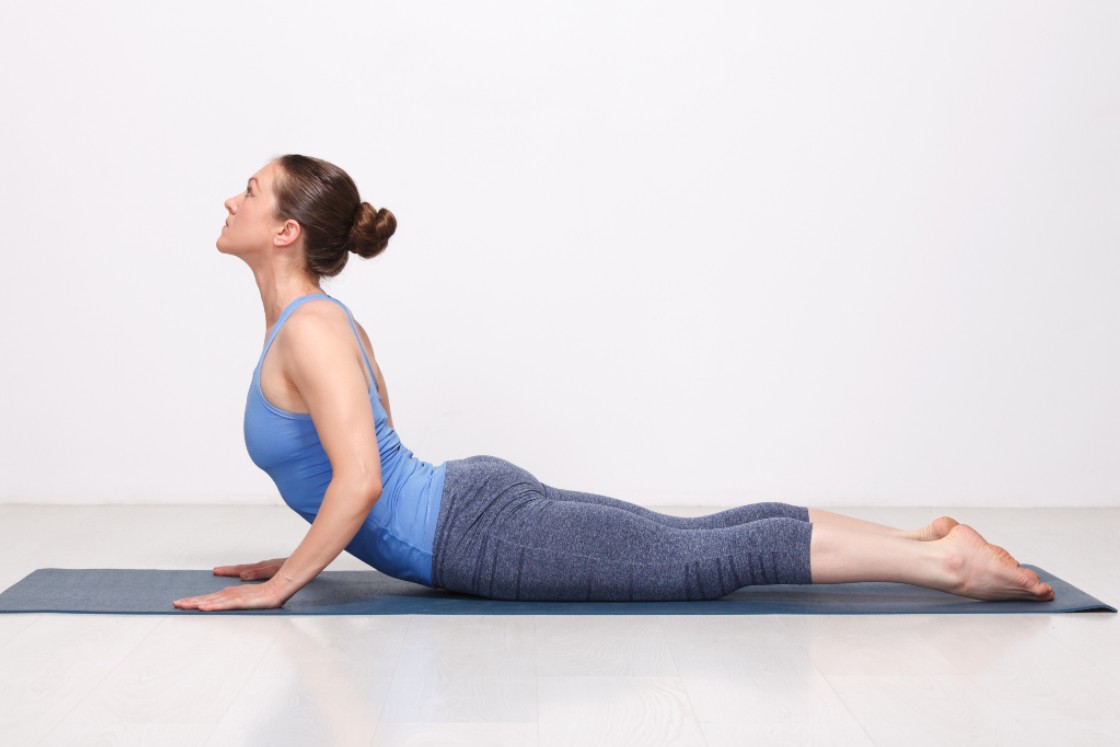
Bhujangasana is the sixteenth pose of the Bikram yoga style. ‘Bhujanga’ means ‘cobra’ and ‘asana’ means ‘pose’. This pose resembles the hood of the cobra with a raised torso of the practitioner performing it. This back-bending asana is beneficial in many ways.
How to do Cobra Pose?
- First of all, begin with lying in a prone position.
- Stretch your legs back and touch the upper side of the foot on the floor.
- Place your palms on the distance of the shoulders apart. Thighs and pubic areas touch firmly to the floor.
- Now, inhale and lift the chest off the floor. Lift until the connection through pubis to the leg is maintained.
- Lift up the navel and then pubis followed by the pressing of the tailbone.
- Try to gaze at the ceiling side and avoid weight-bearing by the hands.
- Hold the posture as long as you are capable of. Avoid overbending of the back.
- Slowly return back to the prone position. Relax your body.
Benefits of cobra pose
- This pose increases spine flexibility. However, it also helps to cure rheumatism, lumbago, etc.
- It enhances the functioning of the digestive system, spleen, liver, etc. It also cures loss of appetite.
- Cobra pose relieves menstrual-related problems such as cramps, irregularities, etc
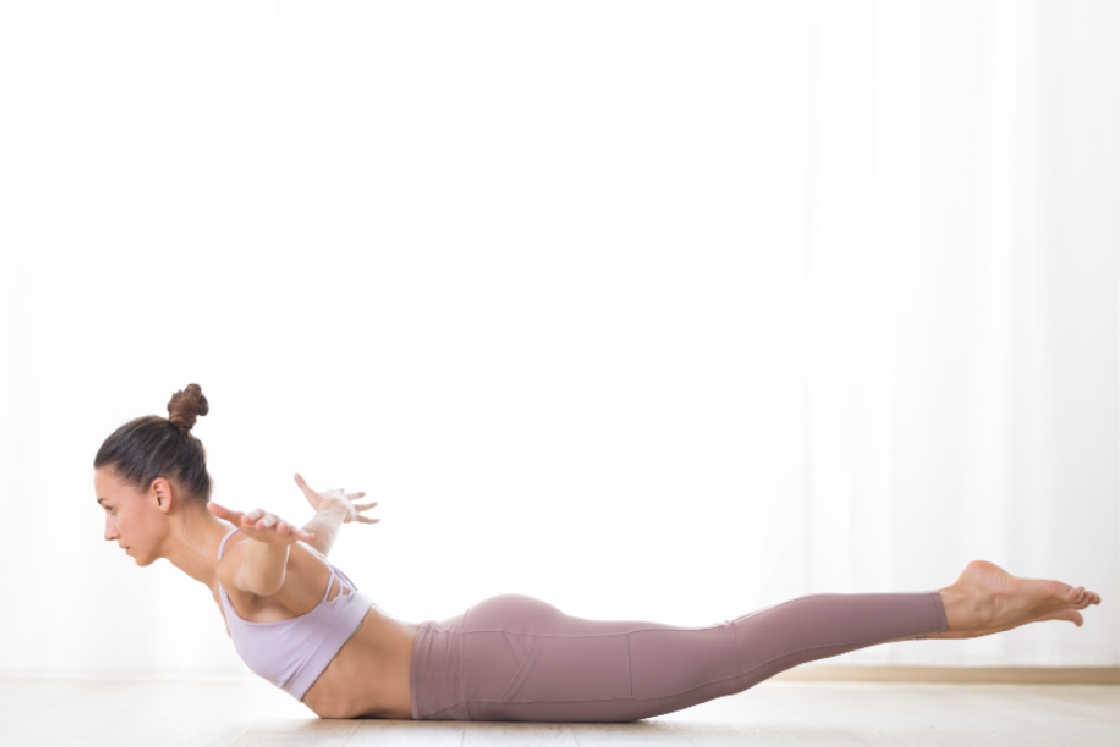
17. Locust Pose (Salabhasana)
Locust Pose is an intermediate level body pose that stretches the whole back and tones it. The word Salabhasana is a combination of two Sanskrit words, Salabha and Asana. ‘Salabha’ means ‘locust’ and ‘Asana’ means ‘Pose’. This asana increases the flexibility and strength of the entire back.
How to Do Locust Pose?
- Firstly, lay flat on your stomach and place your hands on the sides of your body.
- Now, bring your arm under your body. Bring your hands as close as possible and place your elbow pointing towards your abdomen, palm facing downwards.
- Spread the fingers apart, pointing towards feet. Then, place your forehead on the floor.
- Now, press the fingers and palm firmly to the floor and lift your both legs one by one, towards the ceiling.
- Bring the bodyweight to the torso and keep the leg straight and stretched.
- Now, close your eyes and hold this position as long as you can.
- When you are done, slowly bring your legs down, release your hands and relax.
Benefits of Locust Pose
- This pose stretches the muscle of the spine and strengthens it. Also, it increases the flexibility of the spine and keeps it healthy.
- It soothes the muscles of the whole back part of the body. It massages and strengthens the muscles of the entire back.
- This asana firms the muscles of hips and releases the stress stored at the hips.
- It gently stretches the muscles of the legs. Thus, it helps in strong and flexible legs.
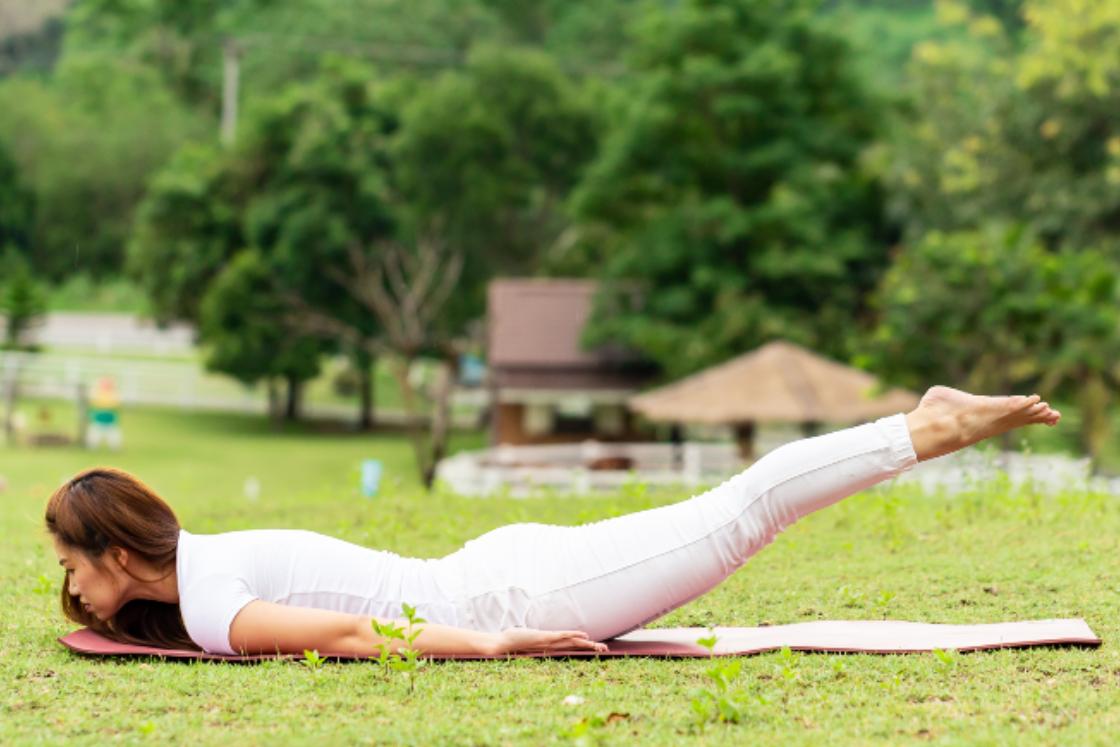
18. Full Locust Pose (Poorna Salabhasana)
‘Poorna’ means ‘full’, ‘shalabha’ means ‘locust or grasshopper’ and ‘asana’ means ‘pose or posture’. It comes at 18th in the Bikram’s yoga series. This pose has a tendency to stretch an entire body. Therefore, one of the best posture for optimum benefits.
How to do Full Locust Pose?
- First of all, lie down into the prone position.
- By aligning the chin inward. After that, stretch your both hands in a straight line with the shoulder.
- Your legs, knees, and feet should be together. Palms facing downward.
- Firm up your thighs, hips, calves and lower back muscle to provide the necessary strength on lifting.
- Now, deep exhale and then inhale to lift up your arms, legs, chest, head, and torso from the floor.
- Deep breathing helps in maintaining lift. However, the lifted gaze also aids in keeping the posture alive.
- Draw arms in the backward direction and develops a curve in your spine and back of the neck.
- Hold here as long as you are feeling comfortable. Slowly return back into the prone position and relax.
Benefits of full locust pose
- It strengthens the spine by improving its flexibility. However, it also cures various vertebrae problems such as cervical spondylosis, spinal stenosis, poor posture, etc.
- Full locust pose invigorates the muscles of thighs, hips, lower back, shoulder and upper arms, etc.
- It improves the functioning of internal organs. Also, it helps in widening the chest by harnessing the rib’s flexibility.
19. Floor Bow Pose (Dhanurasana)
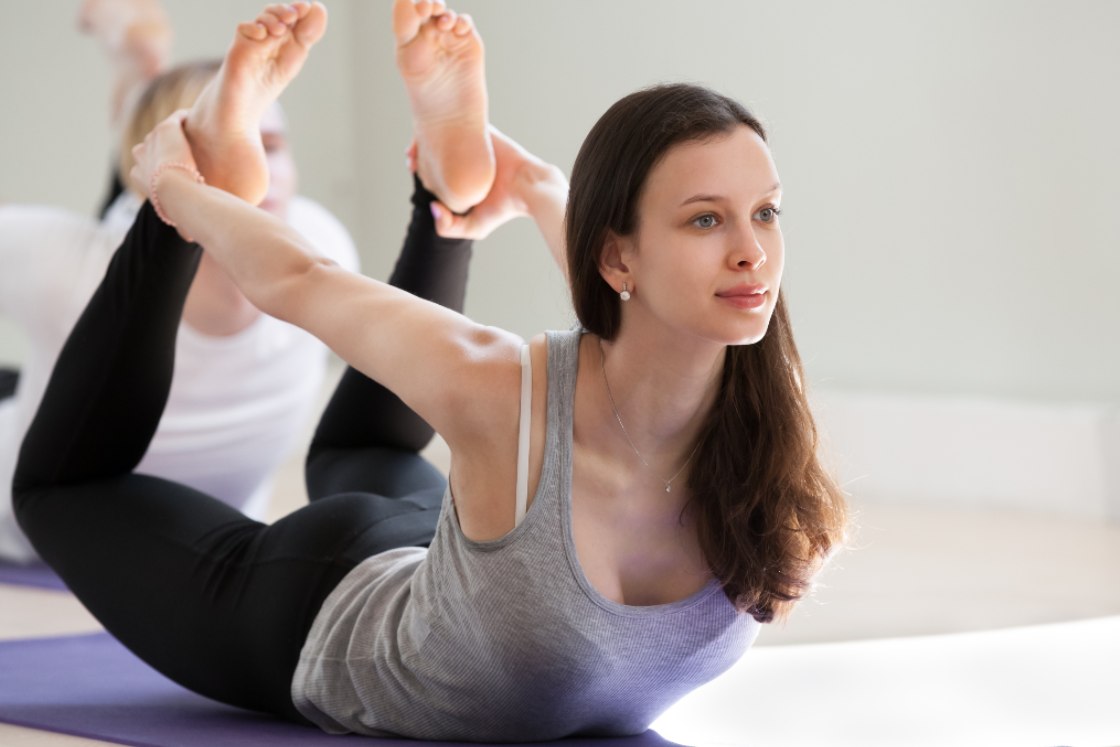
‘Dhanurasana’ is derived from the Sanskrit language. ‘Dhanur’ means ‘bow’ and ‘asana’ means ‘pose or seat’. It is one of the back-bending poses of hatha yoga. Bikram series has given this pose the nineteenth position.
How to do Floor Bow Pose?
- Begin with falling into the prone position.
- Now, bend your knees and try to grab the feet two inches below the ankle, with your hand.
- Your knees and feet should be together and near to the body.
- Hips and torso should be in a straight line and are not tilted to the either side.
- Use hips and pelvis to generate more power in order to get into the posture, before kicking legs up.
- Now, Inhale deeply and try to lift body from the floor by kicking up the leg.
- Release your shoulder free at the backside to lift the torso up.
- Balance the posture on your navel point and roll your body weight in forwarding direction.
- Hold the posture without straining the body. Gradually return back into the normal position and relax your body.
Read More: Traditional Method of Bow Pose
Benefits of Floor bow pose
- This posture provides the overall flexibility to the spine. This invigorates its surrounding muscles, which helps in maintaining the posture.
- Stretching of intercostal muscles expands the thoracic capacity. This ensures better lung capacity and oxygen-rich blood supply to the rest of the body.
- It massages the entire abdominal area. Ultimately, it improves the functioning of internal organs such as kidney, liver, spleen, digestive organs.
20. Fixed Firm Pose (Supta Vajrasana)
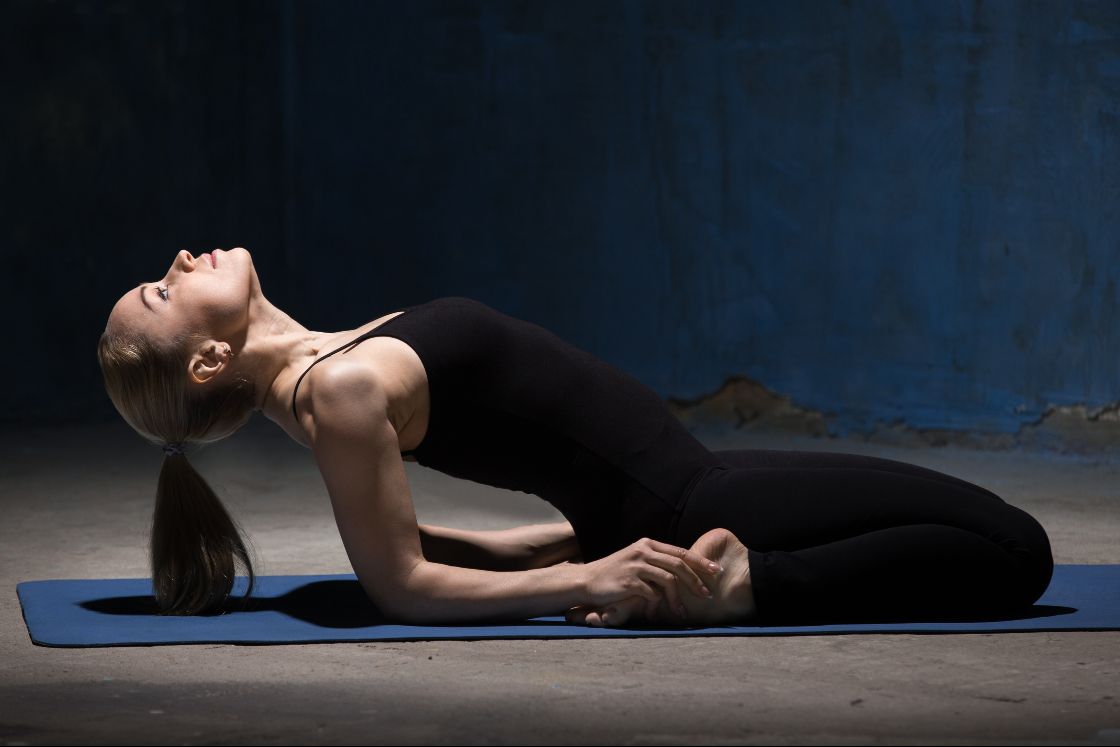
The name of the pose is derived from the Sanskrit language. ‘Supta’ means ‘sleeping’, ‘Vajra’ means ‘thunderbolt weapon’, and ‘asana’ means ‘seat or pose’. This is the moderate level supine pose, which has a beneficial impact on our body.
How to do Fixed Firm Pose?
- First of all, come into the vajrasana by bending your knees and sitting between the heels.
- Space between the knees can be considered as your ease with the posture.
- Now, place the hands-on sole of the feet. Fingers should be facing forward.
- Gradually, lower your back and touch one elbow at a time on the floor.
- Bring down your lower back by maintaining a curve in the spine. Drop the head backward.
- The whole of the spine should not be touched on the floor, except the upper portion. Chest lift up.
- Firm the shoulders, knees, and back of the head on the ground. Hands along each side flat on the ground.
- Chin should be tucked and knees groundes. Abdomen and thoracic area let stretched fully.
- Hold the posture for a few seconds and then increase the time. Avoid any kind of hurry in achieving mastery.
- slowly return into a vajrasana and relax your body.
Benefits of fixed firm pose
- This pose improves the circulation to the knee joints. This helps in maintaining synovial fluid, which further aids my joints problems such as gout, arthritis, rheumatism, etc.
- It stretches the entire torso and its internal organs. This gives the massaging effects and betters their functioning.
- Fixed firms pose tone up the various muscles of the body such as thigh, calves, hips and lower back, etc.
21. Half Tortoise Pose (Ardha Kurmasana)
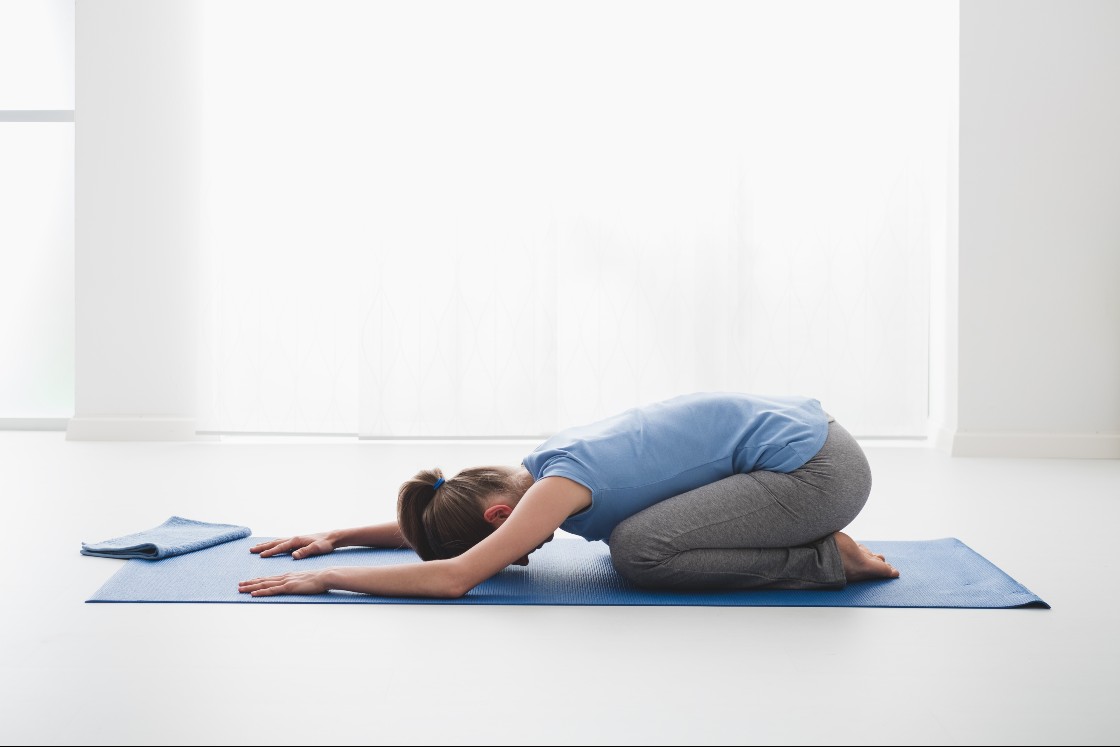
‘Ardha’ means ‘half’, ‘kurma’ means ‘tortoise’ and ‘asana’ means ‘seat or posture’. This is the restorative asana of Bikram’s yoga series. It ensures deep relaxation for the practitioner.
How to do Half Tortoise Pose?
- Begin with the kneeling position. Feet together and hips on the heels.
- Now, raise your arms and cross the thumbs.
- Inhale while stretching the spine and arms straight up in the air.
- Slowly bend forward and let your torso stretch until your forehead touches the floor.
- Straighten up the arm to avoid the contact of wrist, elbow and triceps muscles.
- Deepens your stretch by walking fingers forward. Let your abdomen and thoracic area stretch fully.
- Perform deep breathing while in the posture. Grasp the relaxation by maintaining the posture.
- Hold the posture as long as you are comfortable. Gradually return back to the normal position & relax.
Benefits of Half tortoise pose
- This posture affects the melatonin (a hormone responsible for the sleep-wake cycle) secretion, by stimulating the pituitary gland.
- It improves the blood circulation to the brain, which helps in focus and concentration.
- This pose tones thigh, deltoid latissimus dorsi muscles, and triceps. However, it also aids in digestive disorders.
22. Camel Pose (Ustrasana)
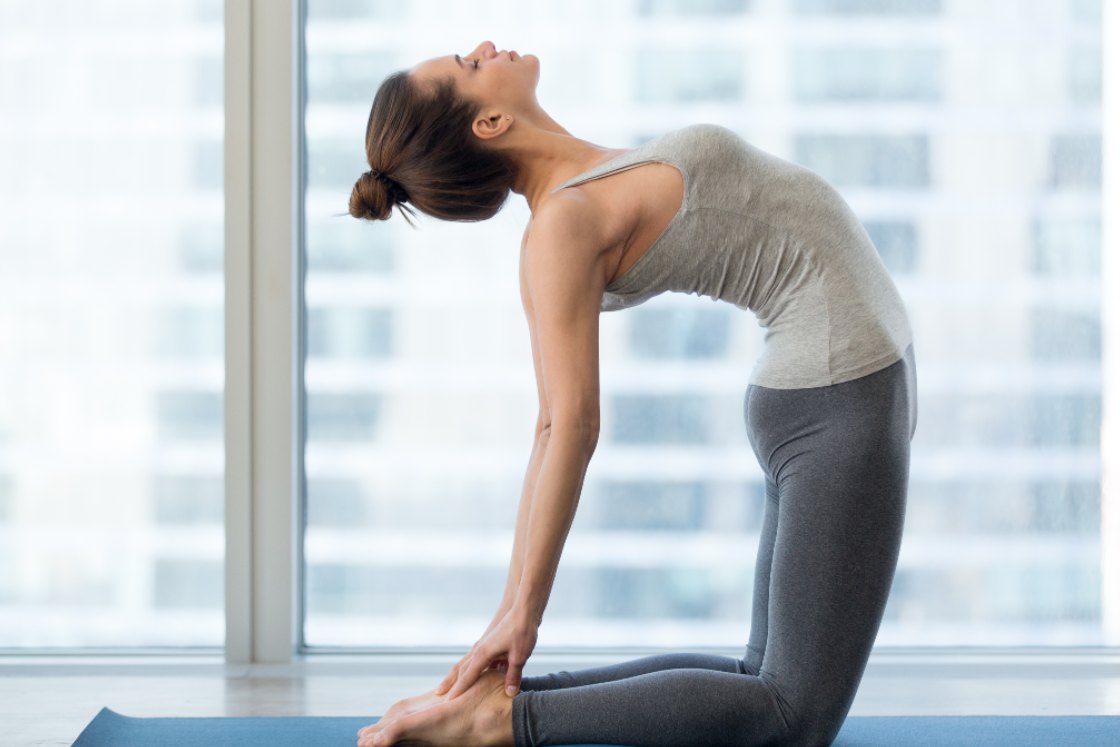
‘Ushtra’ means ‘camel’ and ‘asana’ means ‘seat or posture’. Camel pose is the kneeling back-bending pose. It comes on number 22 in the Bikram’s yoga. Performing this pose has a beneficial approach to our health.
How to do Camel Pose?
- Begin with the kneeling position. Keep a distance of 5 to 6 inches between the knees.
- Place your hands slightly above the hips to support your back from falling flat.
- Avoid swaying of the elbow to their respective sides.
- Now, inhale to lift the chest and exhale to drop down the head backward.
- Inhale again to support the back and exhale to arch the torso more backward.
- Bring down your right hand to grab the right heel and then left hand to grab the left heel.
- Adjust the placement of fingers on sole and thumb outside. However, this helps in pushing the hips forward direction.
- Keep harnessing the spinal curve by arching and lengthening the tailbone.
- Hold the pose as long as you feel comfortable. Slowly come back and Relax the body.
Read More: Traditional Method of Camel Pose
Benefits of camel pose
- It improves the GFR rate of the kidney and helps in flushes out the toxins.
- Lengthens the thoracic region and gives a deep stretch to the muscles concerning that area.
- Improve the flexibility of the spine and shoulders. However, it also stimulates the glands like pituitary, adrenal, thyroid, etc
23. Rabbit Pose (Sasangasana)
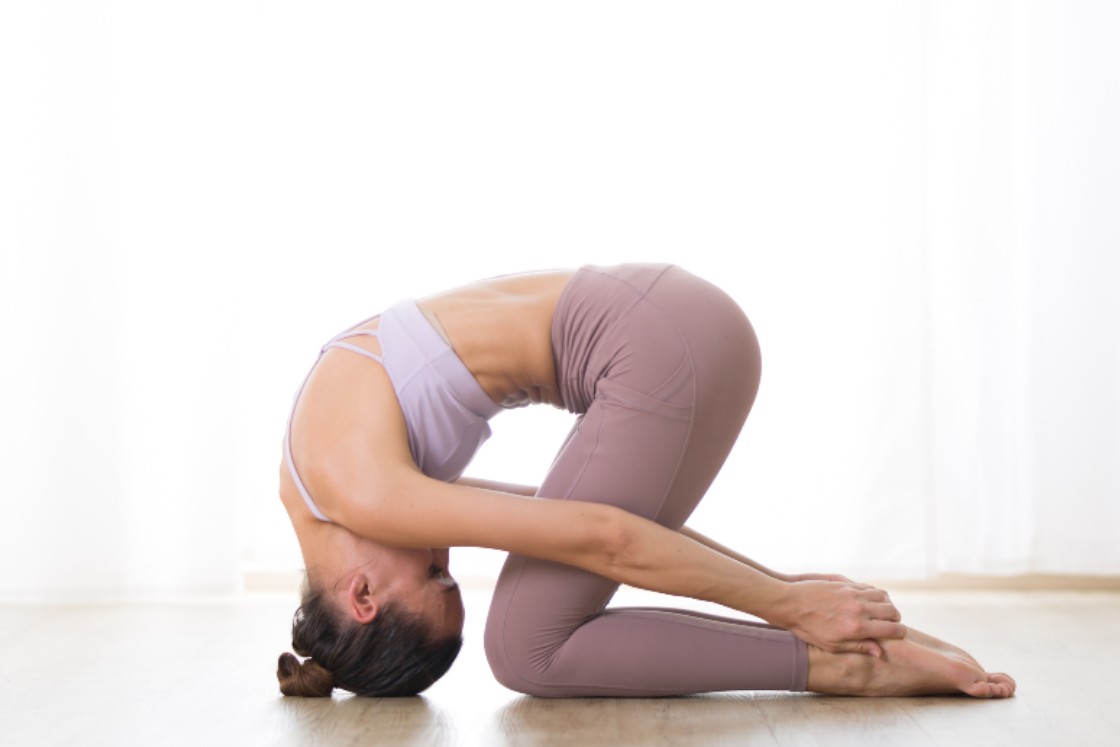
This pose has a numerous benefits regarding the neck and back region. However, it also improves the blood circulation to the brain. A practitioner has to acquire a rabbit position, hence its name.
How to do Rabbit Pose?
- First of all, get into the child pose and then come in kneeling position. Hips raised.
- Slowly reach your hand to the heels of feet. The upper part of the feet flat on the ground.
- Now, pull your forehead toward your knees and tuck your chin into the chest.
- Touch your forehead on your mat with ease. Avoid sudden falling of head downward.
- Breathe normally here and try to hold the heel tightly.
- Replace the contact of the ground to forehead with the crown, by rolling inward.
- By pressing up the forehead to bring your knees as close as possible.
- Hold the position for a few seconds and increase the time on getting a good grip over the pose.
- Slowly raise your head and come back to the normal position. Relax your body.
24. Head-to-Knee with Stretching Pose (Janusirsasana with Paschimottanasana)
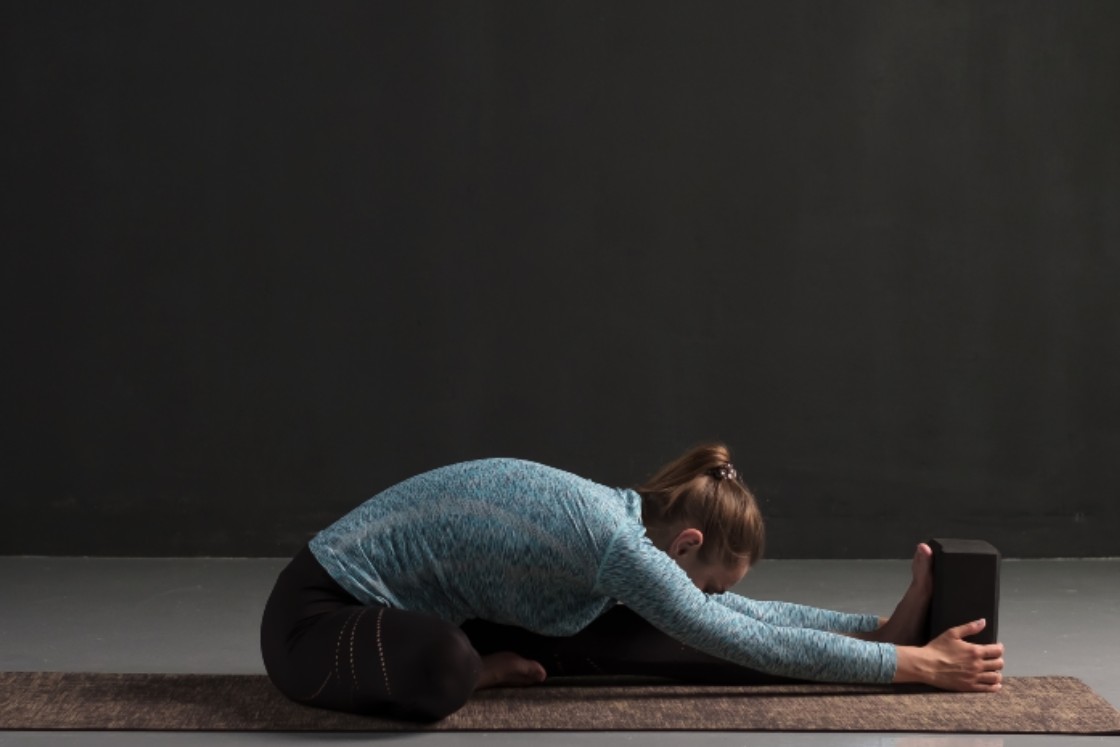
‘Janusirsana’ is an asymmetrical series of forwarding bending poses. ‘Janu’ means ‘knee’, ‘Sirsa’ means ‘head’ and ‘asana’ means ‘seat or posture’. This pose is good practice to improve the flexibility of hamstring, spine, and neck, etc.
‘Paschim’ means ‘west(direction)’ or ‘back of the body or back’, ‘uttana’ means ‘intense stretch’, ‘asana’ means ‘pose or seat’. Paschimattanasana or stretching pose is one of the most important forward bending poses of Bikram yoga style.
How to do Head-to-Knee with Stretching Pose?
- Firstly, sit on the floor with the back erect.
- Stretch your left leg and bend your right leg. Place the bottom of the right foot at the inner left thigh.
- Place your chest and navel in a straight line with the left leg.
- Support the posture by using hands as they rest beside the hip.
- Inhale and stretch your belly and torso and then exhale.
- Now, inhale again and raise your arms up. This creates lengthening in the spine.
- Exhale to bend downward in forwarding direction.
- Try to exhale more and more after inhalation. So, you can reach the foot or ankle.
- Hold here the posture for a few minutes. Repeat the same posture with other legs too.
- Now, gradually return back your bend leg and straighten up it for the stretching pose.
- Begin with sitting in the dandasana (upright position). Back and neck should be erect and hands on the thighs.
- Your feet should be together and their toes touching each other.
- Now, inhale and raise your hand to stretch your spine fully. Exhale to bend slowly in a downward forwarding direction.
- Reach to the feet and grab the toes of the sole of the feet with middle or index finger. However, If unable to reach, place your hands flat beside the feet or use the ropes or straps.
- Inhale to lift the chin and expand the chest. Exhale to fold forward by engaging the core muscles.
- Keep the knees straight and reduce the curve from the back.
- Hold the position as long as you feel comfortable. Gradually come back to the normal position. Relax your body.
Benefits of Head to knee pose
- It improves blood circulation in the pelvic area. This vitalize sexuality and also aids in mild impotence.
- Regular practice helps in the burning of the extra fat and ultimately decreases obesity.
- Practicing these asanas or pose helps in regulating the blood sugar level by stimulating metabolism.
- Increase the flexibility of hips, spine, ankles and hamstring muscles. This helps in greater body movements.
- They massages the internal organs like kidney, liver, spleen, small and large intestine, etc. Further, improve their functioning.
- Thes yoga practices have stretching effects on deltoids, trapezius, and hamstrings, particularly erector femoris.
- However, it also improves the blood circulation to the head, which results in better concentration and focus.
25. Spine Twisting Pose (Ardha Matsyendrasana)
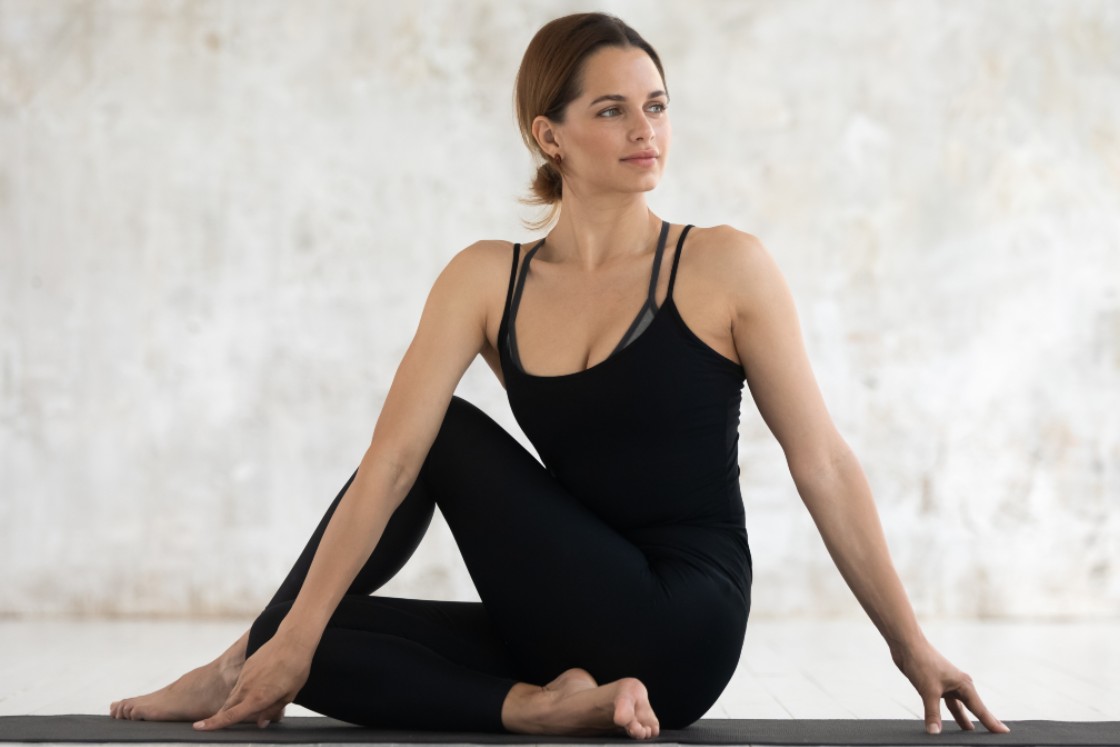
‘Ardha’ means ‘half’, ‘Matsya’ means ‘king of the fish or lord of the fish’, ‘asana’ means ‘seat or pose’. It is beneficial for chest expansion and spine alignment as it twists up the spine.
How to do Spine Twisting Pose?
- Begin with sitting in dandasana or leg stretched out in front of you.
- Keep your spine erect and feet together.
- Now bend your left leg and put it beside the inner thigh of the right foot.
- Bring your right leg over the left knee and place your left hand on your right knee.
- Twist the waist, shoulder, and neck in a sequence to gaze at back over the right shoulder.
- Breathing must be calm and deep.
- Hold the posture as long as you feel comfortable. Avoid any kind of hurry in twisting the spine, wrist, neck.
- Perform the same set of steps with the other leg too.
- Slowly return to the normal position and let you relax.
Benefits of spine twisting pose
- It helps in overcoming various defects of the spine such as scoliosis, kyphosis, etc.
- This pose enhances the flexibility of the waist, spine, hip joints, Etc.
- It strengthens up the abdominal, thighs, upper back, buttocks muscles, etc.
26. Blowing in Firm (Kapalbhati-in-Vajrasana)
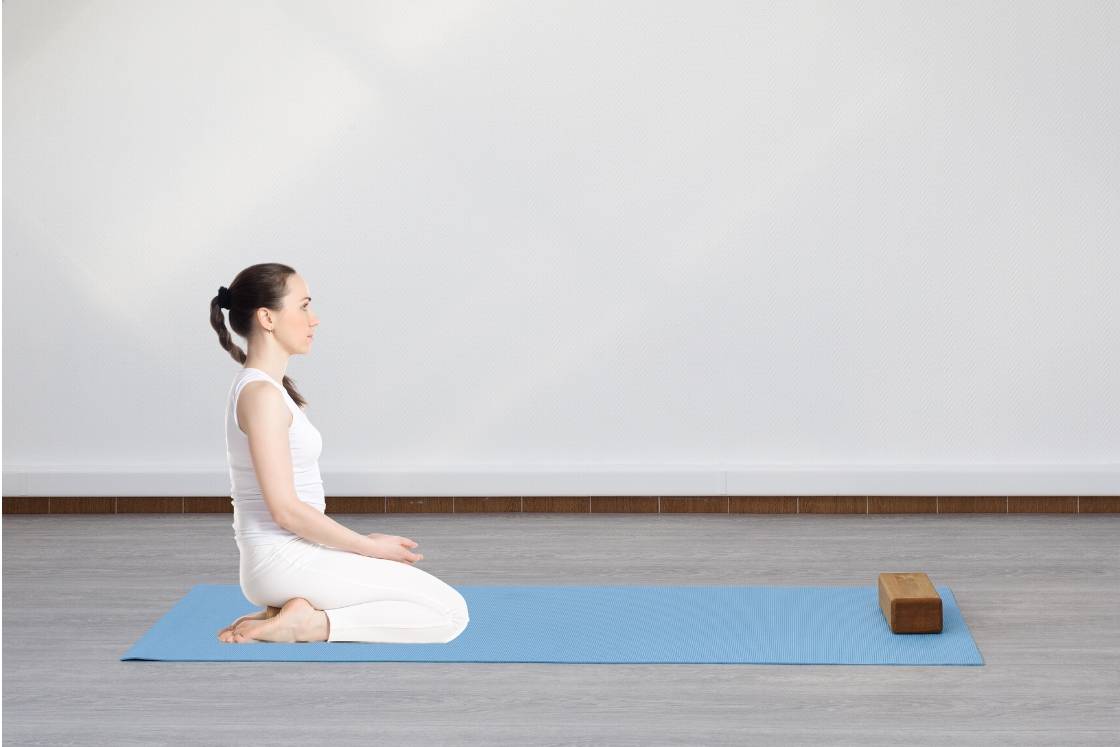
‘Kapal’ means ‘head’ and ‘Bhati’ means ‘shining’, which means head shining. This breathing exercise involves the vigorous inhalation and exhalation of breath. This is helpful in various health aspects.
How to do Blowing in Firm?
- First of all, come into the vajrasana or thunderbolt sitting position.
- Now, inhale a deep breath through your nostrils and let your stomach fully filled with air.
- Exhale forcibly while pressing you stomach or your navel towards the spine.
- Exhale as long as you feel comfortable. one can exhale 10 or 20 such breaths at a time.
- Slowly return into the normal breathing state. Relax your body.
Read More: Skull Shinning Breath Benefits
Benefits of blowing in firm breathing
- It fastens the metabolic rate of the body. Therefore helps in weight loss.
- It helps in the purification of the nadis (subtle energy channels).
- This also improves the functioning of the digestive system and improves blood circulation, which results in radiance face.
: Cleansing of Intestines")


